Are you looking to optimize your Creality K1 3D printer for top-notch performance? The Creality K1 Bowden Tube plays a critical role in ensuring smooth filament feeding and high-quality prints. In this article, we’ll dive into essential tips, upgrades, and troubleshooting methods that can help you make the most of your Bowden tube setup.
Let’s explore how you can elevate your 3D printing experience with the Creality K1 Bowden Tube.
Creality K1 Bowden Tube Accessories
The Creality K1 3D printer features a Bowden tube in its extrusion system. The Bowden tube is a crucial component that guides the filament from the extruder motor to the hotend. Here are some relevant details and resources related to the Creality K1 Bowden tube:
Underextrusion Quick Fix:
If you’re experiencing underextrusion issues with your Creality K1, one potential solution is to remove the Bowden tube from the drag chain. This quick fix can help improve filament flow and prevent clogs. You can find a detailed guide on this process in this YouTube video by Nathan Builds Robots.
For the Creality K1 Max, there’s a convenience mod that provides better guidance for the Bowden tube. This mod ensures smoother filament movement and reduces the chances of kinks or blockages. You can find the STL model for this mod on Cults 3D.
Bowden Tube Clip:
Another useful accessory is the Creality K1 Max Bowden Tube Clip, designed by SHaDoW6. This clip helps secure the Bowden tube in place, preventing it from shifting during printing. You can download the STL files for this clip from Thingiverse.
Creality K1 Bowden Tube Specifications
Let’s dive into the Creality K1 Bowden Tube specifications and its compatibility with 3D printers.
Bowden Tube Specifications:
The Creality K1 3D printer comes with a Bowden tube that plays a crucial role in guiding filament from the extruder to the hotend.
Unfortunately, specific details about the exact length, diameter, or material of the Bowden tube for the K1 are not readily available in the search results.
For precise specifications, I recommend referring to the official Creality K1 documentation or contacting Creality directly.
Compatibility with Filaments:
The Creality K1 is compatible with a wide range of third-party filaments, as long as they fall within the printable materials list.
You can use standard PLA, PETG, ABS, TPU, and other common filaments with the K1.
If you plan to experiment with specialty filaments (such as ASA, nylon, or composite materials), ensure that they are within the recommended temperature range for the K1’s hotend.
Upgrades and Accessories:
To enhance your Creality K1 3D printing experience, consider some of the following upgrades and accessories:
Copper Alloy & Hardened Steel Nozzles: These upgraded nozzles offer improved thermal conductivity and durability. The copper alloy nozzles can handle up to 500°C, while the steel ones can go up to 450°C.
270 Degree Door Hinge: If you’re printing with PLA and don’t need the inside to be super warm, this door hinge upgrade is practical. It also allows better visibility for monitoring prints or capturing time-lapse videos.
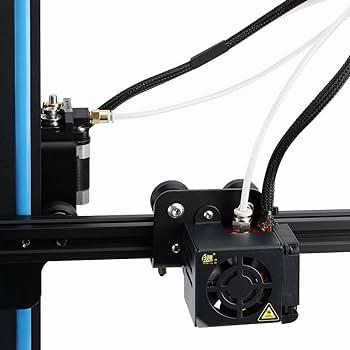
K1 Lid Riser: The original design placed the Bowden tube inside the cable chain, causing bending and friction. The lid riser resolves this issue, ensuring smoother filament flow during printing.
Cable Chain Bowden Clip: A simple 3D printable part that helps manage the Bowden tube within the cable chain.
IMG Source: media-amazon.com
Steps to Install a Bowden Tube in Your 3D Printer
Installing a Bowden tube in your 3D printer is essential for smooth filament feeding. Here are the steps to correctly install a Bowden tube:
Switch Off and Unplug the Printer:
Before starting any maintenance, ensure that your 3D printer is powered off and unplugged.
Disconnect the Bowden Tube from the 3D Printer:
Locate the Bowden tube connected to your printer. Gently remove it from both ends (extruder and hot end).
Clean the Bowden Tube with Isopropyl Alcohol:
Use isopropyl alcohol to clean the inside of the Bowden tube. This ensures that there’s no residue or debris that could affect filament flow.
Insert the Bowden Tube into the Connector:
Reinsert the Bowden tube into the connector at the extruder end. Make sure it’s fully seated and secure.
Tighten the Connector:
Tighten the connector to prevent any leaks or wiggling. Ensure a snug fit without over-tightening.
Plug the 3D Printer into the Power Socket:
Reconnect the power supply to your printer.
Test the Connection:
Turn on the printer and perform a test print. Verify that the filament feeds smoothly through the Bowden tube.
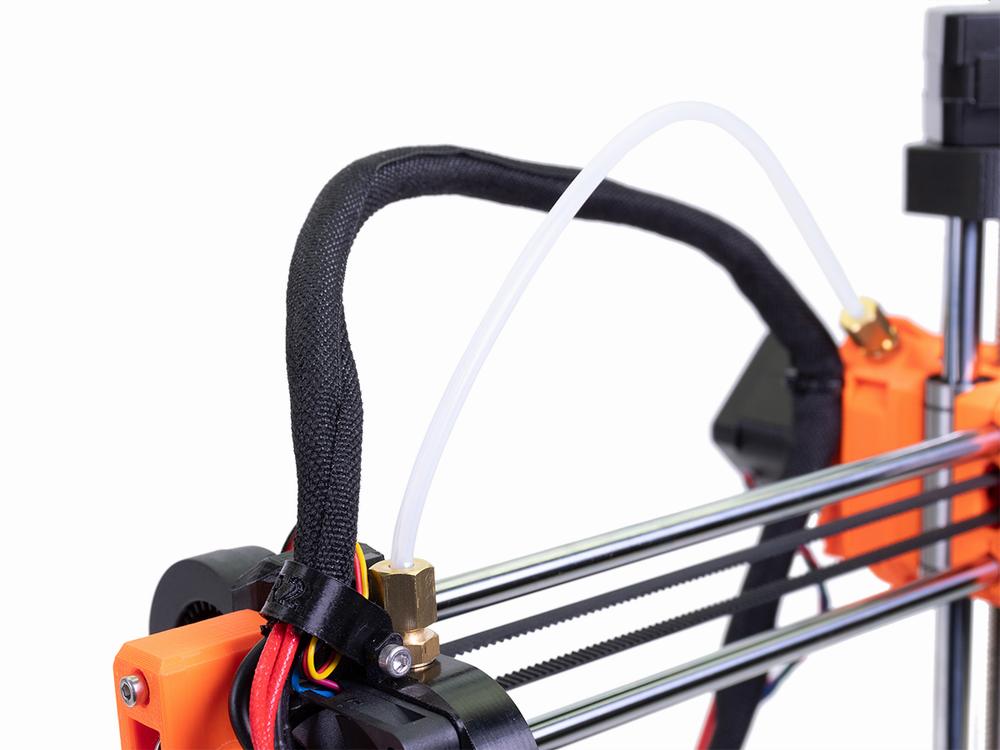
For visual guidance, you can also check out videos like this one on replacing a Bowden tube on an Ender 3 Pro 3D printer. Although it focuses on replacement, the installation process is similar.
If you’re using a Capricorn Bowden Tube, you can find detailed instructions on their website
IMG Source: prusa3d.com
Troubleshooting Common Bowden Tube Issues on Creality K1
Troubleshooting Bowden Tube issues on the Creality K1 can be crucial for optimal 3D printing performance. Here are some tips to address common problems related to the Bowden Tube:
Underextrusion Quick Fix:
If you’re experiencing underextrusion, consider removing the Bowden Tube from the drag chain. This quick fix can significantly improve extrusion reliability.
Check out this YouTube video by Nathan Builds Robots for a step-by-step guide on removing the Bowden Tube from the drag chain.
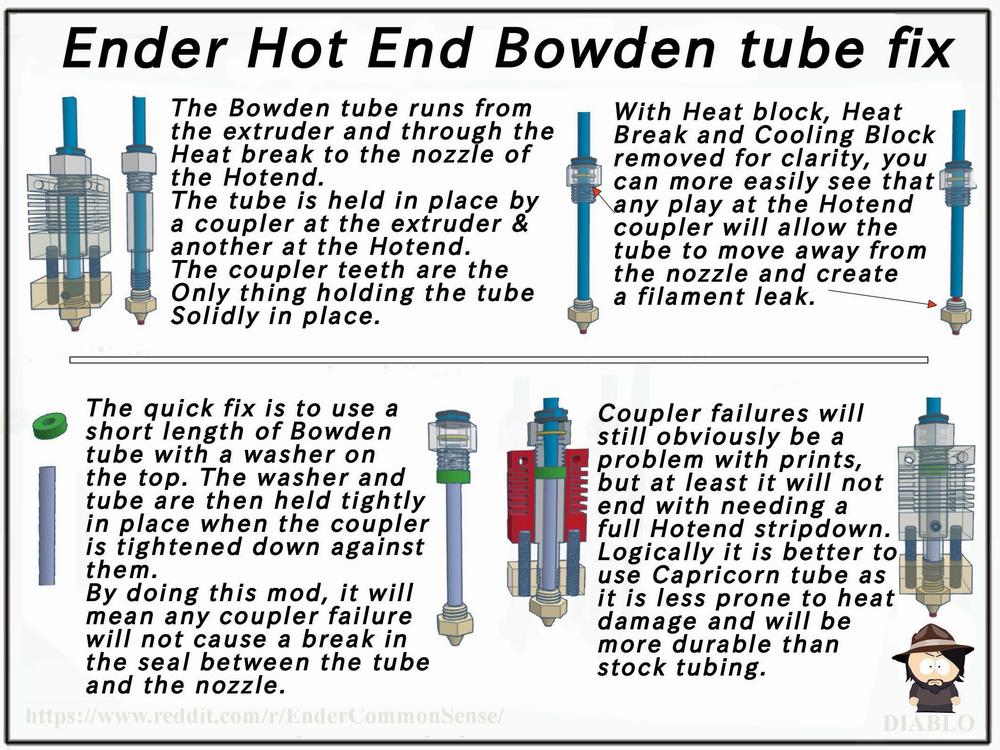
Inspect the Bowden Tube:
Ensure that the Bowden Tube is properly seated and not kinked or bent.
Examine the blue locking clip and gently pull out the PTFE tube from the top of the extruder, exposing the filament.
Set the nozzle temperature to the recommended printing temperature and wait for it to stabilize.
Disassembly and Cleaning:
Disassemble the extruder by removing the back screws and cover.
Lift the extruder from the printhead and disconnect it from the stepper motor.
Inspect the Bowden Tube for any debris or blockages.
Clean the tube and reassemble the extruder.
Consider Removing the Tube:
Some users have reported success by removing the Bowden Tube altogether and feeding filament directly to the extruder.
Removing the tube can make filament changes easier and potentially reduce resistance for the extruder.
Test this approach before committing to cutting out the tube.
Remember that individual experiences may vary, so it’s essential to experiment and find the best solution for your specific setup. If issues persist, consider seeking professional assistance or referring to official Creality resources for further troubleshooting.
IMG Source: redd.it
Improving Your Creality K1 3D Printer
Optimizing your Creality K1 3D printer’s Bowden tube can significantly improve your printing results. Here are some recommendations and upgrades to consider:
Nozzle Kit:
Consider upgrading your nozzle to the K1 Nozzle Kit, which includes both copper alloy and hardened steel nozzles.
The copper alloy nozzles heat up evenly and support high print speeds, while the steel nozzles are durable and corrosion-resistant.
These nozzles work well with various materials and can handle temperatures up to 500°C for copper alloy and 450°C for steel.
270 Degree Door Hinge:
If you primarily print with PLA and don’t need the inside of the printer to be very warm, consider installing a 270-degree door hinge.
This upgrade allows you to keep an eye on your prints and capture time-lapse videos without obstruction from the front door.
K1 Lid Riser:
The original design placed the Bowden tube inside the cable chain, limiting its mobility and causing filament bending.
To address this, consider using a K1 Lid Riser to improve the Bowden tube’s movement and reduce friction during printing.
Cable Chain Bowden Clip:
Install a Bowden clip specifically designed for the K1. This helps secure the Bowden tube along the cable chain.
Properly securing the tube prevents it from rubbing against other parts and ensures smooth filament flow.
Explore convenience mods available for the Creality K1 Max.
These mods can enhance the Bowden tube’s performance and overall printing experience.
Consider Removing the Bowden Tube:
Some users have reported better results by removing the Bowden tube and feeding filament directly to the extruder.
Ensure that the filament spool is positioned correctly to prevent under-extrusion.
IMG Source: 3dprintinguk.com
Ensuring that your Creality K1 Bowden Tube is functioning optimally is key to achieving excellent 3D printing results. By following the recommended upgrades, troubleshooting steps, and maintenance tips outlined in this guide, you can enhance the performance and reliability of your Bowden tube setup. Remember, a well-maintained Bowden tube not only improves filament flow but also contributes to the overall print quality and consistency on your Creality K1 printer.
Stay informed, stay proactive, and unlock the full potential of your 3D printing projects with a properly optimized Creality K1 Bowden Tube.