Welcome to the world of 3D printing with the Creality Ender-3 V3 SE, a budget-friendly printer that offers impressive features for both beginners and enthusiasts. Dive into the realm of creativity with the Ender-3 V3 SE Extruder, known for its reliability and high performance. Let’s explore the exciting capabilities of this printer and how it can elevate your 3D printing experience.
The Creality Ender-3 V3 SE is an exciting addition to the world of budget 3D printers. Let’s delve into its features and capabilities:
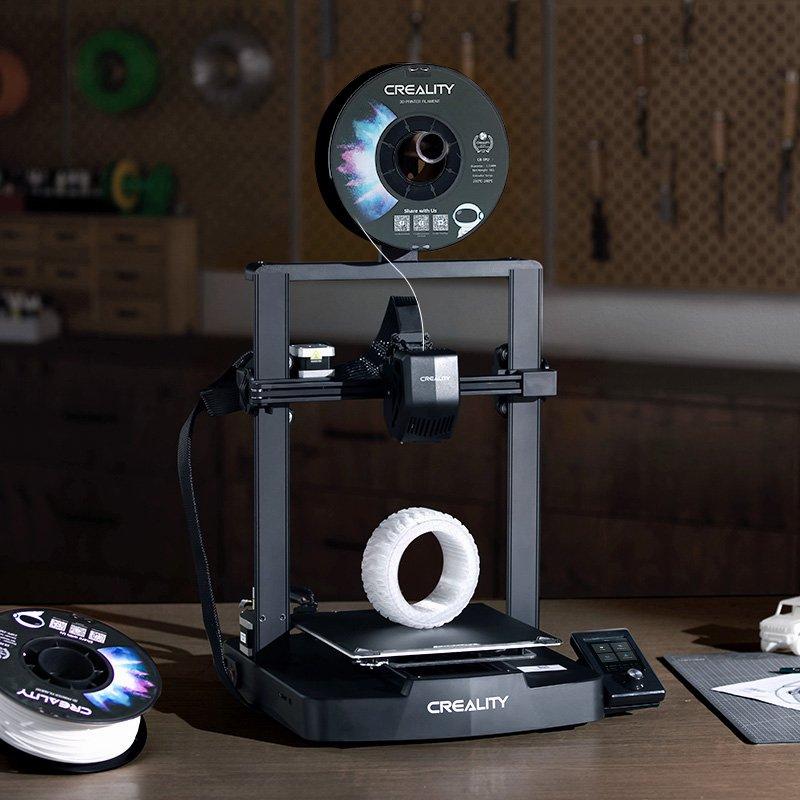
Extruder Type: The Ender-3 V3 SE boasts a Dual Gear Direct Drive (Sprite) extruder. This design ensures reliable filament feeding and better performance during printing.
Build Volume: With a build volume of 220 x 220 x 250 mm (approximately 8.75 x 8.75 x 10 inches), this printer provides ample space for your creative projects.
Bed Type: The printer features a PC Spring Steel Bed, which offers good adhesion and easy removal of prints.
Main Features:
Assembly: Unlike its predecessors, the Ender-3 V3 SE is a breeze to assemble. You’ll have it up and running in just 10-15 minutes. The pre-assembled Sprite extruder and Z-axis beams simplify the process significantly. Here’s a quick overview of the assembly steps:
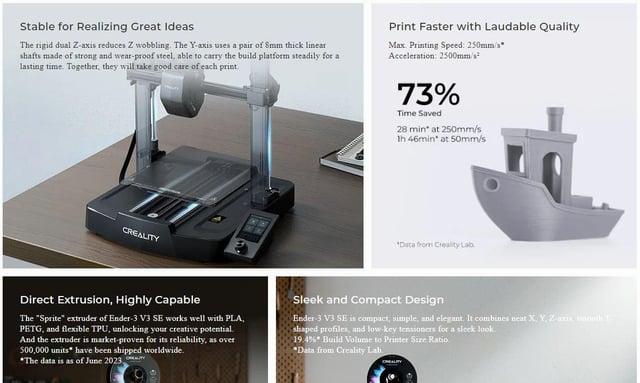
Versatility: The Ender-3 V3 SE follows the Cartesian design principle with a Bed Slinger motion system, ensuring stability and precision. It can handle various filaments like PLA, PETG, and TPU, thanks to its maximum hot-end temperature of 260°C.
For more details and purchasing options, you can check it out on the official Creality3D store.
Let’s explore the features of the Creality Ender-3 V3 SE 3D printer:
Build Volume: The Ender-3 V3 SE offers a build volume of 220 × 220 × 250 mm. This means you can create 3D prints within these dimensions.
Extruder: The printer features a “Sprite” Direct Drive extruder. Direct drive extruders are known for their reliability and better filament control, resulting in improved print quality.
Automatic Bed Leveling: The Ender-3 V3 SE comes with fully automatic bed leveling. This feature ensures that your print bed is perfectly leveled, which is crucial for successful 3D printing.
Print Bed: The print bed is made of PC Spring Steel, providing good adhesion for your prints. A well-leveled bed contributes to better first-layer adhesion and overall print quality.
Nozzle Temperature: The maximum nozzle temperature supported by this printer is 260°C. This versatility allows you to work with various filament types, including PLA, PETG, and TPU.
Bed Temperature: The maximum bed temperature is 100°C. A heated bed helps prevent warping and ensures better adhesion during printing.
Pros:
Cons:
In summary, the Creality Ender-3 V3 SE strikes a balance between price, performance, and user-friendly features. While it requires some fine-tuning to unlock its full potential, it’s an excellent choice for beginners venturing into 3D printing
IMG Source: squarespace-cdn.com
Let’s walk through the process of assembling the Creality Ender-3 V3 SE and get you started with your first 3D prints. The Ender-3 V3 SE is a new addition to Creality’s Ender 3 series, boasting several significant upgrades over its predecessors. Here’s a step-by-step guide to help you with the extruder installation:
Unboxing the Ender-3 V3 SE:
Mounting the Gantry Frame Assembly to the Printer Base:
Additional Features:
Estimated Assembly Time:
For more detailed instructions, you can refer to the Creality Ender 3 V3 SE Assembly Guide
IMG Source: yoopai.com
The Creality Ender-3 V3 SE is a budget-friendly 3D printer that packs quite a punch in terms of features. Let’s dive into its performance and what makes it stand out:
Direct-Drive Extruder: The Ender-3 V3 SE features a Sprite dual gear direct-drive extruder. This design ensures better filament feeding and minimizes the risk of filament slipping or grinding. It’s a significant improvement over the original Ender 3 and enhances overall printing performance.
High-Speed Printing: With a maximum print speed of 250 mm/s, the Ender-3 V3 SE allows you to bring your designs to life faster. Whether you’re a beginner or an experienced user, this speed can significantly reduce printing time.
Quick Assembly: Setting up the Ender-3 V3 SE is a breeze. Unlike its predecessors, which required more extensive assembly, this printer takes only 10-15 minutes to put together. The pre-assembled Sprite extruder and Z-axis beams simplify the process, making it beginner-friendly.
Auto Bed Leveling: The printer features automatic bed leveling, eliminating the need for manual adjustments. This ensures a consistent first layer and better overall print quality.
PC Spring Steel Bed: The build surface is made of PC spring steel, which provides good adhesion and easy part removal. It’s durable and reliable for repeated prints.
Linear Rails for Y-Axis: Linear rails enhance stability and reduce vibrations during printing, resulting in smoother motion and better accuracy.
Strain-Based Z-Offset Calibration: Fine-tuning the nozzle height is made easier with strain-based Z-offset calibration. Achieving the perfect first layer is crucial, and this feature helps streamline the process.
Quiet Motors: The Ender-3 V3 SE comes equipped with quiet stepper motors, ensuring a quieter printing experience.
In summary, the Ender-3 V3 SE offers an impressive feature set for its price range, making it an excellent choice for both beginners and enthusiasts. Whether you’re creating functional parts or artistic designs, this printer delivers on its promises.

IMG Source: bigcommerce.com
Maintaining your Ender-3 V3 SE 3D printer’s extruder is essential for optimal performance. Here are some steps you can follow:
Lubricate 3D Printer Parts: Regularly lubricate moving parts, such as rails and lead screws, to ensure smooth movement during printing.
Tighten Loose Belts: Check the belts that drive the printer’s motion. If they’re loose, tighten them to prevent misalignment.
Clean Dust and Debris: Remove dust and debris from the print bed and other surfaces. A clean environment helps prevent issues during printing.
Inspect the PTFE Tube: The PTFE tube (also known as the Bowden tube) guides filament from the extruder to the hotend. Make sure it’s not damaged or clogged.
Check Wire Connections: Ensure all wires are securely connected. Loose connections can lead to printing problems.
Inspect the Extruder Arm: Examine the extruder arm for cracks or damage. If you notice any issues, consider replacing it.
Clean the Nozzle: Use cleaning filament or a needle to clear any clogs or residue from the nozzle.
For more detailed instructions, refer to the Creality Ender-3 V3 SE User Manual. It covers assembly, troubleshooting, and maintenance procedures.
IMG Source: redd.it
Don’t miss out on the opportunity to explore the world of 3D printing with the Creality Ender-3 V3 SE and its innovative Extruder technology.