Ultimate Guide to Creality Ender-3 V3 KE Build Plate
Are you looking to enhance your Creality Ender-3 V3 KE 3D printer with the perfect build plate for optimal performance? The build plate plays a crucial role in the success of your 3D prints, providing a stable base for your creations. In this article, we explore various build plate options and offer tips to improve adhesion and maintenance for top-notch printing results.
Whether you’re a beginner or an experienced user, having the right build plate can elevate your 3D printing experience to new heights.
Alternative Build Plate Options for Creality Ender-3 V3 KE
The Creality Ender-3 V3 KE comes with a textured PEI build plate included. However, if you’re looking for alternative build plates, here are some options:
Chinese Gold Textured PEI Plates: These plates are compatible with the Ender-3 V3 KE and provide good adhesion. You can find them on Amazon:
Amazon Link 1
Amazon Link 2
Smooth PEI Plates: If you prefer a smooth surface, consider these options:
Creality PEI Flexible Build Plate: This consists of a powder-coated PEI plate and a magnetic base plate. When combined, it creates a robust, magnetic, and heat-resistant flexible plate with excellent adhesion. The PEI plate is heat-resistant up to 200°C.
Creality K1 Smooth PEI Magnetic Build Plate Kit: Designed for Ender-3 V3 SE/KE, Ender 5 S1, Ender 3 S1, Ender 3 S1 Pro, Ender 3, Ender 3 V2, Ender 3 V2 Neo, Ender 5 Pro, and CR-10 SE 3D printers.
Build Plate Adhesion Techniques
Build plate adhesion is crucial for successful 3D printing. Let’s explore the different settings and techniques to improve it:
Types of Build Plate Adhesion Settings:
Skirt: A skirt extrudes an outline around your model, ensuring the nozzle is ready to extrude cleanly. It’s useful for leveling prints before the actual process begins. I often use 3 skirts for my prints if I’m not using a brim or raft.
Brim: Adding a single layer of flat area around the base of the model prevents warping. Although it uses more material and takes a bit longer, it significantly improves build plate adhesion. Brims are easy to remove and don’t affect the bottom layer finish.
Raft: This setting creates a thick grid-like structure between the build plate and the model. It provides a solid foundation for better adhesion.
Tips to Improve Build Plate Adhesion:
Level Your Build Plate: Ensure proper leveling to maintain consistent first-layer adhesion.
Optimize Build Plate Temperature: Set the correct temperature for the material you’re using.
Use Trusted Adhesives: Keep the build plate surface smooth and clean. Remove any traces of oil, grease, or fingerprints.
Adjust Slicer Settings: Fine-tune parameters like initial layer flow rate and infill density.
IMG Source: walmartimages.com
Installing Creality Ender-3 V3 KE Build Plate
Installing the Creality Ender-3 V3 KE Build Plate on your 3D printer is a straightforward process. Here are the steps you can follow:
Unbox and Inspect:
Begin by unboxing your Ender-3 V3 KE 3D printer. Check that all components are present and undamaged. You should find tools, side cutters, a nozzle cleaner, a spare nozzle, and a USB thumb drive included in the package.
Assemble the Gantry Frame:
Follow the assembly instructions provided in the user manual. Assemble the gantry frame, ensuring all parts are securely connected. This includes attaching the vertical uprights, crossbars, and other structural components.
Install the Display Screen:
Attach the display screen to the designated location on the gantry frame. Secure it in place using the provided screws.
Connect Material Rack and Filament Detection Assemblies:
Install the material rack and filament detection assemblies according to the instructions. These components are essential for feeding filament during printing.
Wiring and Connections:
Connect the wires and cables as per the labeled instructions. Pay attention to the extruder line, X-axis motor, and other electrical connections. Ensure proper routing and secure fastening.
Install the Build Plate:
The Creality Ender-3 V3 KE comes with a PEI-coated spring steel sheet as the build plate. Here’s how to install it:
First, insert the nozzle wire into the nozzle adapter plate.
Next, attach the FFC (Flat Flexible Cable) fixing clip assembly.
Use M3*8 screws to fix and lock the assembly in place.
Follow the wire label instructions to insert the extruder line into the cable fixing clip.
Connect the X-axis motor.
Adjust the platform height by turning the leveling knob underneath the front/left leveling screw.
Calibrate and Level the Build Plate:
Power on the printer and navigate to the menu.
Use the auto bed leveling feature to ensure the build plate is perfectly leveled.
Adjust the Z height if necessary to achieve proper nozzle-to-bed distance.
First Printing:
Load filament into the extruder. You can either manually feed it or use the auto-feed feature.
Set up your slicing software (such as Cura) with the correct settings for your material (PLA, PETG, TPU).
Start your first print!
IMG Source: ytimg.com
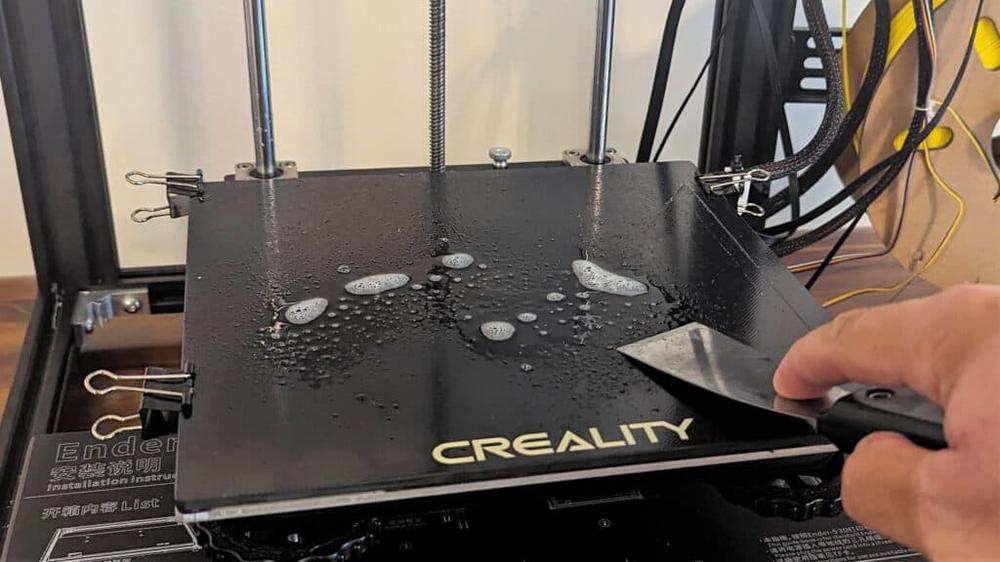
Proper Maintenance Tips for 3D Printer Build Plate
Proper maintenance of your 3D printer build plate is crucial for achieving successful prints. A clean and well-maintained build plate ensures better adhesion, higher print quality, and prolongs the life of your printer. Let’s explore some effective ways to keep your build plate in top shape:
Isopropyl Alcohol (IPA) is your best friend when it comes to cleaning the build plate. Use IPA with a concentration ranging from 70% up to 99.99%.
Soak a paper towel, microfiber cloth, or cotton in IPA and clean the bed surface in a circular motion.
Rinse and repeat until the build plate is free of leftover filament, fingerprints, oils, and other imperfections that affect printing quality.
Glass Beds and Adhesive Tape:
If your printer has a glass bed, you can also use acetone for cleaning. However, use acetone as a last resort and only on specific parts where alcohol couldn’t clean effectively.
Regularly check your build plate. If it looks dirty, assume it needs cleaning. It’s better to be safe than sorry!
Refer to the image below: If your surface resembles the left-hand side, you’re in good shape. But if it looks like the right side, it’s time for some cleaning.
!Build Plate Comparison
Additional Tips:
For resin printers, ensure the build plate is leveled and clean the resin vat as well.
Consider using Dawn dish soap and a small nylon scrubber brush for regular cleaning. This gentle approach will extend the life of your print bed and maintain excellent adhesion.
IMG Source: 3dprintmentor.com
Creality Ender-3 V3 KE: Affordable, Fast, and User-Friendly 3D Printer
The Creality Ender-3 V3 KE is a 3D printer that combines affordability, speed, and ease of use. Let’s delve into its features and compatibility:
Speed and Performance:
The Ender-3 V3 KE boasts impressive speed, reaching up to 500 mm/s with a maximum acceleration of 8000 mm/s². It’s nearly as fast as the popular Creality K1.
The printer utilizes Klipper firmware, which contributes to its swift performance.
Auto bed leveling ensures ease of use, and it can set its own Z height similar to the Creality CR10 SE.
The tool head features Creality’s best extruder (S1’s Sprite extruder) and hotend (K1’s ceramic heated high-flow hotend).
Compatibility:
The Ender-3 V3 KE is Open Source, allowing users to install vanilla Klipper for unlocking its full potential.
It comes with Creality Print, a slicer that works well with the printer. Additionally, it’s compatible with Cura and PrusaSlicer, although you’ll need to create your own profile for those slicers.
Build Plate:
The build volume is 220 x 220 x 240 mm (8.6 x 8.6 x 9.5 inches).
The build platform features a PEI-coated spring steel sheet, which provides good adhesion and easy part removal.
The printer supports materials like PLA, PETG, and TPU (up to 300 degrees Celsius).
Other Specifications:
Extruder Type: Direct Drive
Nozzle Diameter: 0.4 mm (high flow)
Connectivity: USB, Wi-Fi
Interface: 4.3-inch touch screen
Machine Footprint: 433 x 366 x 490 mm (17 x 14.4 x 19.3 inches)
Machine Weight: 7.8 kg (17.2 lbs)
In summary, the Ender-3 V3 KE offers a feature-packed experience at an affordable price, making it one of the best budget 3D printers on the market. Whether you’re a beginner or an experienced user, this printer’s versatility and efficiency make it a solid investment for your 3D printing needs.
IMG Source: fantaskycdn.com
In conclusion, the proper selection and care of your Creality Ender-3 V3 KE Build Plate are essential for achieving outstanding 3D printing results. By choosing the right build plate and implementing effective adhesion techniques, you can enhance print quality and success rates. Regular maintenance, such as cleaning with isopropyl alcohol and using appropriate adhesives, will prolong the life of your build plate and ensure consistent performance.
Invest in the best build plate options and follow the recommended tips to unlock the full potential of your 3D printer. With the right build plate at your disposal, you can embark on a seamless printing journey filled with precision and creativity.