Are you ready to take your 3D printing journey to the next level with the Anycubic Kobra 2 Neo? Dive into the world of precision and speed as we explore the innovative features of this entry-level 3D printer. From high-speed printing to user-friendly interfaces, the Kobra 2 Neo is designed to elevate your printing experience.
Let’s delve into the details of the Anycubic Kobra 2 Neo and discover why it’s a game-changer in the world of 3D printing.
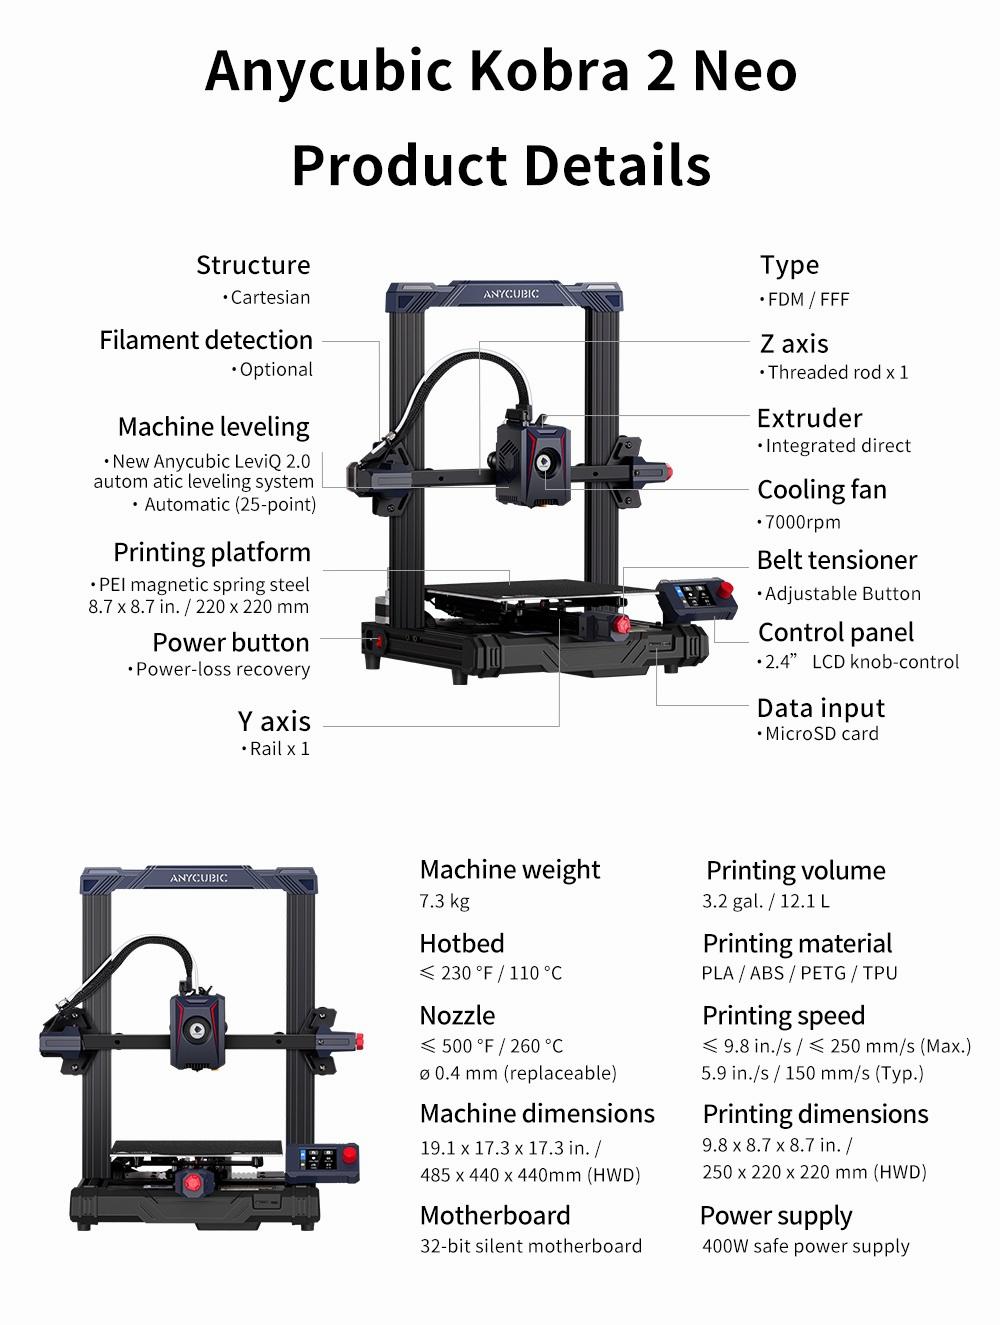
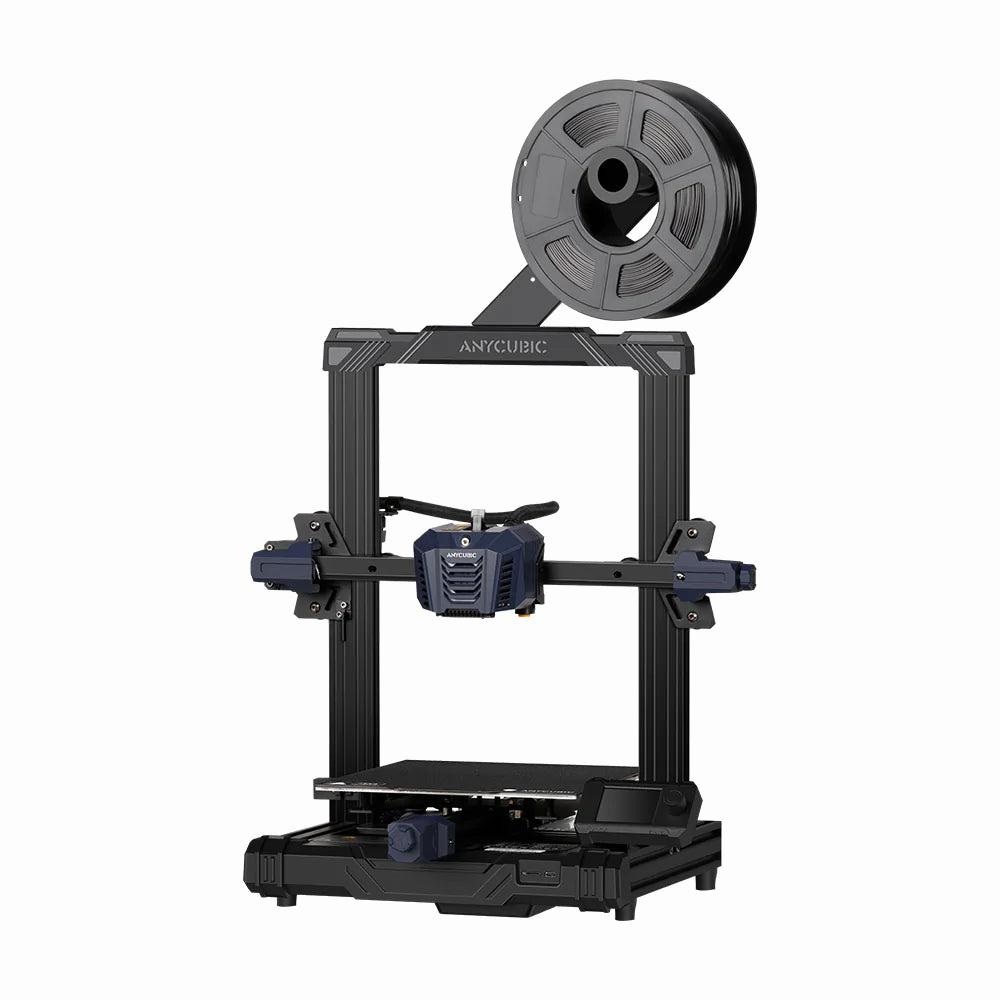
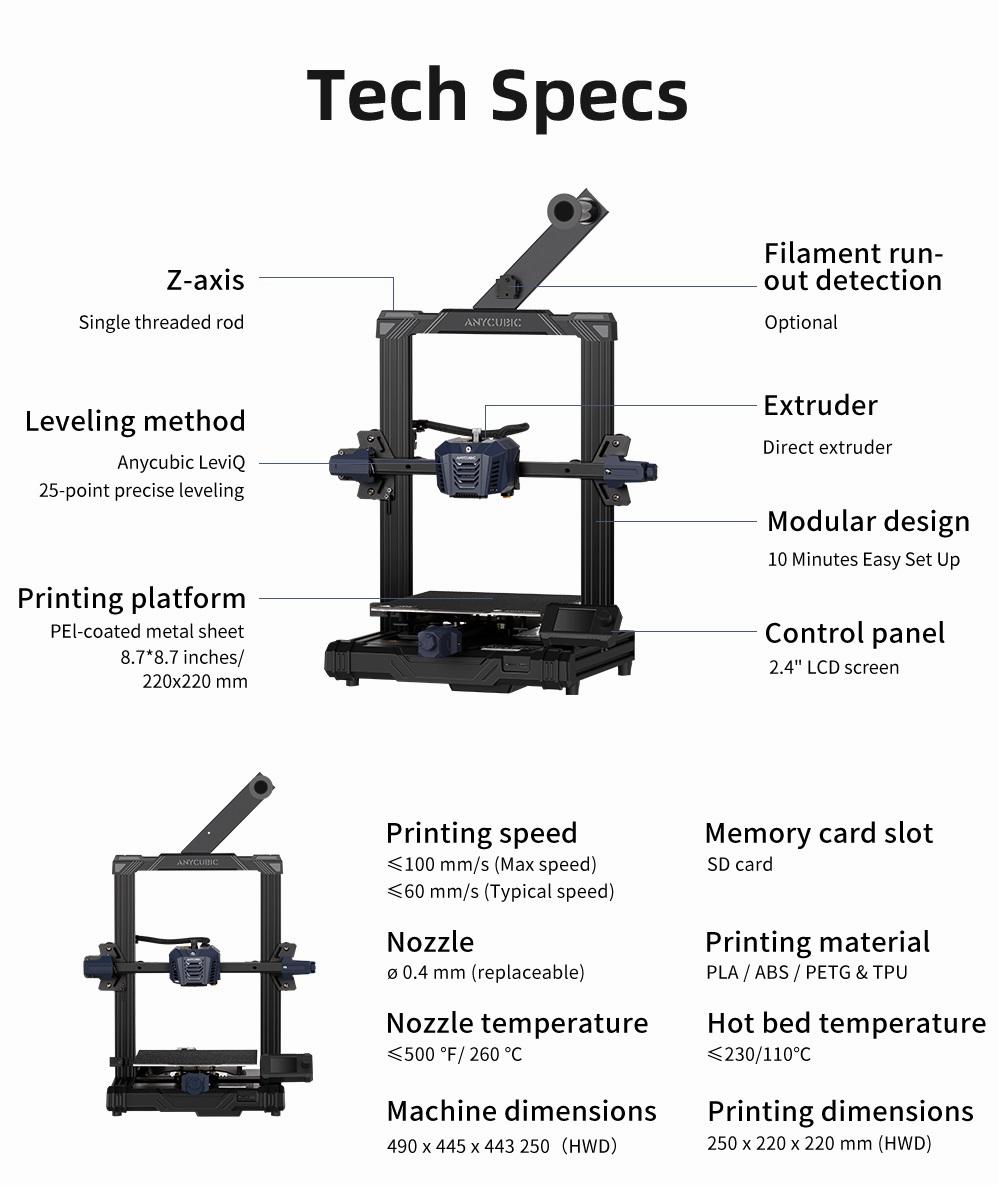
The Anycubic Kobra 2 Neo is an impressive entry-level 3D printer that combines speed, precision, and affordability. Let’s delve into its features:
High-Speed Printing: The Kobra 2 Neo boasts impressive printing speeds of up to 250mm/s, allowing you to create your designs swiftly and efficiently.
User-Friendly Interface: Equipped with a 2.4-inch LCD knob screen, the printer offers a more intuitive and easy-to-navigate interface. Controlling and interacting with the printer becomes a breeze.
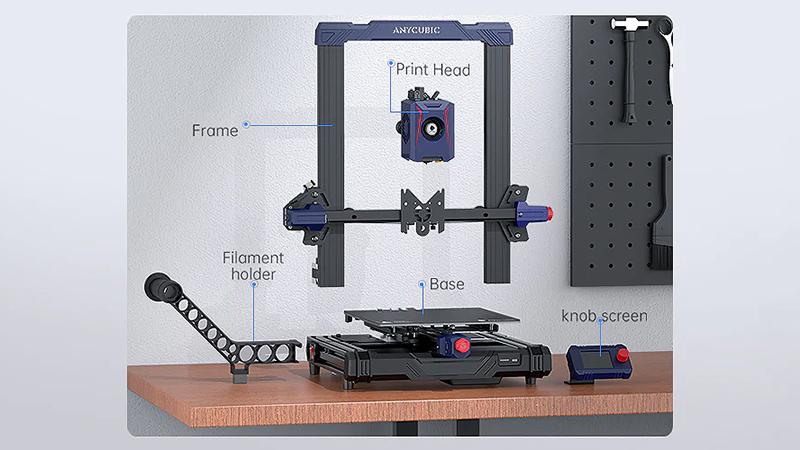
All-in-One Structure: The machine is designed with a gantry frame structure, consisting of five modules. This streamlined design ensures stability and ease of assembly.
Automated Calibration: The Kobra 2 Neo features automated build plate calibration, making it user-friendly for beginners. You won’t need to spend hours fine-tuning settings; it’s ready to print out of the box.
Versatile Hot End: With a maximum hot end temperature of 260°C, this printer allows you to work with various thermoplastic materials. Whether you’re a novice or an experienced user, the Kobra 2 Neo has you covered.
Compact Build Volume: While it’s not the largest printer, its compact build volume makes it suitable for hobbyists, students, and those new to 3D printing.
Let’s delve into the specifications of the Anycubic Kobra 2 Neo 3D printer:
The Kobra 2 Neo is an entry-level 3D printer that combines affordability with impressive printing speeds of up to 250mm/s
For more details, you can explore the official Anycubic Kobra 2 Neo page.
IMG Source: anycubic.com
The Anycubic Kobra 2 Neo offers several advantages over its predecessor, the Kobra Neo. Let’s delve into the specifics:
Printing Speed: The Kobra 2 Neo outperforms the Kobra Neo in terms of printing speed. With impressive speeds of up to 250mm/s, it allows you to complete your 3D printing projects more swiftly.
Convenience: The Kobra 2 Neo is designed with user convenience in mind. Its features and functionality make it an excellent choice for beginners. Whether you’re new to 3D printing or an experienced enthusiast, the Kobra 2 Neo offers a hassle-free experience.
Affordability: Despite its advanced features, the Kobra 2 Neo remains budget-friendly. Priced under $200, it provides an affordable entry point for those venturing into the world of 3D printing.
In summary, the Anycubic Kobra 2 Neo combines speed, convenience, and affordability, making it an excellent choice for both beginners and experienced users alike
For more details, you can explore the official Anycubic Kobra 2 Neo product page.
IMG Source: anycubicnordic.com
Let’s get you started with the Anycubic Kobra 2 Neo frame installation. Here are the steps to assemble your printer:
Unboxing and Initial Setup:
Frame Installation:
Insert Filament Tube:
Remember to use the hex keys and wrench that come with the Kobra 2 Neo
For more detailed information, you can also refer to the Quick Start Guide for Anycubic Kobra 2 Neo on the official Anycubic website.
IMG Source: shopify.com
If you’re experiencing issues with your Anycubic Kobra 2 Neo printer frame, here are some troubleshooting steps to help you out:
For more detailed instructions and additional troubleshooting tips, you can refer to the official Anycubic Kobra 2 Neo User Manual. It provides comprehensive guidance on maintenance and troubleshooting.
IMG Source: anycubic.com
Embrace the future of 3D printing with the Anycubic Kobra 2 Neo frame and unlock a world of endless possibilities.