
Discover how to enhance your Anycubic Kobra 2 Neo 3D printing experience with the installation of a filament runout sensor. This crucial upgrade can help you avoid print failures and ensure seamless printing sessions. Dive into the detailed steps below to learn how to integrate the Anycubic Kobra 2 Neo filament sensor effectively.
The Anycubic Kobra Neo is a 3D printer that offers impressive features for enthusiasts and makers. One essential upgrade you might consider is adding a filament runout sensor. Let’s dive into the details of how to install this handy component:
Filament Runout Sensor Purpose:
The filament runout sensor detects the status of the filament during printing. When the filament runs out, the sensor stops the printing process, saving filament and reducing the risk of print failures.
Compatibility:
Installation Steps:
Follow these steps to install the filament runout sensor on your Anycubic Kobra Neo:
Step 1: Remove Filament
Before installation, ensure that there’s no filament loaded in the printer. Use a wrench to secure the hexagonal copper spacer on the filament rack hole located on the top of the printer’s metal frame.
Step 2: Attach the Sensor
Install the filament sensor onto the hexagonal copper spacer.
Step 3: Cable Clips
Peel off the adhesive backing of the cable clips and stick them onto the printer:
Step 4: Connect the Wire
Insert one end of the wire connector into the sensor mounted on the bracket. Guide the wire toward the back of the printer frame, avoiding any obstruction to the print head’s movement.
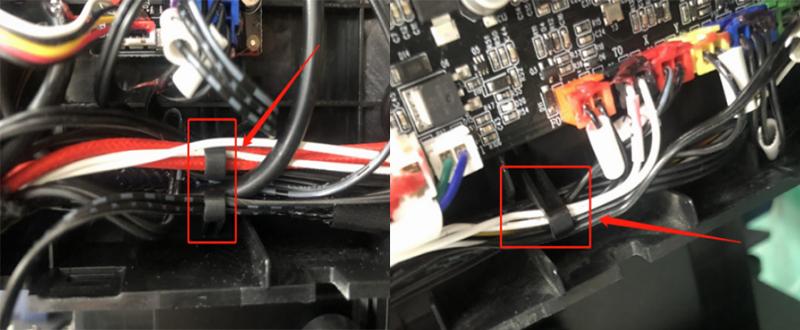
Step 5: Secure the Wire
Secure the wire onto the attached cable clips, ensuring it won’t be pulled by the heated bed. Wrap the wire around the cable clip on the bottom right corner of the Z-axis.
Step 6: Connect to the Motherboard
Loosen the four screws on the machine’s bottom plate using an M2.5 hex key. Remove the bottom cover. Insert the other end of the green connector wire into the green port on the motherboard.
Step 7: Pass Through Reserved Holes
The bottom of the Kobra Neo has reserved holes for the wire to pass through.
Step 8: Reassemble
Once both connectors are plugged in, reattach the machine’s bottom cover using the appropriate screws (two long and two short).
Step 9: Load Filament
Load filament through the sensor’s hole and feed it to the extruder.
For visual guidance, you can also check out this video tutorial on installing the filament runout sensor for the Anycubic Kobra Neo.
The Anycubic Kobra Neo is a fantastic 3D printer, and integrating a filament runout sensor can enhance its functionality. The filament runout sensor detects when the filament is about to run out and pauses the printing process, preventing print failures and saving filament. Here’s how you can integrate the filament runout sensor into your Anycubic Kobra Neo:
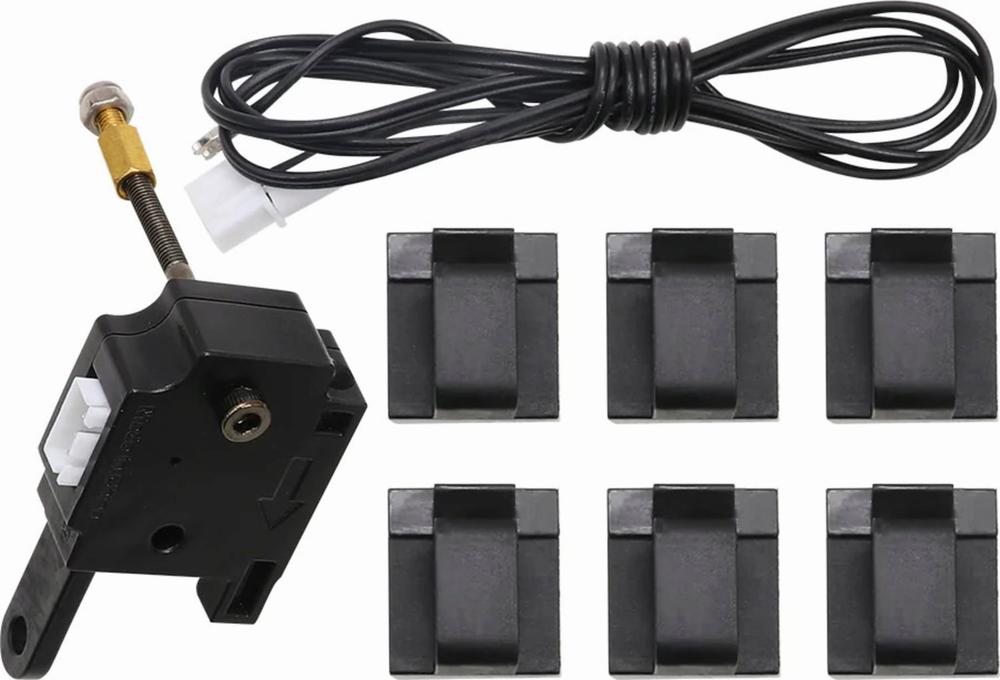
Get the Filament Sensor Kit:
Remove Filament:
Install the Filament Sensor:
Connect the Wires:
Secure the Wire Path:
Load Filament:
For more detailed instructions, you can refer to Anycubic’s official guide on Filament Runout Sensor Upgrade for Anycubic Kobra Neo.
IMG Source: shopify.com
The Anycubic Kobra 2 Neo is an impressive 3D printer that comes with several notable features, including the filament runout sensor. Let’s explore the benefits of this sensor:
Filament Monitoring and Prevention of Print Failures: The filament runout sensor automatically monitors filament levels during printing. When the filament runs out, it stops the printing process, preventing print failures due to filament depletion. This feature ensures uninterrupted printing and saves filament material.
Hassle-Free Filament Management: With the filament sensor in place, you don’t need to constantly check the filament spool. It takes care of filament detection, allowing you to focus on your creative projects without interruptions. No more worrying about running out of filament mid-print.
Enhanced Reliability: By preventing filament-related issues, such as empty spools or tangled filaments, the sensor contributes to the overall reliability of your 3D printing process. You can rely on consistent and successful prints with the Anycubic Kobra 2 Neo.
IMG Source: nice-cdn.com
Let’s walk through the steps to install a filament runout sensor for your Anycubic Kobra 2 Neo 3D printer. Ensuring proper filament detection is crucial for successful prints. Here’s a step-by-step guide:
Remove Filament: Before installing the sensor, make sure there’s no filament loaded in the printer. Clear the filament from the machine.
Prepare the Filament Rack: Locate the filament rack on the top of the printer’s metal frame. You’ll find a hole there. Use a wrench to secure the hexagonal copper spacer onto this hole.
This spacer will help position the filament runout sensor correctly.
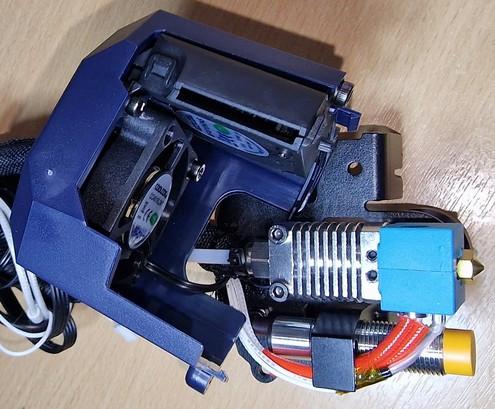
Install the Filament Sensor:
For more detailed instructions, you can refer to the official Anycubic guide here.

IMG Source: anycubic.com
Maintaining the filament sensor on your Anycubic Kobra 2 Neo is essential for smooth 3D printing. Here are some tips to keep it in good working condition:
IMG Source: github.io