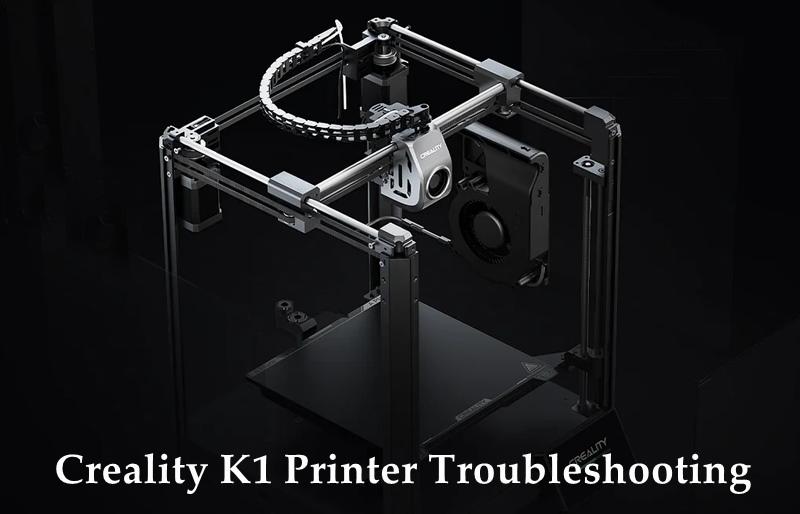


Welcome to a comprehensive guide on optimizing and maintaining your Creality K1 frame for top-tier 3D printing performance. Dive into the world of frame structure and its critical role in achieving impeccable print quality with the Creality K1 3D printer. Let’s explore the importance of a stable frame, the benefits it brings to your printing experience, and practical tips for frame maintenance to ensure lasting excellence.
The Creality K1 3D Printer is a remarkable addition to the world of 3D printing. Let’s delve into its features:
Speed: The K1 is 12 times faster than a regular FDM 3D printer, boasting an astonishing printing speed of 600 mm/s. Imagine the thrill of watching it in action!
Stability: Its solid unibody frame ensures unparalleled stability during printing. No wobbles here!
Auto-Leveling: The K1 comes with effortless auto-leveling, making it user-friendly for beginners and experienced makers alike.
Intelligent Controls: Equipped with Creality OS and smart remote features, the K1 ensures seamless operation.
Filament Path: The K1 features a reverse Bowden setup, guiding the filament from the runout sensor near the spool holder, up the side of the frame, and across the top to the extruder.
For those who want to display their K1 with pride, you can even find a 3D printable display frame for it here
The frame of a 3D printer is akin to its skeleton. It serves as the fundamental structural framework that holds and supports all of its components. A robust and well-engineered frame plays a crucial role in ensuring high-quality 3D prints.
Here’s why:
Vibration Reduction: A sturdy frame helps minimize vibrations during printing. When the printer’s frame is stable, it reduces unwanted movement and oscillations. This stability directly impacts the precision of the print.
Consistent Movement: The seamless and consistent movement of various parts along the printer’s axes is essential for accurate layer deposition. A wobbly or weak frame can introduce irregularities, affecting the overall print quality.
Reduced Artifacts: A stable frame contributes to reducing artifacts such as ringing (also known as ghosting). Ringing occurs when the printer’s motion system resonates with certain frequencies, causing visible wavy patterns on printed surfaces. A sturdy frame helps dampen these vibrations and minimizes ringing effects.
Print Speed and Accuracy: A flimsy table or frame can lead to print inaccuracies. For example, printers often leave a wavy pattern after turning a right-angle corner. A sturdy frame allows you to run at higher speeds without compromising print quality.
In summary, investing in a well-constructed and stable frame is essential for achieving dimensional accuracy, minimizing artifacts, and ensuring overall high-quality 3D prints.

IMG Source: elecrow.com
Let’s delve into optimizing the performance of your Creality K1 Max 3D printer by exploring its compatibility with various software and understanding its specifications.
The Creality K1 Max is a robust 3D printer with impressive features. Let’s break down its compatibility with popular 3D printing clients:
SimplyPrint: Yes, the Creality K1 Max is compatible with SimplyPrint. You can set up SimplyPrint on your K1 Max to streamline your printing experience.
OctoPrint: Unfortunately, the Creality K1 Max is not compatible with OctoPrint. If you were considering using OctoPrint, you’ll need to explore other options.
Mainsail: Good news! The Creality K1 Max works seamlessly with Mainsail. Follow the setup instructions to integrate Mainsail with your printer.
Fluidd: The Creality K1 Max is also compatible with Fluidd. Set it up to enhance your control and monitoring capabilities.
Let’s dive into the technical details of the Creality K1 Max:
Please note that while we strive to keep this information accurate, it’s always a good idea to verify with the manufacturer or official documentation.

IMG Source: 3dprintergear.com.au
Let’s walk through the assembly process for the Creality K1 3D printer frame with step-by-step instructions and visuals. Whether you’re a hobbyist, a professional, or just curious about the latest in 3D printing technology, this guide will help you set up your Creality K1 with ease.
Attach the Screen:
Install and Load the Filament:
Remove the Locking Bolts:
Install the Bed:
Attach the Feet and Perform Self-Inspection:
Insert the USB and Prepare for Your First Test Print:
For additional reference, you can also check out this video tutorial that demonstrates the assembly process in under 2 minutes.

IMG Source: ytimg.com
Let’s delve into Creality K1 frame maintenance and troubleshooting. Here are some essential steps and tips to keep your printer in top shape:
Routine Maintenance:
Troubleshooting:
Remember to consult the official user manuals for detailed instructions and diagrams specific to your Creality K1 model:
For more in-depth troubleshooting, you can also refer to Creality’s comprehensive guide: Comprehensive Guide to Troubleshooting the Creality K1 3D Printer.

IMG Source: shoplazza.com