
Welcome to a comprehensive exploration of the Creality K1 Display Panel. In this article, we will delve into the features, installation guides, troubleshooting tips, and advantages of the Creality K1’s display panel. Discover everything you need to know about optimizing your 3D printing experience with this essential component.
The Creality K1 is a fascinating 3D printer, and its display panel plays a crucial role in controlling and monitoring the printing process. Let’s explore some information related to the display panel:
My Knomi Display Installation Guide for Creality K1:
3D Printable Display Frame:
Adjustable Display Mount:
Troubleshooting Touch Pad Screen Issues:
User Manual:
The Creality K1 3D printer boasts several impressive features and advantages. Let’s delve into the details:
Core XY Design: The K1 utilizes a Core XY configuration, which contributes to its impressive speed and accuracy during printing. This design ensures smooth movement of the print head, resulting in high-quality prints.
Enclosed Build Chamber: The K1 comes with an enclosed build chamber, providing better temperature control and stability. This enclosure helps maintain consistent printing conditions, especially when working with materials sensitive to temperature fluctuations.
Klipper Firmware: While the K1 runs a limited version of Klipper firmware, it offers an improved interface and the ability to avoid unreliable cloud printing. You can use a USB stick or your private LAN for more reliable printing.
Volcano-Inspired Nozzle: The K1 features a Creality Sprite hotend with a Volcano-inspired nozzle. This combination ensures efficient extrusion and smooth filament flow, even at high speeds.
Build Volume: The K1 provides a generous build volume of 220 x 220 x 250 mm (8.6 x 8.6 x 9.84 inches), allowing you to create larger prints.
Material Compatibility: It supports various materials, including PLA, PETG, TPU, and ABS (up to 300 degrees Celsius).
Automatic Bed Leveling: The K1 features automatic bed leveling, simplifying the setup process and ensuring a flat printing surface.
Filament Runout Sensor: With a built-in filament runout sensor, the K1 can pause printing when the filament runs out, preventing failed prints.
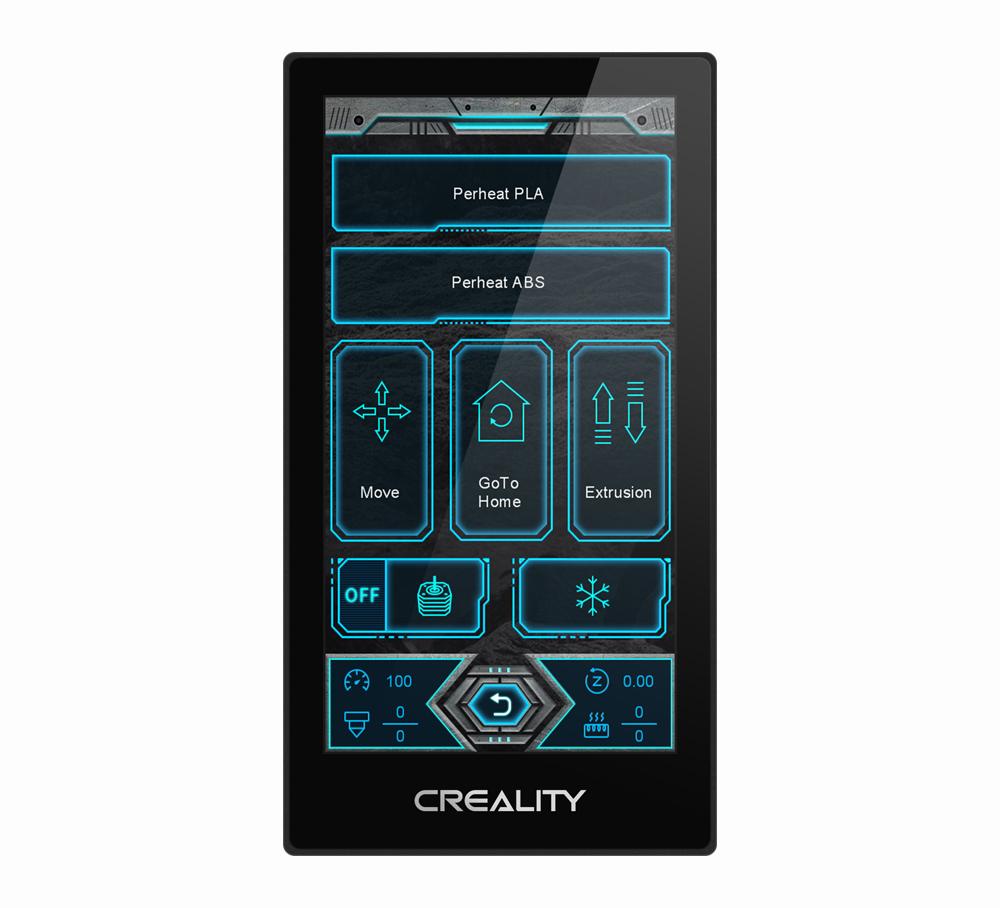
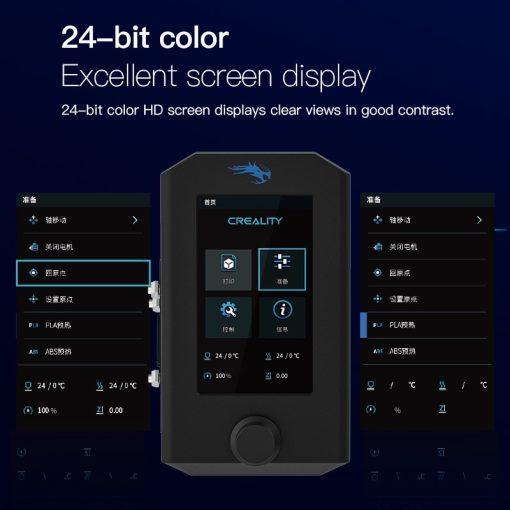
Color Touch Screen: The K1 boasts a 4.3-inch color touch screen interface, making navigation and parameter adjustments intuitive and user-friendly.
Machine Footprint: The K1’s dimensions are 355 x 355 x 480 mm (14 x 14 x 18.8 inches), providing a compact footprint for your workspace.
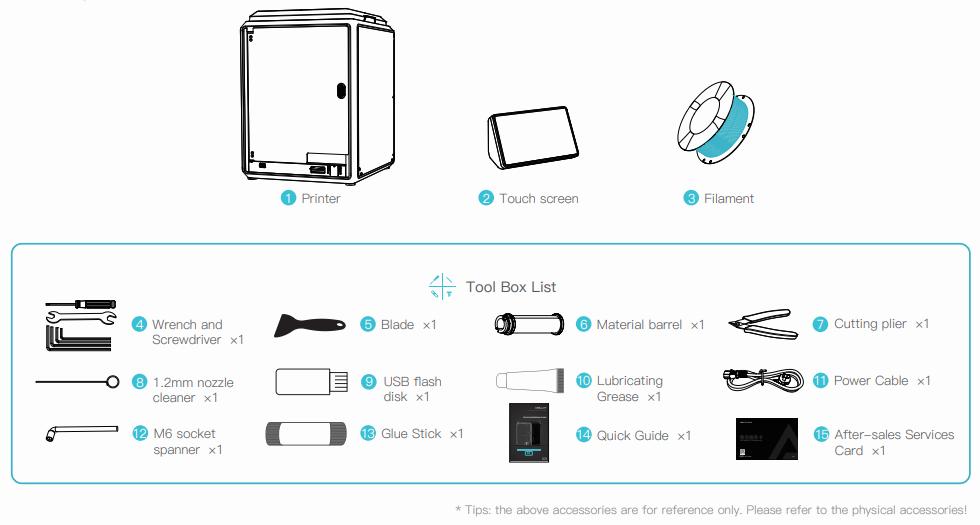
Included Accessories: When you purchase the K1, you’ll receive essential accessories, including tools for maintenance, side cutters, a plastic scraper, and a USB stick. Additionally, a small spool of white Creality Hyper PLA is included for your initial prints.
In summary, the Creality K1 combines speed, quality, and affordability, making it an excellent choice for both beginners and experienced users. Whether you’re creating intricate prototypes or robust architectural models, the K1’s versatility will meet your printing needs.
IMG Source: botland.store
The Creality K1 3D printer boasts several impressive features, making it a compelling choice for both beginners and experienced users. Let’s delve into the benefits of the Creality K1 display panel:
High Print Speed: The Creality K1 reaches print speeds of up to 600 mm/s, which is approximately 12 times faster than standard 3D printers. Even when aiming for high print quality, you can still achieve remarkable speeds of around 400 mm/s.
Pre-Assembled Convenience: The K1 comes fully pre-assembled, saving you time and effort during setup. No need to tinker with intricate assembly steps; it’s ready to go right out of the box.
Automatic Bed Leveling: Say goodbye to manual bed leveling frustrations. The Creality K1 features fully automatic bed leveling, ensuring optimal first-layer adhesion and print accuracy.
Acceleration Sensor: The lightweight print head incorporates an acceleration sensor, enhancing overall performance and responsiveness during printing.
Effective Cooling System: The K1 is equipped with an efficient cooling system, maintaining stable temperatures during extended print sessions.
Wide Filament Compatibility: You can print with a variety of materials, including PLA, ABS, PETG, TPU, PA, ASA, PC, PLA-CF, PA-CF, and PET-CF.
Generous Print Volume: The build volume of 220 × 220 × 250 mm allows you to create sizable 3D prints.
User-Friendly Touch Screen: The 4.3-inch color touch screen provides an intuitive interface for controlling your prints and adjusting settings.
Filament Sensor and Resume Print: The K1 includes a filament sensor that detects filament runout and pauses the print, allowing you to resume seamlessly after reloading filament.
LED Lighting: Illuminate your printing area with built-in LED lights for better visibility.
In summary, the Creality K1 combines speed, convenience, and versatility, making it an excellent choice for those seeking a reliable and efficient 3D printing experience.
IMG Source: creality3dparts.com
Let’s walk through the installation process for the Creality K1 Display Panel. Follow these steps carefully:
Unboxing:
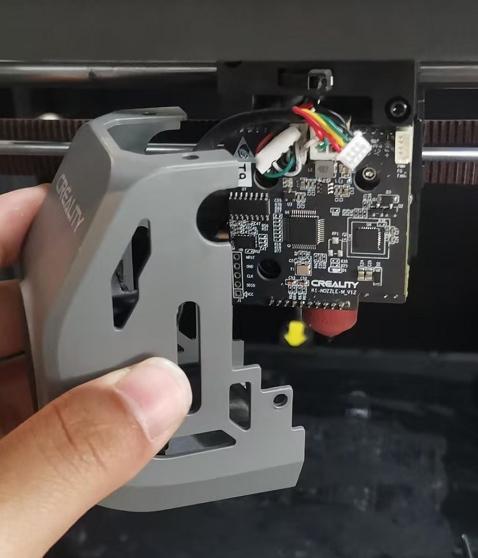
Slide the Extruder:
Remember to consult the user manual
For more comprehensive information, you can refer to the Creality K1 User Manual.
IMG Source: creality.com
If you’re experiencing issues with the Creality K1 Display Panel, here are some steps you can take to troubleshoot:
Check Connections:
Power Cycle:
Inspect the Display Screen:
Factory Reset:
Software Configuration:
Test with Another Display:
Contact Support:
Remember to consult the official user manual for specific details related to the Creality K1 display panel. Additionally, you can find troubleshooting guidance from the Creality community partner Luke Hatfield, who has created a detailed and practical troubleshooting document
IMG Source: shoplazza.com
The Creality K1 Display Panel truly stands out as a key element in the realm of 3D printing technology.