Embark on a journey into the intricate world of Creality K1 Bearings, where precision meets innovation. Unravel the secrets of the Creality K1 3D printer and its bearings, essential components that ensure smooth movement and precise prints. From the robust Graphite Bronze Bush Bearings to the Rear Z Rod Wobble Bushing, each element plays a crucial role in enhancing your 3D printing experience.
Let’s dive deeper into the inner workings of the Creality K1 and explore how its bearings set it apart from the competition.
Exploring Creality K1 Components
Let’s delve into the world of Creality K1 and explore its bearings. The Creality K1 is a fascinating 3D printer, and understanding its components is essential for optimal performance.
Graphite Bronze Bush Bearings:
Creality has equipped the X-axis with heavy-duty Graphite Bronze Bush Bearings. These bearings are robust and can withstand wear and tear. Unlike ball bearings, they don’t require frequent servicing.
Interestingly, the X-axis rail has some resistance compared to the Y-axis, which is usually the opposite behavior. Creality intentionally made the X-axis unserviceable by using these durable bushings. Disassembling it without removing glue is challenging, and attempting to do so might lead to breakage.
Note that lubricating the X-axis is not recommended unless specifically advised by Creality.
Rear Z Rod Wobble Bushing:
To address any wobbling issues, you can follow these steps:
Remove both screws above the rear Z-rod bearing.
Use a small pick or an Allen wrench from underneath the bearing to gently push it out (alternating left and right).
Be cautious as the bearing might pop out unexpectedly.
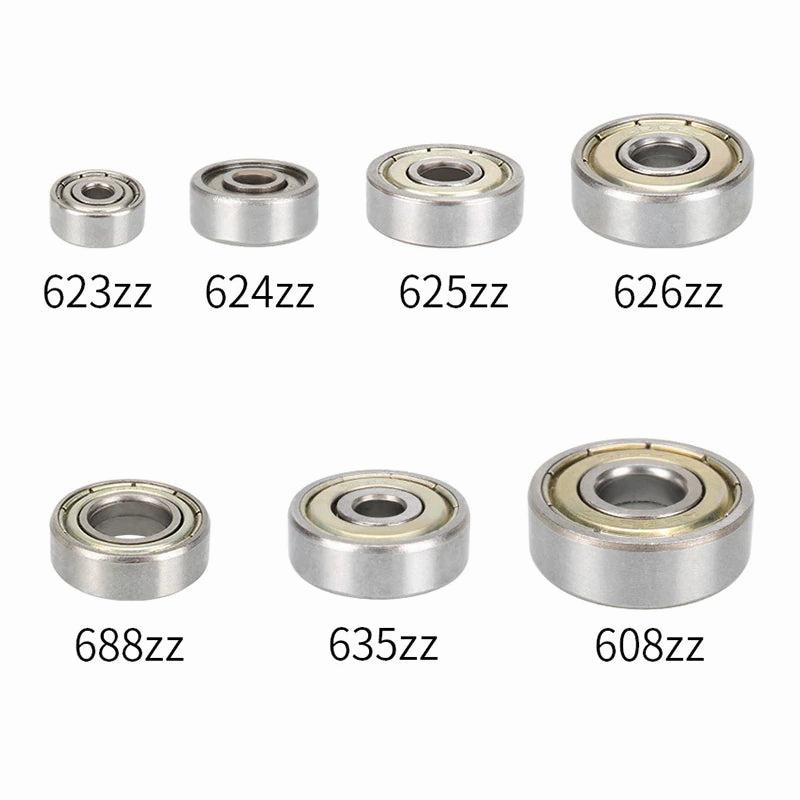
Bearing Spool Holder:
If you’re looking to modify your spool holder, consider this simple upgrade:
You’ll need an M8 bolt (at least 78 mm), an M8 locknut, four M8 washers (approximately 16 mm x 1.5 mm), and two 608 bearings (608, 608zz, or 608rs).
Adjust it according to your preference, and skip the outermost and innermost washers if needed.
After-Market Parts and Upgrades:
The Creality K1 community actively explores after-market parts and upgrades.
Some users have experimented with drop-in hot end replacements and linear rail conversions for improved performance.
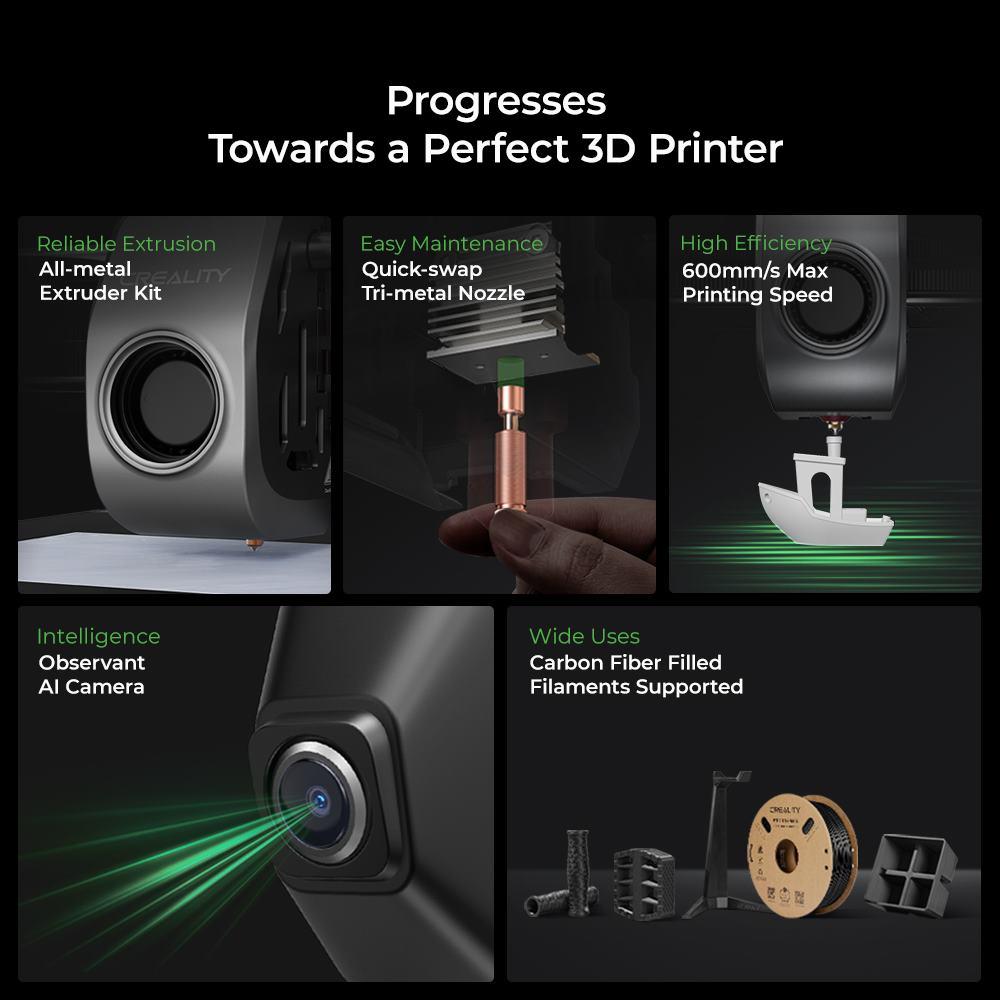
Key Features of the Creality K1 3D Printer
The Creality K1 3D Printer is a remarkable addition to the world of FDM (Fused Deposition Modeling) printers. Let’s delve into its specifications and design features:
Speed: The K1 boasts an impressive speed, being 12 times faster than a regular FDM 3D printer. It can achieve a crazy 600mm/s. Imagine the thrill of breathtaking speed as it brings your designs to life!
Core XY Design: The K1 utilizes a Core XY mechanism, which enhances precision and performance. This design ensures smoother movement of the print head, resulting in accurate prints.
Enclosed Build Area: The printer features an enclosed build area, providing better temperature control during printing. This enclosure helps maintain consistent conditions, especially when working with materials that are sensitive to temperature fluctuations.
Klipper Firmware: The K1 employs the Klipper firmware, which contributes to its speed and accuracy. However, some users find its implementation a bit clumsy and may require a glue stick for better adhesion.
Affordability: Despite its advanced features, the K1 is less expensive compared to some of its competitors. Creality has managed to strike a balance between performance and cost.
IMG Source: shoplazza.com
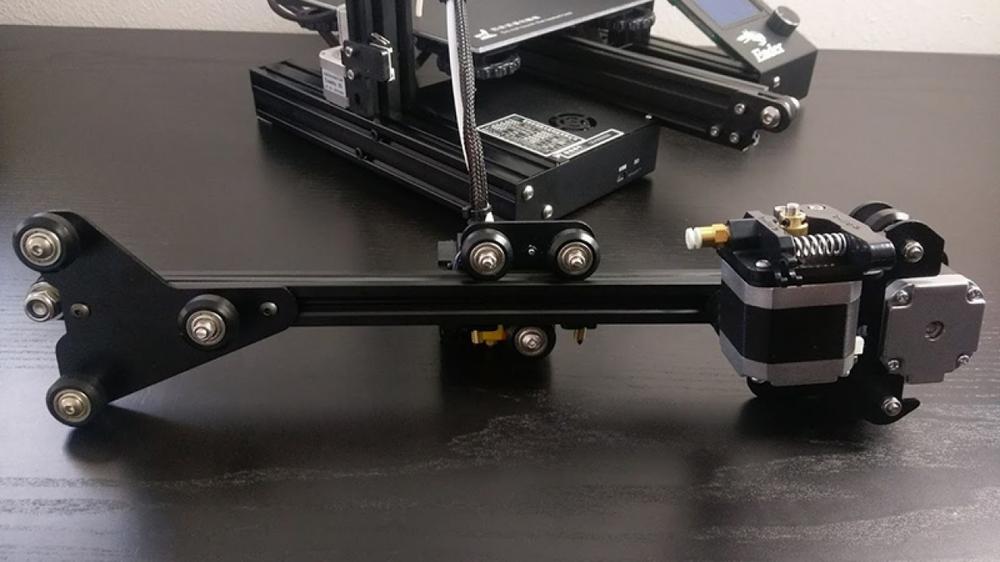
Guide to Bearings Installation in Creality K1 3D Printer
Installing bearings in your Creality K1 3D printer is an essential step to ensure smooth movement and precise printing. Let’s walk through the process:
Unboxing and Inspection:
Begin by unboxing your Creality K1 printer and inspecting all components. Make sure everything is intact and undamaged.
Assemble the Printer:
Follow the provided assembly instructions. Here are the key steps:
Attach the Screen: Secure the screen to the designated location.
Install and Load Filament: Insert the filament spool and load it into the extruder.
Remove Locking Bolts: Remove any locking bolts or clips that secure moving parts during shipping.
Install the Print Bed: Attach the print bed to the frame.
Attach the Feet and Self-Inspection: Add the feet to stabilize the printer and perform a self-inspection.
Insert the USB Drive: Insert a USB drive with your test print file.
Prepare for First Test Print: Level the bed and prepare for your first test print.
Calibrate and Level:
Properly calibrate the printer by adjusting the bed leveling screws. This ensures consistent layer adhesion and accurate prints.
Bearings Installation:
The Creality K1 uses linear bearings for smooth movement along the X, Y, and Z axes.
Locate the bearing slots on the printer frame and carriage.
Insert the bearings into their designated slots. Ensure they slide freely without any binding.
Secure the bearings in place using the provided screws or clips.
Test Movement:
Power on the printer and manually move the print head along each axis.
Check if the bearings allow smooth and precise movement. Lubricate them if necessary.
Regularly inspect the bearings for wear or damage.
Apply a light machine oil or lithium grease to keep the bearings lubricated.
Remember to consult the official Creality K1 user manual for detailed instructions and safety precautions
IMG Source: wp.com
User Reviews of Creality K1 3D Printer
Let’s delve into the user reviews for the Creality K1 3D printer. This speedy new flagship from Creality has garnered attention for its impressive features and budget-friendly pricing. Here’s what users have to say:
Tom’s Hardware Review:
The Creality K1 is a fast Core XY printer that offers great quality.
Pros:
Core XY design.
Impressive speed.
Enclosed build.
Utilizes Klipper firmware.
More affordable than similar competitors.
Cons:
Some users find the Klipper implementation clumsy.
Requires the use of a glue stick.
In testing, the K1 performed admirably, matching the speed of other printers while maintaining clean and smooth prints with frictionless joints.
It’s priced at $599, which is half the cost of the Bambu Lab X1 Carbon and $100 cheaper than the open-frame P1P.
CraftKnights Review:
The Creality K1 is an enclosed Core XY 3D printer with excellent print quality.
It can handle various materials, including PLA, PETG, ASA, ABS, and TPU.
While it’s a good alternative to the Bambu Lab P1S, it’s worth noting that the K1 comes with a stripped-down version of Klipper.
Reddit User Thoughts:
A user shares their experience after using the K1 for a couple of weeks.
Unfortunately, the specific details of their thoughts are not provided in the snippet.
IMG Source: staticdj.com
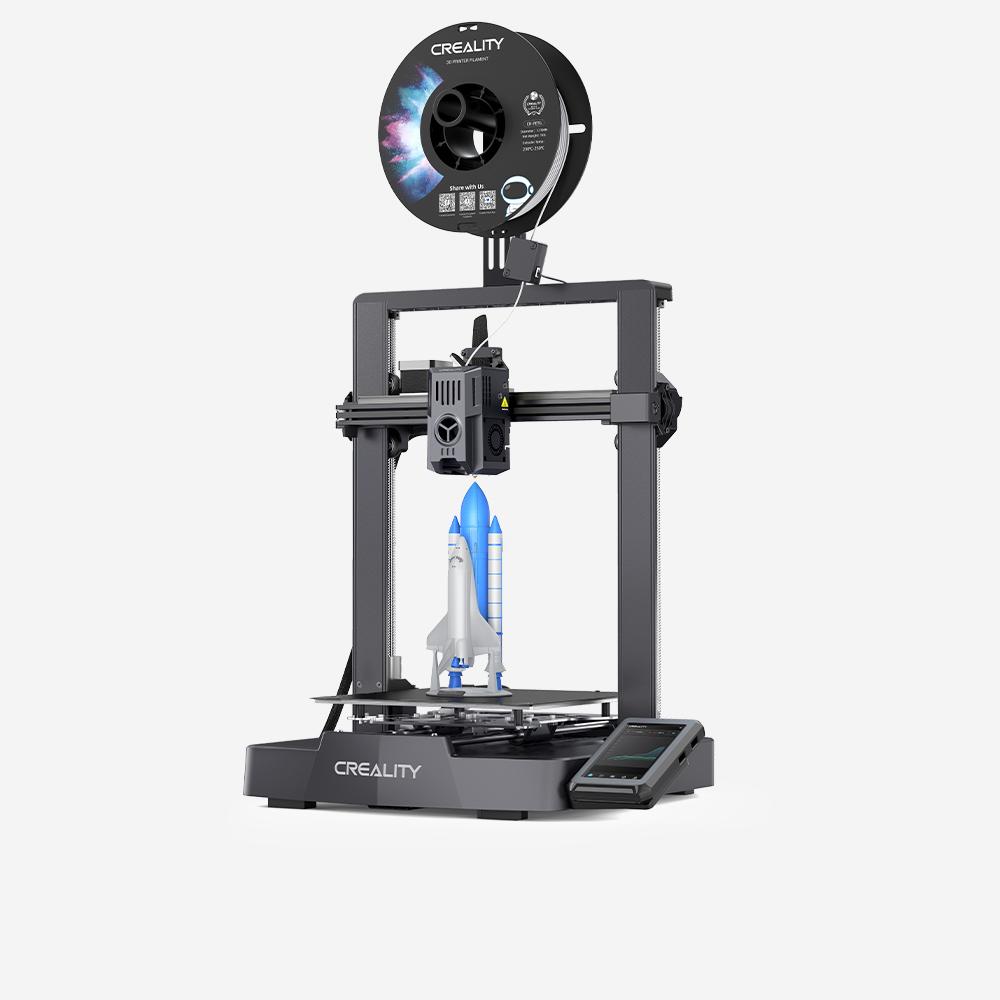
Comparing Bearings in Creality K1 and Competitors
Let’s delve into the Creality K1 and compare its bearings with those of competitors. The Creality K1 is part of the flagship series of 3D printers, and understanding its features can help you make an informed decision.
Creality K1: Key Features
Build Volume: The Creality K1 boasts a larger build volume, making it suitable for large-scale projects or batch printing. This generous size doesn’t compromise the quality and features provided by the CoreXY Cartesian motion system.
CoreXY System: The K1 utilizes the CoreXY motion system, which contributes to its precise and efficient printing capabilities.
Now, let’s explore the bearings:
Linear Bearings: The Creality K1 incorporates high-quality linear bearings that facilitate smooth movement along the X, Y, and Z axes. These bearings play a crucial role in maintaining accuracy and reducing friction during printing.
Ball Bearings: The K1 also features ball bearings, which are essential for the movement of components like the print head and bed. These bearings ensure stability and consistent motion.
Comparisons with Competitors:
While I don’t have specific details on competitors’ bearings, it’s essential to consider the overall build quality, material, and precision of the bearings.
Some competitors may use similar linear or ball bearings, but the devil lies in the details. Factors like bearing material, lubrication, and load capacity can significantly impact performance.
For more detailed comparisons, you can explore Creality’s official website.
IMG Source: kingroon.com
In conclusion, the Creality K1 3D printer stands out as a beacon of technological advancement, with its focus on high-quality bearings that elevate its performance. The Graphite Bronze Bush Bearings, Rear Z Rod Wobble Bushing, and Bearing Spool Holder all contribute to the seamless operation of the printer. As you embark on your 3D printing journey with the Creality K1, remember the importance of proper installation, maintenance, and calibration of the bearings.
These small yet significant components are the backbone of the printer, ensuring precise prints and efficient operation. Embrace the world of Creality K1 Bearings and witness the difference they make in your 3D printing endeavors.