Ultimate Guide to Creality Ender 7 Heated Bed Thermistor
Welcome to our in-depth guide on the Creality Ender 7 heated bed thermistor, a vital component in maintaining optimal printing conditions for your 3D printer. Understanding the intricacies of this thermistor is essential for ensuring precise temperature control during your printing projects. Let’s explore the features and functions of the Creality Ender 7 heated bed thermistor to help you enhance your 3D printing experience.
Creality Ender 7 Hotbed Thermistor Details
The Creality Ender 7 3D printer utilizes a hotbed thermistor to monitor the temperature of its heated bed. Here are some details about this component:
Temperature Sensor: The thermistor is a 100KΩ NTC (Negative Temperature Coefficient) sensor, which means its resistance decreases as the temperature increases. This accuracy of this thermistor is ±1%.
Compatibility: It is compatible with several Creality 3D printers, including:
Ender 3 S1
CR-6 Max
CR-6 SE
CR-10 Smart Pro
Ender 7
CR-10 Smart
Glass Sealed Design: The thermistor features a single-ended glass sealed design. This glass material ensures maximum service life, precise temperature measurement, resistance to high temperatures, and efficient temperature conduction.
Easy Installation: You won’t need to disassemble the motherboard or wire harness. Simply replace the thermistor directly. If you need guidance, there’s a video available for fast replacement.
The Role of Thermistors in 3D Printing
A thermistor plays a crucial role in 3D printing by monitoring and regulating the temperature of both the print bed and the hotend. Let’s delve into the details:
What Is a Thermistor?
A thermistor is an electrical device whose resistance varies with temperature. There are two main types:
Negative Temperature Coefficient (NTC) Thermistors: Their resistance decreases as the temperature rises.
Positive Temperature Coefficient (PTC) Thermistors: Their resistance increases with higher temperatures.
The sensitivity of thermistors to temperature changes makes them suitable for various applications, including 3D printing.
How Is a Thermistor Used in 3D Printers?
Thermistors serve as temperature sensing devices in 3D printers.
They are strategically placed in temperature-sensitive areas:
Hot End: Monitors the temperature of the extruder nozzle.
Heated Bed: Monitors the temperature of the print surface.
The thermistor relays temperature data back to the printer’s micro-controller.
The micro-controller uses this feedback to control the print temperature, ensuring it stays within the desired range for successful 3D printing.
Replacing and Attaching a Thermistor:
Thermistors are delicate instruments, often located in hard-to-reach areas.
To maintain optimal performance:
Replace a malfunctioning thermistor promptly.
Ensure proper attachment to the hot end or heated bed.
Regular checks are essential to prevent disruptions in temperature control during printing.
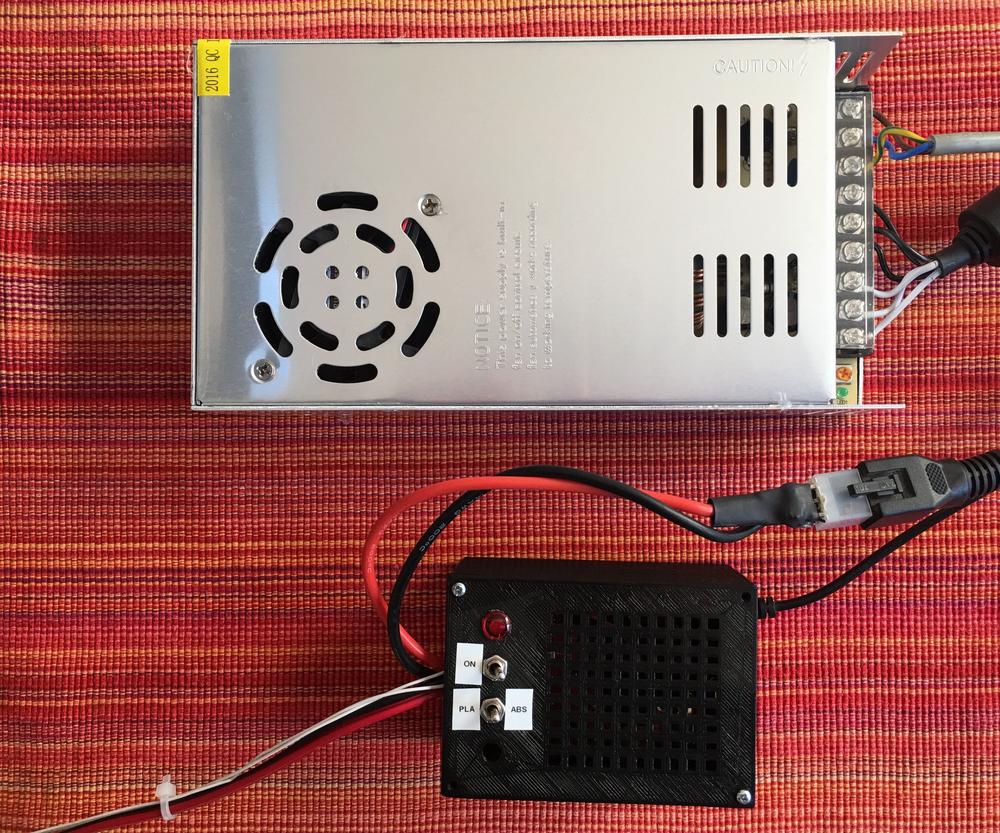
IMG Source: instructables.com
Selecting a Thermistor for Your Creality Ender 7 Heated Bed
When selecting a thermistor for your Creality Ender 7 heated bed, it’s essential to choose one that is compatible and reliable. Let’s dive into the details:
Thermistor Basics:
A thermistor is an electrical device whose resistance varies with temperature.
There are two common types of thermistors:
Negative Temperature Coefficient (NTC) Thermistors: Their resistance decreases as the temperature rises.
Positive Temperature Coefficient (PTC) Thermistors: Their resistance increases with higher temperatures.
Ender 7 Thermistor Type:
The Creality Ender 7 uses an NTC 100K thermistor for both the hotend (nozzle) and the heated bed.
Specifically, the bed thermistor is an NTC 100K glass bead type with a 23 cm cable featuring bare cable ends.
Replacing the Thermistor on Your Print Bed:
If you need to replace the thermistor on your heated bed, follow these general steps:
Safety First: Ensure the printer is powered off and unplugged.
Locate the Thermistor: The bed thermistor is often labeled as “TB” (Thermistor Bed).
Disconnect the Thermistor: Loosen any set screws and gently remove the wires from the thermistor.
Replace It: Install the new thermistor, making sure it’s securely connected.
Calibration: After replacement, recalibrate your printer to ensure accurate temperature readings.
Recommended Thermistor Replacements:
While the original Creality thermistors are suitable, you can also consider these alternatives:
Installation Process for Heated Bed Thermistor on Creality Ender 7 3D Printer
Let’s walk through the installation process for the heated bed thermistor on your Creality Ender 7 3D printer. Proper installation ensures accurate temperature readings and reliable performance. Here are the steps:
Begin by removing the black hot end sock from the new hot end assembly.
Apply Thermal Grease to the Thermistor Probe:
Open the included packet of thermal grease.
Apply a small amount of thermal grease to the thermistor probe. This helps ensure good thermal contact between the thermistor and the heated bed.
Loosen Set Screws on the Heater Block:
Locate the small set screws on the underside of the heater block (these are positioned above the smaller hole).
Loosen these set screws to create space for inserting the thermistor.
Insert the Thermistor:
Carefully insert the thermistor into the designated hole on the heater block.
Ensure that the thermistor is properly seated and aligned.
Tighten the Set Screws:
Once the thermistor is in place, tighten the set screws to secure it.
Make sure the thermistor is held firmly without any play.
Remember to follow the manufacturer’s guidelines and safety precautions during the installation process. If you encounter any issues or need further assistance, refer to the official user manual for detailed instructions
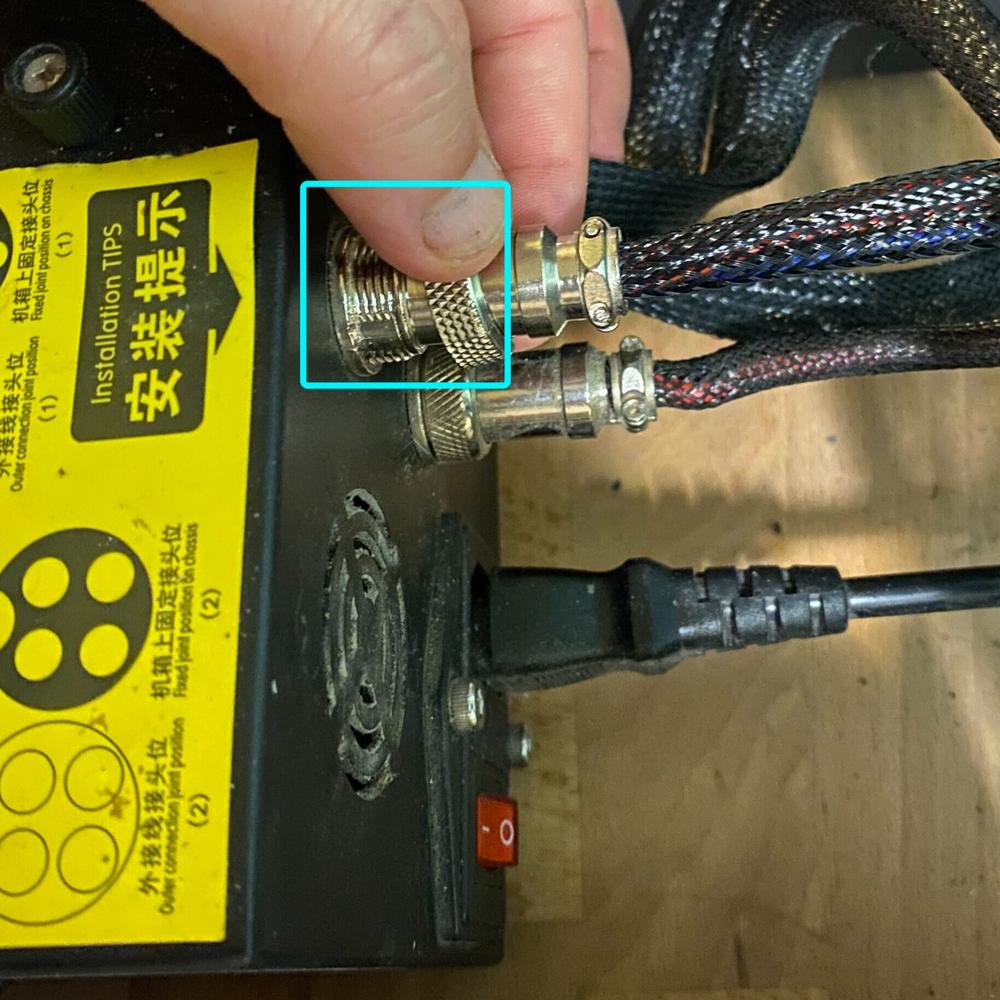
IMG Source: squarespace-cdn.com
Troubleshooting Heated Bed Thermistor Issues in 3D Printers
Troubleshooting issues related to the heated bed thermistor in 3D printers is essential for maintaining optimal printing conditions. Let’s dive into some steps to address these problems:
Check for Continuity:
Turn off and unplug your printer.
Ensure the hot end has cooled down completely.
Remove any filament from the extruder.
Examine the thermistor’s wiring for any breaks or loose connections.
Verify continuity by using a multimeter to measure resistance across the thermistor leads. Most 3D printing thermistors have a resistance of 100k ohms at room temperature.
If there’s no continuity, consider replacing the thermistor.
Adjust the Pins in the Print Bed Connectors:
Inspect the connectors that link the heated bed to the printer’s control board.
Sometimes, pins can become misaligned or loose, affecting the thermistor’s functionality.
Gently adjust the pins to ensure proper contact.
Check for Burn Marks on Bed Wires:
Examine the wires connected to the heated bed.
Look for any signs of burn marks, fraying, or damage.
If you find any issues, replace the affected wires.
Check for Burnt Connectors:
Inspect the connectors themselves (both on the heated bed and the control board).
Burnt connectors can cause poor electrical contact.
Replace any damaged connectors.
Ensure Thermal Runaway Protection:
Thermal runaway occurs when the printer’s temperature control fails, leading to dangerous overheating.
Make sure your printer’s firmware has thermal runaway protection enabled.
To test this feature, disconnect the heater element (either hotend or heated bed) during printing or while sending commands via USB.
If the printer detects runaway temperature, it should shut down to prevent damage.
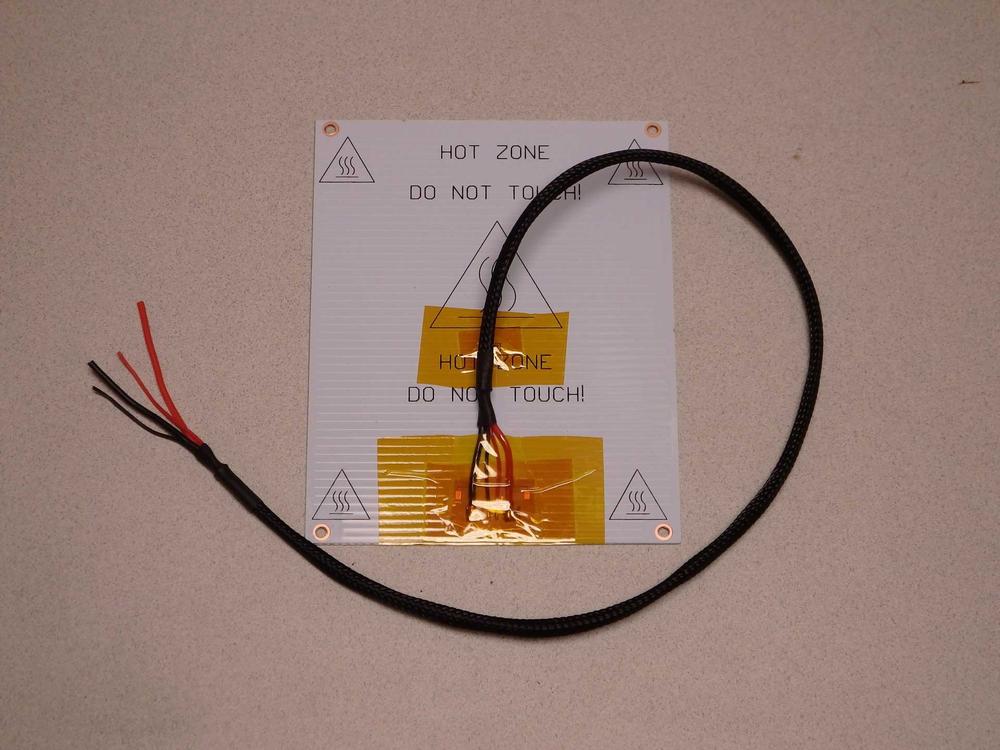
IMG Source: hackaday.io
In conclusion, the Creality Ender 7 heated bed thermistor plays a critical role in regulating and monitoring the temperature of your 3D printer’s print bed. By selecting a compatible and reliable thermistor and following proper installation procedures, you can ensure accurate temperature readings and consistent printing performance. Regular maintenance and troubleshooting steps, such as checking for continuity, adjusting connectors, and ensuring thermal runaway protection, are essential to address any issues that may arise with the thermistor.
We hope this guide has provided you with valuable insights into the importance of the Creality Ender 7 heated bed thermistor and how to effectively maintain and optimize its functionality for your 3D printing needs.