Are you looking to enhance the performance of your Creality Ender 7 3D printer with the right cooling fans? Dive into our detailed guide that covers everything you need to know about Creality Ender 7 cooling fans. From understanding the different types of cooling fans commonly used in 3D printers to exploring the benefits of upgrading your printer’s cooling system, we’ve got you covered.
Let’s unravel the world of Creality Ender 7 cooling fans and how they can elevate your printing experience to new heights.
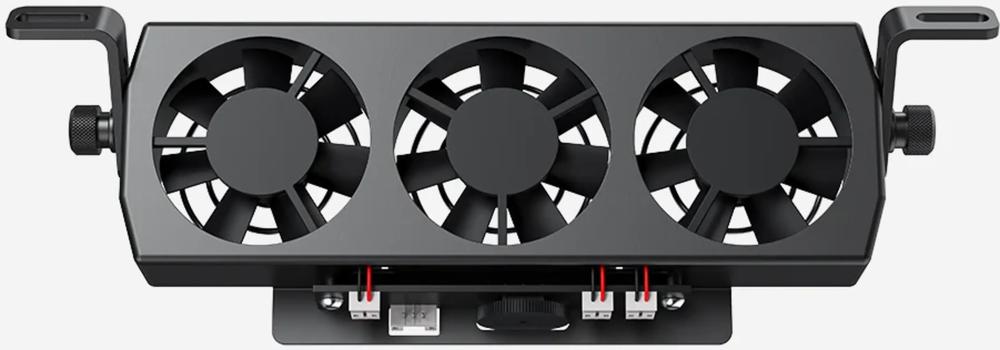
High-Speed Fan Features
The Creality Ender-7 3D printer boasts some impressive features, including high-speed cooling fans. Let’s delve into the details:
High-Speed Fan:
The Ender-7 comes equipped with a 9500 RPM high-speed fan. This powerful fan efficiently cools the curing model, ensuring rapid cooling after printing.
The fan’s design includes a transparent heat-shrinkable tube with a tin ring in the middle. When heated, this tube can be melted directly, making it easy to operate without any welding.
Additionally, the fan features waterproof hot melt adhesive inside, ensuring that the wire is tightly wrapped after hot melting. It’s sealed, waterproof, and resistant to high temperatures.
Types of Cooling Fans in 3D Printers
Let’s explore the different types of cooling fans commonly used in 3D printers:
Hot-End Fans:
These fans are positioned near the hot end (extruder) of the 3D printer.
Their primary purpose is to cool the hot end and prevent heat from traveling upward into the cold end.
Effective cooling ensures consistent filament flow and prevents clogs.
Hot-end fans are crucial for maintaining print quality.
Part Cooling Fans:
Part cooling fans are directed toward the printed object during the printing process.
They rapidly cool down the material as it is deposited layer by layer.
By solidifying the material quickly, they help prevent warping, improve overhangs, and enhance overall print quality.
Control Board Fans:
These fans are installed on the control board (mainboard) of the 3D printer.
Installing a Cooling Fan on Creality Ender 7 3D Printer
Let’s walk through the steps for installing a cooling fan on your Creality Ender 7 3D printer. Proper cooling is essential for achieving high-quality prints and maintaining stable temperatures during long printing sessions. Here’s a guide to help you get started:
Safety First:
Before proceeding, ensure that your printer is powered off and unplugged. Safety is paramount!
Gather Your Tools:
Make sure you have the necessary tools and components ready:
The cooling fan (usually a 4010 or 5015 fan)
Appropriate screws (M4 or M5, depending on the fan)
Screwdriver
Pliers (if needed)
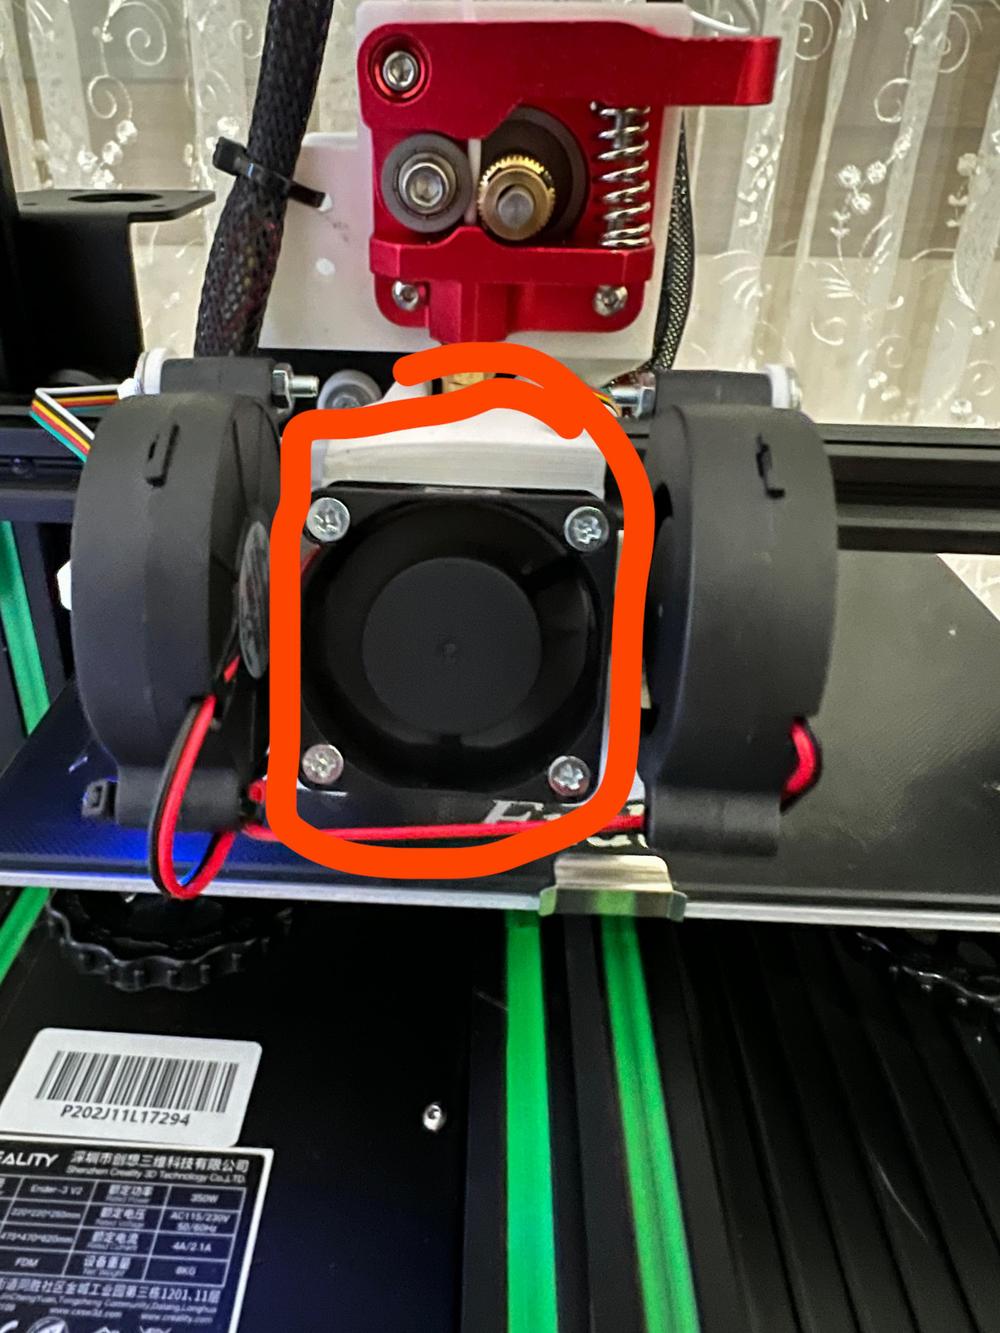
Remove the Old Fan Housing and Fans:
If your Ender 7 already has a stock fan, carefully remove it by unscrewing the housing.
Disconnect any wiring connected to the old fan.
Connect the New Cooling Fan:
Attach the new cooling fan to the designated fan port on the control board.
Secure the fan using the appropriate screws (M4 or M5).
Mount the New Fan Housing:
If your cooling fan came with a housing, position it over the fan.
Secure the housing to the printer frame using the provided screws.
Mount the Front Fan (Optional):
Some users choose to add an additional front fan for improved cooling.
If you’re installing a front fan, follow the same steps as above.
Update Firmware (If Necessary):
If you’ve made any hardware modifications, consider updating your printer’s firmware.
Consult the official Creality resources for firmware updates specific to the Ender 7.
Test the Cooling Fan:
Power on your printer and verify that the cooling fan spins correctly.
Ensure that the airflow is directed toward the hotend and other critical components.
Calibrate and Fine-Tune:
Run a test print and observe the cooling performance.
Adjust the fan speed in your slicer settings to optimize cooling during different print layers.
Maintenance and Cleaning:
Regularly check the fan for dust or debris buildup.
Clean the fan blades gently using compressed air or a soft brush.
Remember to consult the official Ender-7 User Manual
For more detailed information, you can refer to the Ender-7 User Manual. If you encounter any issues during the installation process, feel free to reach out to Creality’s support team using the contact details provided in the manual.
IMG Source: redd.it
Fan Settings for 3D Printing with Creality Ender 7
When it comes to 3D printing, getting the right fan settings can significantly impact your print quality. Let’s dive into the specifics for your Creality Ender 7 printer:
Cooling Fans and Filaments:
PLA: Cooling fans are essential for PLA prints. They improve overhangs, bridging, and overall detail. Here’s what you need to know:
Enable cooling fans: Your slicer usually starts the cooling fan after the first 1 or 2 layers to ensure better adhesion to the build surface. After that, it activates the fan.
Fan speed: Use high-quality cooling fans at 100% speed for PLA prints. Proper cooling optimizes overhangs and bridges, leading to successful complex prints.
Fan ducts: Consider upgrading your fan ducts using designs available on platforms like Thingiverse. These simple upgrades can significantly enhance your PLA print quality.
ABS: While ABS doesn’t require cooling fans as much as PLA, some users still use them. If you choose to, keep the fan speed low (around 20-30%) to prevent warping.
PETG: PETG benefits from cooling fans, especially for bridging and overhangs. Use fans at around 50-70% for PETG prints.
TPU: TPU is flexible and less prone to warping, so cooling fans are less critical. You can use them at a low speed (around 20-30%) if needed.
Ender 7 Fan Upgrade:
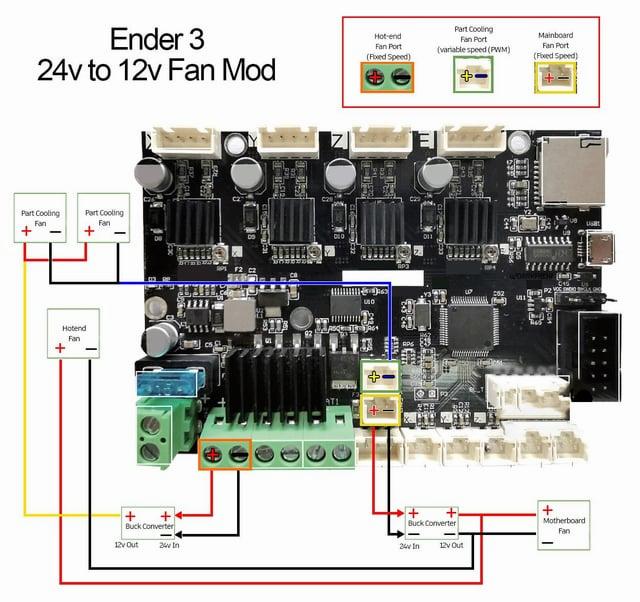
When replacing fans on your Ender 7, ensure they are 24V fans or use a 12V fan with a buck converter to step down the voltage. The WINSINN 50mm 24V 5015 Blower Fan is a quiet option that works well with HeroMe ducts.
Slicer Settings:
If you’re using PrusaSlicer, go to Filament Settings > Cooling and set “Disable fan for the first” to 0.
In Cura, adjust the “Regular fan speed at height” and “Regular fan speed at layer” settings to your preference.
IMG Source: redd.it
Benefits of Upgrading 3D Printer Cooling Fans
Upgrading your 3D printer cooling fans can have several advantages. Let’s explore them:
Improved Bridging and Overhangs:
With a newer fan, you’ll experience better bridging capabilities. This means that when printing over gaps or unsupported areas, the filament will bridge more smoothly, resulting in cleaner and more precise prints.
Upgraded fans also enhance overhang performance. Overhangs are those parts of a print that extend horizontally without any support underneath. Proper cooling helps maintain their shape and prevents sagging.
Noise Reduction:
One of the crucial benefits of a fan upgrade is reduced noise. Stock fans can sometimes be noisy, especially if they’re older or low-quality. Upgrading to quieter fans can make your 3D printing environment more pleasant.
Better Cooling Efficiency:
Upgraded fans provide more effective cooling for your prints. Proper cooling is essential to prevent warping, improve layer adhesion, and maintain print quality.
Blower fans, in particular, are effective at cooling the print and are well-suited for materials that require higher cooling rates. They can also handle larger 3D printers due to their higher volume of airflow.
Enhanced Print Quality:
Improved cooling directly impacts print quality. By maintaining consistent temperatures during printing, you’ll achieve cleaner, more accurate layers.
Overheating can lead to issues like stringing (unwanted filament strands between printed parts) and poor layer bonding. Upgraded fans help mitigate these problems.
Remember that different 3D printers may have varying fan types (such as part cooling, hotend, mainboard, and power supply fans), so consider upgrading the relevant ones based on your specific printer model
IMG Source: nice-cdn.com
In conclusion, the Creality Ender 7 cooling fans play a vital role in ensuring optimal print quality and printer performance. By selecting the right cooling fans, such as high-speed fans with advanced features, you can achieve precise and reliable 3D prints. Whether you’re printing with PLA, ABS, PETG, or TPU, understanding the importance of cooling fans tailored to your filament choice is key.
Upgrading your Ender 7 cooling fans can lead to improved bridging, reduced noise, better cooling efficiency, and enhanced print quality. Remember, proper maintenance and calibration are essential for maximizing the benefits of your cooling fans. So, equip your Creality Ender 7 with the right cooling fans and witness a significant transformation in your 3D printing journey.