Ultimate Guide to Creality Ender-3 V3 SE Electronics Board
Are you curious about the advanced features of the Creality Ender-3 V3 SE 3D printer and its upgraded electronics board? Dive into the technical details of the Creality Ender-3 V3 SE Electronics Board and discover how it enhances your 3D printing experience. From the super mute motherboard to the main board drive model, this article provides an in-depth exploration of what sets this electronics board apart.
Super Mute Motherboard
The Creality Ender-3 V3 SE 3D printer features an upgraded 32-bit original silent board motherboard. Let’s delve into the details:
Super Mute Motherboard:
Creality has developed an advanced motherboard for the Ender-3 V3 SE. It boasts the following features:
Equipped with a 32-bit MCU and 24V power input, resulting in faster calculations, improved operation control, higher printing accuracy, and enhanced stability.
Utilizes the MS35774 stepper motor driver, ensuring precise and smooth motion control.
Superior noise reduction for a quiet printing experience.
Compatibility:
This motherboard is specifically designed for the Creality Ender-3 V3 SE 3D printer. It’s a plug-and-play replacement for the original board.
Main Board Drive Model: MS35774:
The MS35774 motor driver enables a complete motion control system, working seamlessly with the main processor, motor, and incremental encoder.
Supports features like auto leveling, filament exhaustion detection, power recovery, and easy installation.
Easy Installation:
Simply remove the original motherboard and install this upgraded one. It works right out of the box, making it suitable for beginners and minimizing the need for firmware re-flashing.
After-Sale Service:
If you have any issues or questions about this product, feel free to contact Creality’s professional technical team. They’re available to provide support within 24 hours.
Product Information:
Dimensions: 5.91 x 4.53 x 1.77 inches
Weight: 4.9 ounces
Manufacturer: Creality 3D
ASIN: B0CM5NDSVX
Warranty & Support:
Introducing Creality Ender-3 V3 SE
The Creality Ender-3 V3 SE is an exciting addition to the Ender 3 series, boasting several significant upgrades over its predecessors. Let’s delve into the assembly process and explore the key components of this 3D printer.
Unboxing and Initial Components:
The Ender-3 V3 SE arrives securely packaged in foam box inserts. Here’s what you’ll find:
Gantry Frame Assembly: This pre-assembled component provides stability for the printer.
Printer Base Assembly: Also pre-assembled, it forms the foundation of the printer.
Tools and Hardware: Included for assembly.
SD Card: Contains ready-to-print files.
Sample PLA Filament: For your initial prints.
Assembling the Gantry Frame:
Place the printer base on its side.
Mount the gantry frame using the 4 largest screws (2 on each side).
Insert the screws from underneath the base.
Secure the top with 2 additional screws on one side.
The gantry frame has a non-symmetrical design, ensuring correct installation.
Tighten the screws to secure the gantry frame in place.
Key Features of the Ender-3 V3 SE:
Build Volume: 220 x 220 x 250 mm (approximately 8.75 x 8.75 x 10 inches).
Extruder Type: Dual Gear Direct Drive (known as “Sprite”).
Bed Type: PC Spring Steel Bed.
Maximum Hot-End Temperature: 260°C, allowing compatibility with various filaments like PLA, PETG, and TPU.
Motion System: Follows the Cartesian design principle with a Bed Slinger motion system for stability and precision.
IMG Source: niceshops.com
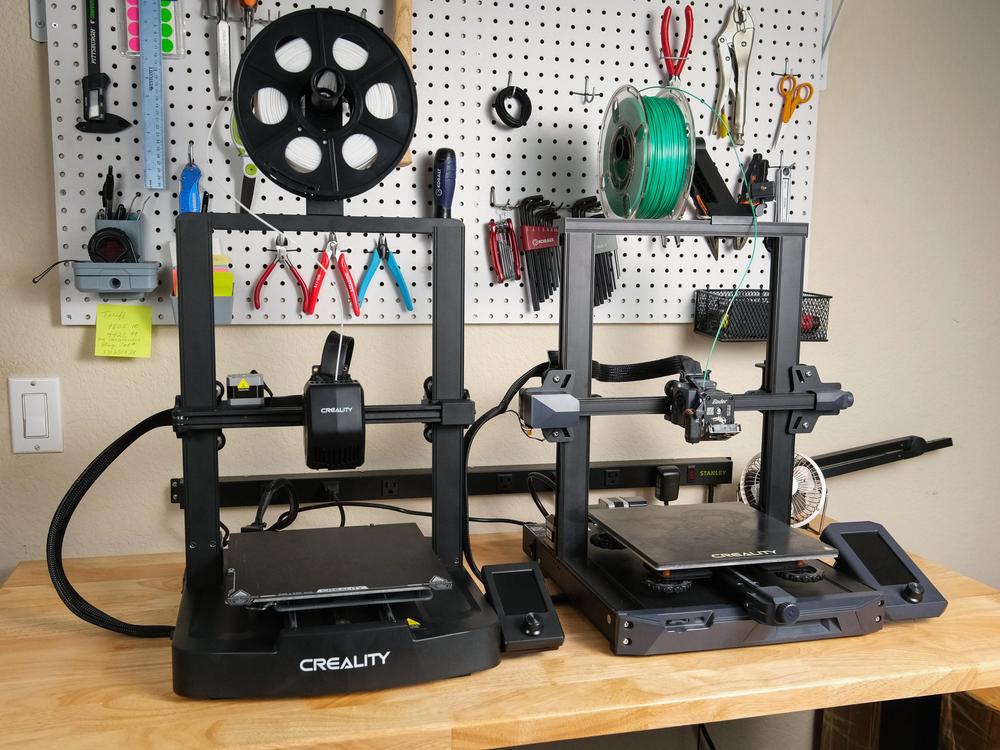
Comparison of Creality Ender-3 V3 3D Printers
Let’s compare the Creality Ender-3 V3 SE and the Ender-3 V3 KE in terms of their electronics board performance. These two 3D printers share a lineage, but they have distinct differences that set them apart. Here’s a breakdown of their key features:
Ender-3 V3 KE:
Maximum Printing Speed: The KE model boasts an impressive maximum printing speed of 500 mm/s. This speed is derived from its advanced hardware, including an X-axis linear rail and an improved hotend.
Maximum Printing Temperature: Unlike the SE, the KE can reach a maximum printing temperature of 300°C, compared to the SE’s 260°C.
Filament Sensor: The KE includes a filament sensor, which can be handy for uninterrupted printing.
PEI Print Bed Surface: It features a PEI print bed surface, enhancing adhesion and ease of use.
Touchscreen Interface: The KE comes with a convenient 4.3-inch color touch screen for intuitive control.
Ender-3 V3 SE:
While not as feature-rich as the KE, the SE is a solid choice for those on a budget.
Reliable Printing: The SE delivers reliable printing performance.
Print Quality: It offers comparable good print quality.
Maximum Speed: The SE has a maximum printing speed of 250 mm/s.
Lacks Filament Sensor and Touchscreen: Unlike the KE, the SE does not have a filament sensor or touchscreen.
In summary, if you’re looking for high-speed printing with quality of life features, the KE is an excellent choice. However, if budget-friendly reliability is your priority, the SE can still provide a satisfying 3D printing experience, especially with a few upgrades like the PEI print bed.
IMG Source: squarespace-cdn.com
Versatile 3D Printer Upgrades
The Creality Ender-3 V3 SE is a versatile 3D printer that offers a solid foundation for customization and upgrades. Here are some potential modifications you can consider:
OctoPrint: Set up OctoPrint for remote monitoring and control. You’ll need a Raspberry Pi and an optional webcam.
Filament Dryer/Dehydrator: Enhance filament quality by adding a filament dryer or dehydrator to keep your filament moisture-free.
Enclosure: Consider building or buying an enclosure for temperature stability and better print quality.
Linear Rails: Upgrade from wheels to linear rails for smoother axis movements.
Belt Tensioners: Improve belt tension for more precise prints.
Touchscreen: Replace the stock screen with a touchscreen interface for a more user-friendly experience.
Filament Run-Out Sensor: Add a sensor to detect when filament runs out during a print.
For more details, you can refer to the official user manual and explore compatible accessories like the Sonic Pad, Ceramic Heating Kit, Water Cooling Kit, and Laser Engraving Module.
IMG Source: media-amazon.com
Troubleshooting Creality Ender-3 V3 SE Electronics Board
Let’s troubleshoot the Creality Ender-3 V3 SE electronics board. If you’re experiencing any issues, here are some common problems and their solutions:
Motion Anomalies:
Issue: If your printer is not moving correctly or skipping steps, check the following:
Ensure the stepper motor connections are secure.
Verify that the belts and pulleys are properly tensioned.
Calibrate the steps per millimeter for each axis.
Temperature Problems:
Issue: If the hotend or heated bed isn’t reaching the desired temperature:
Confirm that the thermistor is functioning correctly.
Check the heater cartridge and heated bed connections.
Inspect the wiring for any damage.
Extrusion Issues:
Issue: Poor filament extrusion can lead to print defects.
Adjust the extruder tension to ensure proper filament feeding.
Verify that the filament path is clear and not obstructed.
Remember to consult your printer’s user manual
For more detailed troubleshooting, you can refer to Creality’s official Ender-3 V3 SE Troubleshooting Guide . It covers a wide range of problems and provides effective solutions for optimal 3D printing performance.
IMG Source: redd.it
In conclusion, the Creality Ender-3 V3 SE Electronics Board is a game-changer for 3D printing enthusiasts seeking improved performance and reliability. With features like the super mute motherboard, compatibility with the Ender-3 V3 SE printer, and the advanced MS35774 motor driver, this electronics board elevates your printing experience. Whether you’re a beginner or a seasoned pro, the easy installation and robust after-sale service make this board a valuable addition to your 3D printing setup.
Explore the possibilities with the Creality Ender-3 V3 SE Electronics Board and take your 3D printing projects to the next level.