Welcome to a comprehensive exploration of the Bambu Lab X1 3D printer and its intricate endstops system. Dive into the world of 3D printing technology as we uncover the significance of endstop sensors in ensuring impeccable print quality and precision. Discover the maintenance recommendations and upcoming models from Bambu Lab that are set to revolutionize the 3D printing experience.
Bambu Lab X1 Printer Features
The Bambu Lab X1 is a 3D printer that has gained popularity among enthusiasts. Let’s delve into some details about it:
Endstops:
The endstops in a 3D printer are sensors or switches that help determine the position of the print head or the movement of the printer’s axes. They play a crucial role in ensuring accurate and precise printing.
For the Bambu Lab X1, endstops are strategically placed to detect the limits of movement along the X, Y, and Z axes.
These sensors help prevent the print head from moving beyond its intended range, which is essential for successful prints.
Maintenance Recommendations:
Like any 3D printer, the Bambu Lab X1 requires regular maintenance to ensure smooth operation.
Here are some basic maintenance recommendations for the X1 and X1-Carbon models:
Check the endstops: Verify that the endstops are functioning correctly. If they’re misaligned or malfunctioning, it can lead to print errors.
Inspect wiring: Examine the wiring connected to the endstops. Loose or damaged wires can cause issues.
Clean and lubricate: Regularly clean the endstop sensors and apply lubrication to moving parts.
Calibration: Properly calibrate the endstops during initial setup and whenever necessary.
Upcoming Models:
Bambu Lab has been working on expanding its printer lineup.
While the X1 remains popular, there are hints of an upcoming model called the X1E. This new printer is part of their second-generation lineup and is expected to incorporate novel tech features.
For spare parts and accessories related to the Bambu Lab X1, you can explore their official store
Types of 3D Printer Endstop Sensors
Let’s delve into the world of 3D printer endstop sensors. These sensors play a crucial role in ensuring precise movement and positioning within a 3D printer. Here are some key types of endstops commonly used:
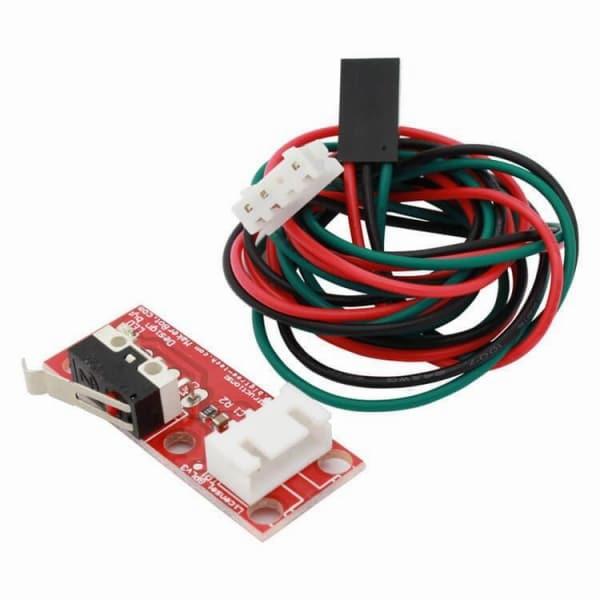
Mechanical Endstop Switches:
These are simple and reliable switches that trigger when a physical object (such as the printer carriage) physically contacts them.
When the moving part reaches the end of its travel, it presses against the mechanical switch, causing it to close and signal the printer to stop.
Mechanical endstops are often used for homing (returning the printer to a known starting position) and as safety measures to prevent the printer from crashing into its limits.
They operate in an inverted way: normally dark (not triggered) and light up when triggered, completing the circuit and applying voltage to the signal line.
Optical Endstops:
Optical endstops use infrared or visible light to detect the presence of an object.
They consist of an infrared emitter (LED) and a phototransistor (receiver).
When the moving part interrupts the light beam, the phototransistor detects the change and signals the printer.
Optical endstops are more precise than mechanical switches and are less susceptible to wear and tear.
They are commonly used for bed leveling and as limit switches.
Magnetic Endstops:
Magnetic endstops rely on magnets and Hall effect sensors.
A magnet is attached to the moving part, and the Hall effect sensor detects changes in the magnetic field.
When the magnet approaches the sensor, it triggers a signal.
These endstops are durable, non-contact, and immune to dust and debris.
They are often used in delta printers and other designs where precise positioning is critical.
Remember, the choice of endstop type depends on factors such as accuracy requirements, ease of installation, and the specific printer design. Each type has its advantages and limitations, so it’s essential to choose the one that best suits your 3D printer setup
IMG Source: all3dp.com
Benefits of 3D Printer Endstops
Let’s explore the benefits of different types of 3D printer endstops:
Mechanical Endstops:
Inexpensive and Simple: Mechanical endstops are popular because they are affordable and easy to use. They connect to the 3D printer motherboard with just two wires.
Reliable: These endstops provide a reliable way to detect the position of the printer’s moving parts, such as the print head or the bed.
Limit Switches: Mechanical endstops act as limit switches, ensuring that the printer stops when it reaches the end of an axis.
Optical Endstops:
Non-Contact Sensing: Optical endstops use light sensors to detect the position. They don’t physically touch the moving parts, reducing wear and tear.
High Precision: Optical endstops offer greater precision compared to mechanical ones. They can detect small movements accurately.
Less Noise: Since there’s no physical contact, optical endstops produce less noise during operation.
Magnetic Endstops:
Hall Effect Sensors: Magnetic endstops use Hall effect sensors to detect the presence of a magnetic field. When a metal part (such as the print head) gets close, the sensor triggers.
Durability: These endstops are durable because they don’t have moving parts that can wear out.
Consistent Performance: Magnetic endstops provide consistent performance even in dusty or dirty environments.
Precision and Safety:
Properly functioning endstops ensure accurate and consistent prints. If an endstop fails, it can lead to print defects or even pose safety hazards.
Regularly check and maintain your endstops to ensure they are working correctly.
Remember, choosing the right type of endstop depends on your specific printer and requirements. Whether you prioritize cost, precision, or ease of use, understanding the benefits of each type will help you make an informed decision.
IMG Source: azurefilm.com
Calibrating 3D Printer Endstops
Calibrating your 3D printer’s endstops is crucial for accurate and consistent prints. Here are some steps to help you calibrate them:
Inspect and Fix Wired Connections:
Check the wiring on the endstop. Ensure that the connections are correct and tightly secured. If any wires are loose, push the endstop connector into the control board.
Loose connections can lead to endstop malfunctions. For example, if your X-axis endstop isn’t working, verify the connections to resolve the issue.
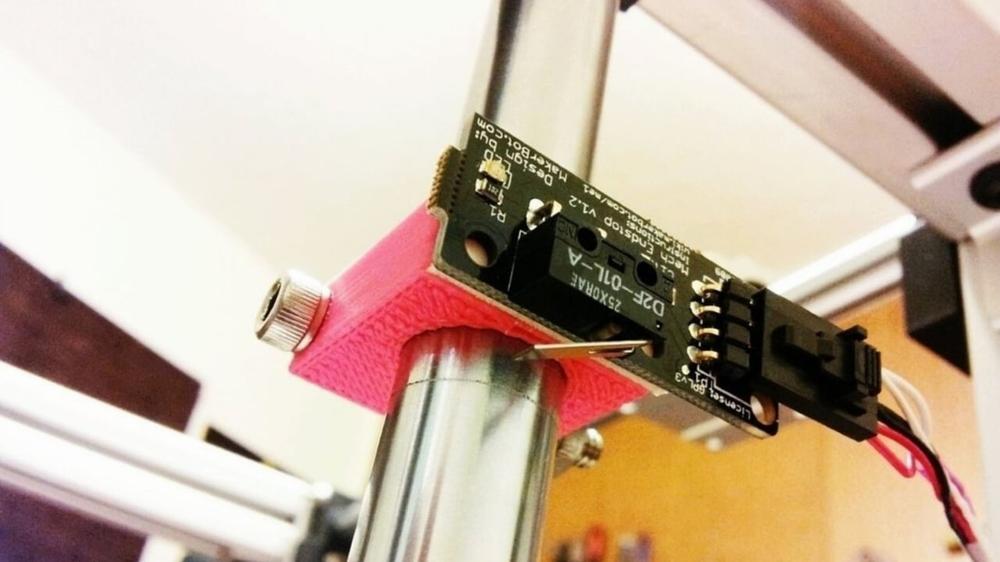
Adjust the Position of the Endstop:
Properly position the endstop. It should trigger at the right moment during movement.
For example, if your printer’s nozzle should stop at the minimum position (closest to the bed), ensure the endstop triggers when the nozzle reaches that point.
Inspect the Endstop Connectors for Rust or Dirt and Clean:
Over time, endstop connectors can accumulate rust or dirt. Inspect them and clean if necessary.
Rusty or dirty connectors can interfere with proper functioning. Use a gentle cleaning method to maintain good contact.
Update Your Firmware:
Ensure your printer’s firmware is up to date. Sometimes endstop issues can be resolved by updating the firmware.
Check the manufacturer’s website or community forums for firmware updates specific to your printer model.
Test Your Endstop for Issues:
Use software like Pronterface, Repetier Host, or Cura to test the endstop.
Manually trigger the endstop and observe if it responds correctly. Adjust as needed.
Replace the Endstops:
If all else fails, consider replacing the endstops. Sometimes they wear out or become faulty.
Purchase compatible endstops and follow the installation instructions.
For more details, you can refer to this article on how to fix 3D printer endstop issues.
IMG Source: all3dp.com
Troubleshooting Endstop Issues with Bambu Lab X1
Let’s address the endstop issues you’re experiencing with your Bambu Lab X1. Here are some steps you can take to troubleshoot:
Power Cycle and Reset:
Turn off the printer using the switch at the back.
Unplug the power cord from the printer itself.
With the printer unplugged, turn the switch back on and leave it in the “on” position for a few minutes.
After that, turn the switch back to the “off” position (this step is crucial) and then plug the printer back in.
Clean the Nozzle and Endstops:
Remove any grease or debris from the endstops.
Clean the outside of the nozzle and the silicone sock thoroughly.
Also, check the inside of the nozzle for any clogs or blockages.
Regular Maintenance:
The X1 printer is a complex electromechanical device with various sensors, electronics, actuators, and mechanical parts.
Regular maintenance can help reduce wear and extend the printer’s lifespan.
Refer to the Bambu Lab Wiki for detailed maintenance guides.
Remember that consistent maintenance
IMG Source: redd.it
In conclusion, the Bambu Lab X1 endstops play a crucial role in the functionality and accuracy of the 3D printer. Understanding the different types of endstops and their benefits can help users optimize their printing processes for exceptional results. By following the calibration steps and troubleshooting tips provided, users can ensure seamless operation of their Bambu Lab X1 and elevate their 3D printing capabilities.
Remember, proper maintenance and attention to detail are key to unlocking the full potential of your Bambu Lab X1 3D printer.