Welcome to the world of 3D printing with the Anycubic Kobra 2 Plus, where precision meets innovation. Today, we delve into a crucial aspect of this cutting-edge technology: the Anycubic Kobra 2 Plus Endstops. Discover how these tiny yet mighty components play a vital role in ensuring the accuracy and reliability of your 3D printing endeavors.
Let’s explore common scenarios and practical solutions related to endstops in the Anycubic Kobra 2 Plus to optimize your printing experience.
Common Endstop Issues with Anycubic Kobra 2 Plus Printer
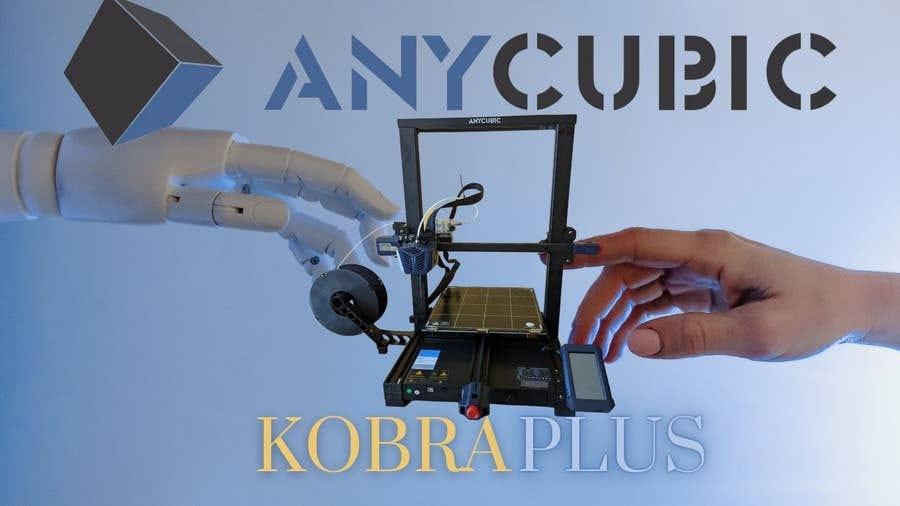
The Anycubic Kobra 2 Plus is a large-sized, balanced, and all-rounded high-speed FDM printer. It boasts a printing volume of 41 liters and offers a 10x faster printing speed compared to conventional printers. However, like any complex machinery, it can encounter issues.
Endstops play a crucial role in 3D printers. They are sensors that help determine the position of the printer’s moving parts. Specifically, the Y endstop is responsible for detecting the position of the print bed along the Y-axis.
Here are some common scenarios related to endstops in the Anycubic Kobra 2 Plus:
Z Homing Failed – Check Y Endstop and Wiring:
If you encounter a Z homing failure with the error message “Z homing failed, please check Y endstop and wiring,” here are some steps to troubleshoot:
Ensure that you’re using the latest firmware (the initial firmware may have bugs).
Verify that the white plugs under the rear left of the print bed are firmly connected to the Y endstop sensor. Loose connections can lead to this error.
Random Stops During Printing:
Some users have reported that their Kobra 2 Max stops in the middle of a print. The symptoms include the fan still running, but the bed and hot end turning off. The touch screen goes black and becomes unresponsive, even though the unit remains powered on. The print head stops at its current position.
If you encounter this issue, consider checking the following:
Firmware: Ensure you’re using the latest firmware to avoid known bugs.
Endstop Connections: Inspect the wiring and connections for any loose or damaged parts.
Power Supply: Verify that the printer is receiving consistent power.
Overheating: Monitor the printer’s temperature during long prints to prevent overheating.
Software Settings: Review your slicing software settings to rule out any misconfigurations.
Importance of 3D Printer Endstops
Let’s delve into the world of 3D printer endstops. These little components play a crucial role in ensuring accurate movement and safety in your 3D printer. Here’s what you need to know:
Purpose of Endstops:
Reference System for Axes: When you power up your 3D printer, the controller board doesn’t know the initial position of its axes. It’s like waking up in a new place without knowing where you are! Endstops help establish the starting point of the physical coordinate system through a process called homing.
Safety Mechanism: Endstops protect your hardware from damage. If any movement tries to exceed the physical limits of the machine, the endstop kicks in and stops the motion.
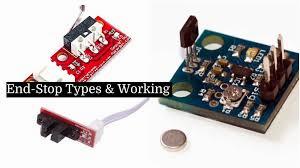
Types of Endstops:
Hardware Endstops:
These are physically connected to the endstop ports on the printer control board.
When the endstop condition is met (e.g., the nozzle reaches a certain position), they provide a signal.
Common types include:
Micro Switch: A classic choice.
Optical Endstop (Light Barrier): Uses light interruption to detect position.
Hall Sensor (Magnetic): Relies on magnetic fields.
Safety Note: Normally closed (NC) switches are recommended because they halt the machine if the switch is damaged (e.g., broken cable).
Z-Endstop Probes: These act as endstops for the minimum Z-axis. Unlike fixed endstops, probes are mounted on the print head and can move freely around the bed.
Software Endstops:
Typically, 3D printers have hardware endstops on only one side of each axis (either minimum or maximum).
To protect the other side of the axes, software endstops are defined in the firmware.
These software limits prevent the axes from moving beyond their intended range.
For example, if you’re printing near the edge of the bed, software endstops prevent the nozzle from wandering off the platform.
Calibration:
Endstop Phase Calibration (for Trinamic stepper motor drivers):
Adjust the endstop phases using the ENDSTOP_PHASE_CALIBRATE command.
This ensures precise positioning and accurate homing.
Remember to restart the printer after making changes.
The Anycubic Kobra 2 Plus is a high-speed FDM 3D printer with impressive features. Let’s delve into its functionalities:
Build Volume: The Kobra 2 Plus offers a large build volume of 320 x 320 x 400mm, allowing you to create sizable 3D prints.
Extruder and Gears: It features a direct drive extruder with double gears, ensuring reliable filament feeding and smoother prints.
Bed Leveling: The Kobra 2 Plus employs the LeviQ 2.0 auto-leveling system with 49-point leveling, ensuring precise bed alignment for optimal print quality.
Print Speed: With a maximum print speed of 500mm/s, this printer is a speed ace. Its average print speed is 300mm/s.
Accelerated Speed: The Kobra 2 Plus achieves an accelerated speed of 10,000mm/s².
Z-Axis and X-Y-Axis: It features double rods and motors for the Z-axis and double metal spindles with SG15 bearings for the X-Y-axis.
Build Plate: The build plate is made of PEI magnetic spring steel, providing excellent adhesion and easy print removal.
Connectivity and Storage:
It supports WiFi and USB connectivity.
The Kobra 2 Plus has 8GB of built-in storage for storing your 3D models.
Control Screen: The printer is equipped with a 4.3″ LCD touch screen for intuitive navigation and settings adjustment.
Nozzle and Hotbed Temperature:
Nozzle diameter: 0.4mm
Nozzle temperature: 260°C
Hotbed temperature: 90°C.
Assembly: Quick modular setup for easy assembly and use.
Let’s walk through the endstop installation and calibration process for your Anycubic Kobra 2 Plus 3D printer. Properly setting up the endstops ensures accurate positioning and reliable printing. Here are the steps:
Tighten V-Slot Wheels on the Z-axis:
Start by raising the Z-axis to make adjustments easier.
Tighten the V-slot wheels on the Z-axis to ensure smooth movement and stability.
Assemble the Printer Components:
The Anycubic Kobra 2 Pro consists of several modules: frame, print head, base, control panel, and filament holder.
Follow these assembly steps:
Cut off the wire ties securing the gantry.
Raise the X-axis bracket by pulling the Z-axis belt.
Assemble the printer gantry and base, securing them with the M4.0 hex key.
Slide in the heated bed and attach the magnetic build plate.
Assemble the print head and fix it using the M2.5 inner hexagon wrench.
Connect the cables.
Fix the assembly touch screen using the M3.0 hexagon wrench.
Install the broken material detection device and filament holder using the M2.0 hex key.
Connect all wires and consumable tubes, securing them with zip ties.
Pre-Power-On Inspection:
Check the print head for any wobbling. If it shakes, adjust the hexagonal spacer post under the print head until it slides smoothly without wobbling.
Ensure that you have the latest firmware for your Kobra 2 Plus. If not, follow the manufacturer’s instructions to upgrade it.
Leveling and Calibration:
Once the printer is assembled, proceed with bed leveling and calibration:
Use a wrench to adjust the bed leveling knobs.
Follow the manufacturer’s guidelines for precise leveling.
Calibrate the Z-axis endstop to ensure accurate printing height.
Test the homing behavior and adjust as needed.
Remember to consult the detailed user manual and any video tutorials provided by Anycubic for additional guidance during the setup process
For more information, you can also refer to the official Anycubic Kobra 2 Cura profiles to optimize your slicing settings.
IMG Source: 3dwithus.com
Troubleshooting Endstop Issues in 3D Printing
When dealing with endstop issues in 3D printing, it’s essential to diagnose and address the problem to ensure accurate and consistent prints. Here are some steps you can take to troubleshoot endstop problems:
Inspect and Fix Wired Connections:
Check the wiring on the endstop for any abnormalities. Ensure that the connections are correct and tightly secured. If the wires are loose, push the endstop connector into the control board.
Loose connections are common over time, so verifying the wiring can resolve issues like endstops not triggering correctly.
Adjust the Position of the Endstop:
Make sure the endstop is properly positioned. Incorrect positioning can lead to false triggers or missed stops during homing.
Adjust the endstop’s physical location to align it accurately with the printer’s movement.
Inspect the Endstop Connectors for Rust or Dirt and Clean:
Over time, endstop connectors can accumulate rust or dirt, affecting their performance.
Clean the contact pins of the endstop to ensure proper electrical connections.
Update Your Firmware:
Outdated firmware can cause endstop issues. Check if there are firmware updates available for your 3D printer.
Updating the firmware may resolve compatibility or functionality problems.
Test Your Endstop for Issues:
Manually trigger the endstop by pressing it (if it’s a mechanical switch) or blocking its sensor (if it’s an optical endstop).
Observe the printer’s response and ensure that the endstop registers correctly.
Replace the Endstop:
If all else fails, consider replacing the endstop. Sometimes, components wear out or become faulty.
Purchase a compatible replacement and install it according to your printer’s specifications.
For more detailed information, you can refer to the original sources:
In conclusion, mastering the setup and troubleshooting of your Anycubic Kobra 2 Plus Endstops is key to unlocking the full potential of your 3D printer. By following the detailed installation processes, understanding the purpose and types of endstops, and implementing effective calibration techniques, you can elevate the precision and efficiency of your printing projects. Remember, proper maintenance, firmware updates, and regular inspections are essential for smooth endstop functionality.
Embrace the world of 3D printing with confidence, knowing that your Anycubic Kobra 2 Plus is equipped with reliable endstops to support your creative journey.