The Importance of Creality K1 Endstops in 3D Printing
Welcome to the world of 3D printing with the Creality K1! In this article, we will explore the fascinating realm of Creality K1 endstops and delve into the intricacies of calibrating and optimizing these crucial components. Endstops are the unsung heroes of 3D printing, ensuring precision and accuracy in your creations.
Let’s unravel the significance of endstops on the Creality K1 and learn how to fine-tune them for optimal performance.
Understanding Endstops on Creality K1
The Creality K1 printer is a fascinating machine! Let’s dive into some details about its endstops:
What Are Endstops?
Endstops are sensors or switches placed at specific points on a 3D printer’s axes (X, Y, and Z). They serve as reference points to determine the printer’s position.
When the printer’s carriage reaches an endstop, it triggers a signal that informs the printer’s control board about the position.
Types of Endstops:
Limit Switches: These are mechanical switches that get pressed when the carriage reaches the end of its travel.
Optical Endstops: These use infrared or light-based sensors to detect the position of the carriage.
Hall Effect Sensors: These rely on magnetic fields to detect the position.
Calibrating Endstops on the Creality K1:
E-Steps Calibration:
The E-Steps (extruder steps) calibration ensures that the extruder motor moves the correct amount of filament for each step.
To calibrate E-Steps, you’ll need to access the printer’s configuration settings. You can do this by rooting the printer and using software like Fluidd or Mainsail.
Follow these steps:
Remove the extruder motor and flush-cut the filament to the bottom of the motor.
Instruct the printer to extrude what it thinks is 50mm of filament.
Measure the actual extruded amount using calipers (with at least 2 decimal points).
Use an online calculator (like esteps_cal/calculator.php”>this one) to determine the corrected value for the rotation distance.
Update the rotation_distance value in the printer configuration file (usually printer.cfg).
Save the changes and restart the printer.
Stuck at Starting Screen:
If your K1 is stuck at the starting screen, try restarting the printer. Sometimes a simple reboot resolves minor issues.
Ensure that you’re using the latest firmware version, as updates often include bug fixes and improvements.
Blocked Hot End:
If you encounter a jammed extruder, try heating the end of the rod and pushing it through the throat to dislodge any stuck filament.
Leveling Issue Resolution:
Turn on the printer, go to Settings, and click System > Self-check.
Check Auto Leveling and click Start Detecting.
Significance of Endstops in 3D Printing
Endstops play a crucial role in the 3D printing process. Let’s delve into their significance:
Reference System for Axes:
When a 3D printer powers up, its controller board doesn’t know the initial position of its axes. You might see blinking question marks or ‘?’ on the LCD screen.
Endstops help establish the starting point of the physical coordinate system through a process called homing.
Homing can be initiated using the G28 G-code or via the LCD controller.
This reference system ensures precise movements during printing, directly impacting print quality.
Safety Mechanism:
Endstops protect the hardware from damage.
If any movement tries to exceed the physical limits of the machine, the endstop immediately halts the motion.
For safety reasons, normally closed (NC) switches are recommended. They halt the machine if the switch is damaged (e.g., due to a broken cable).
Types of Endstops:
Hardware Endstops:
These are electrically connected to the endstop ports on the printer control board.
They provide a signal when the endstop condition is met.
Common types include micro switches, optical endstops (light barriers), and hall sensors (magnetic).
Software Endstops:
Typically, 3D printers have hardware endstops on one side of each axis (minimum or maximum).
To protect the other side, software endstops are defined in the firmware.
These software endstops prevent the axis from moving beyond the commanded stop.
They use values from the firmware configuration to determine the maximum distance between the physical endstop and the software limit.
Remember, maintaining functional endstops ensures accurate prints and prevents potential hazards during the 3D printing process.
IMG Source: codrey.com
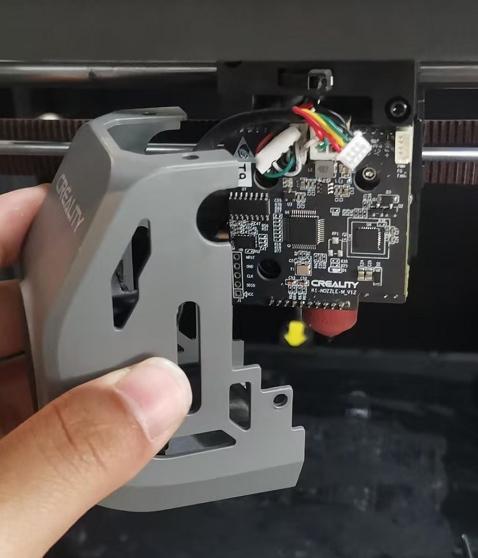
Calibrating the Creality K1 Printer’s E-Steps
Calibrating the Creality K1 printer’s esteps (extruder steps per millimeter) is essential for accurate filament extrusion. Let’s break down the process step-by-step:
Rooting the Printer:
To calibrate the esteps, you’ll need to root the printer. This involves installing either Fluidd or Mainsail on your Creality K1. These software options provide more control over printer settings.
Once you’ve rooted the machine, proceed to the next steps.
Locate the Configuration File:
Inside your printer configuration file (usually named printer.cfg), look for the section labeled [extruder].
Adjust the Rotation Distance:
In the [extruder] section, you’ll find a parameter called rotation_distance. This value represents the amount of rotation (in millimeters) per extruder step.
Use a calculator like this E-Steps Calculator to determine the corrected value.
Follow these steps:
Remove the extruder motor.
Cut the filament flush with the bottom of the motor.
Instruct the printer to extrude what it thinks is 50mm of filament.
Cut the filament flush again and measure the actual extruded amount using calipers (with at least 2 decimal points).
Enter the measured value into the calculator, along with the current rotation distance (usually set to 6.9).
The calculator will provide the corrected value.
Replace the "rotation_distance: 6.9" in your printer.cfg with the new value.
Save the changes and restart the printer.
For more support and discussions related to Creality K1, feel free to join the CrealityK1/K1C/K1Max subreddit
IMG Source: all3dp.com
Optimizing Your 3D Printer’s Endstops
Endstops play a crucial role in ensuring accurate and consistent 3D prints. If you’re aiming for intricate results, here are some steps to optimize your 3D printer’s endstops:
Check the wiring on the endstop for any abnormalities.
Ensure that the connections are correct and tightly secured.
If the wires are loose, push the endstop connector into the control board.
Adjust the Position of the Endstop:
Properly position the endstop to ensure it triggers correctly during printing.
Misaligned endstops can lead to inaccuracies in your prints.
Inspect the Endstop Connectors for Rust or Dirt and Clean:
Over time, endstop connectors may accumulate rust or dirt.
Clean the contact pins to maintain reliable connections.
Update Your Firmware:
Ensure your printer’s firmware is up-to-date.
Firmware updates often include improvements related to endstop functionality.
Test Your Endstop for Issues:
Manually trigger the endstop and observe its behavior.
Use commands like M119 to check if the endstop status is correctly reported.
Replace the Endstops:
If all else fails, consider replacing the endstops with new ones.
Remember that fine-tuning your endstops can significantly impact the quality of your intricate 3D prints. .
IMG Source: ezcontents.org
Creality K1 3D Printer Endstop Maintenance
Maintaining and troubleshooting the Creality K1 3D printer’s endstops is crucial for long-term performance. Let’s dive into some steps to ensure smooth operation:
Calibration and Leveling:
Regularly check and calibrate the printer bed level. Proper leveling ensures accurate printing and prevents issues related to endstop triggering.
If you encounter leveling problems, follow these steps:
Turn on the printer and navigate to Settings.
Click on System and select Self-check.
Check Auto Leveling and click Start Detecting.
During leveling, avoid environmental disturbances.
Inspect Endstop Wiring:
Examine the wiring connecting the endstops to the control board. Look for any loose connections, frayed wires, or damaged insulation.
Securely attach the connectors to the endstop switches and the control board.
Clean and Lubricate:
Dust and debris can accumulate on the endstop switches over time. Regularly clean them using a soft brush or compressed air.
Apply a small amount of lubricant (such as silicone grease) to the moving parts of the endstops. This prevents wear and ensures smooth operation.
Check Endstop Trigger Points:
Manually trigger each endstop by gently pressing the switch with your finger. Observe if the printer recognizes the trigger correctly.
If an endstop fails to trigger or triggers prematurely, it may need adjustment or replacement.
Inspect Mechanical Components:
Verify that the endstop switches are securely mounted and aligned with the printer’s moving parts (such as the X, Y, and Z carriages).
Ensure there are no obstructions or misalignments that could interfere with endstop operation.
Test Homing and Auto-Home:
Initiate homing (returning the printer head to its starting position) and auto-home functions.
Confirm that the endstops correctly stop the movement during homing.
If not, troubleshoot by checking the endstop settings in your printer’s firmware.
Firmware and Software Updates:
Regularly update your printer’s firmware and slicing software.
Some updates may include improvements related to endstop behavior.
Remember that consistent maintenance and proactive troubleshooting will contribute to the long-term reliability of your Creality K1 3D printer. If you encounter persistent issues, refer to the Comprehensive Guide to Troubleshooting the Creality K1 3D Printer for detailed solutions
IMG Source: shoplazza.com
In conclusion, maintaining and optimizing the endstops on your Creality K1 3D printer is key to achieving impeccable print quality and smooth operation. By calibrating the esteps, inspecting wiring, and ensuring proper functionality, you can enhance the overall printing experience. Remember, attention to detail and proactive maintenance of your Creality K1 endstops will pave the way for successful 3D printing endeavors.
Explore the endless possibilities with your Creality K1 endstops and elevate your printing journey to new heights.