Step into the world of 3D printing excellence with the Anycubic Kobra 2 Plus, a high-speed FDM printer that promises to elevate your creative journey. In this article, we will explore the intricate details of the Anycubic Kobra 2 Plus Display Panel, unveiling its user-friendly interface and cutting-edge features. Get ready to delve into the realm of fast and efficient 3D printing with this innovative device.
The Anycubic Kobra 2 Plus is an impressive high-speed FDM 3D printer designed to elevate your creative process. Let’s delve into the details:
Printing Speed: The Kobra 2 Plus boasts a remarkable maximum printing speed of 500 mm/s. That’s like sprinting through your 3D prints with unparalleled velocity!
Printing Volume: With an expansive 41L printing volume, this printer provides ample space for your creative endeavors. Imagine the possibilities!
Display Panel: While the Kobra 2 Plus doesn’t have a dedicated display panel, it does come with a user-friendly interface that enhances control and monitoring during the post-processing phase of your 3D prints. This ensures a smooth experience as you bring your designs to life.
If you’re curious about how this balanced marvel performs, check out this video: Anycubic Kobra 2 Plus – Balanced print, thrilled speed.
The Anycubic Kobra 2 Plus is a high-speed FDM 3D printer designed to revolutionize your creative process. Let’s delve into the details of its touchscreen interface and other features:
Here’s a quick overview of the Anycubic Kobra 2 Plus’s specifications and features:
| Specifications | Anycubic Kobra 2 Plus |
|---|---|
| Original price | $449 |
| Build volume | 320 x 320 x 400mm |
| Extruder | Direct drive + double gears |
| Bed leveling | LeviQ 2.0 auto-leveling system (49-point) |
| Print speed (max.) | 500mm/s |
| Accelerated speed | 10,000mm/s² |
| Printing accuracy | ±0.1mm |
| Z-axis | Double rods and motors |
| X-Y-axis | Double metal spindles and SG15 bearing |
| Build plate | PEI magnetic spring steel |
| Filament detector | Yes |
| Control screen | 4.3″ LCD touch screen |
| Nozzle diameter | 0.4mm |
| Nozzle temperature | 260°C |
| Hotbed temperature | 90°C |
| Connectivity | WiFi, USB |
| Assembly | Quick modular setup |
| Supported material | PLA/ABS/PETG/TPU |
| Machine dimension | 630 x 605 x 564 mm |
| Weight | 13kg |
The Anycubic Kobra 2 Plus combines speed, precision, and unparalleled quality, making it an excellent choice for your 3D printing needs
IMG Source: gstatic.com
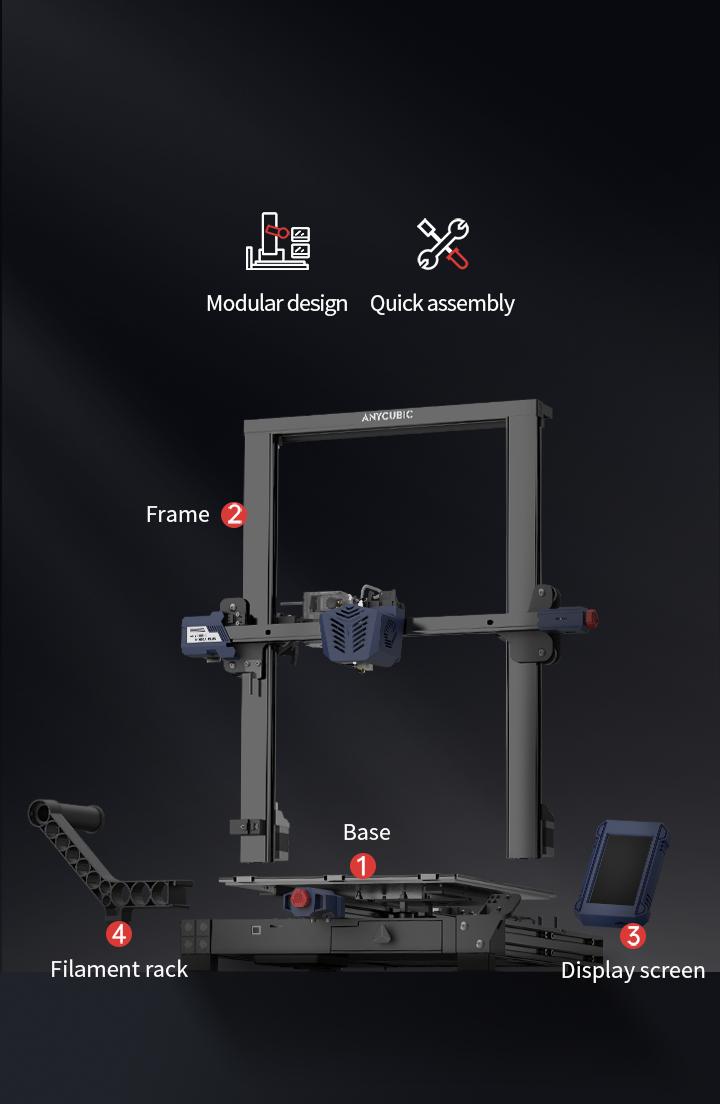
Let’s get your Anycubic Kobra 2 Plus display panel set up. Here are the steps to follow:
Unboxing and Overview:
Assembling the Printer:
Pre-Power-On Inspection:
Firmware Upgrade:
Leveling and First Print:
Remember, the Anycubic Kobra 2 Pro is designed for speed and efficiency, so enjoy your fast 3D printing experience! If you need further assistance, consult the detailed user manual and video tutorials provided by Anycubic.
IMG Source: the-gadgeteer.com
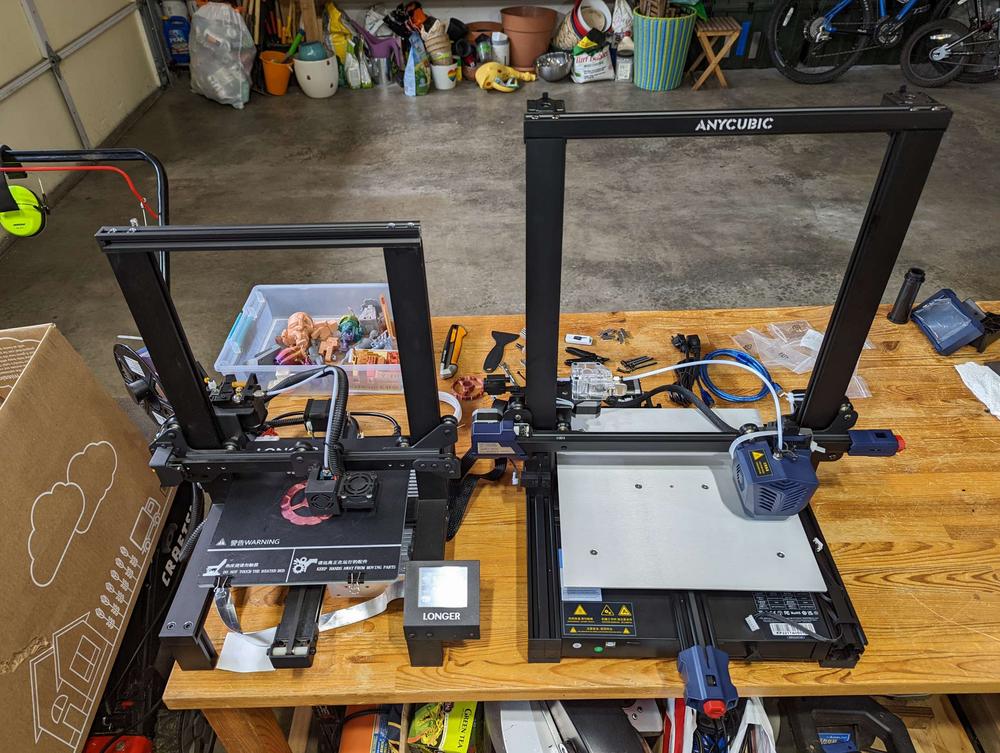
The Anycubic Kobra 2 Plus is an all-rounded fast 3D printer, part of the Kobra 2 Series. Let’s explore its features and compatibility:
Fast Printing: The Kobra 2 Plus offers a balance of speed and performance. It’s not the fastest in the series, but it strikes a good balance between speed and other features.
Large Format: While not the largest, it still provides a decent print volume. The Kobra 2 Plus can handle prints up to 88 liters in size.
User-Friendly: Anycubic has equipped the Kobra 2 Plus with features like automatic leveling, making it accessible for beginners.
Now, let’s address compatibility with popular 3D printing software:
SimplyPrint: Unfortunately, the Anycubic Kobra 2 Plus is not currently compatible with SimplyPrint. If you’re specifically looking for compatibility with SimplyPrint, you might want to explore other options.
OctoPrint: Good news! The Anycubic Kobra 2 Plus is compatible with OctoPrint. You can set up OctoPrint to enhance your 3D printing experience with this printer.
Mainsail: Another positive note—the Kobra 2 Plus supports Mainsail. You can set up Mainsail for a more streamlined printing process.
Fluidd: Yes, the Anycubic Kobra 2 Plus is also compatible with Fluidd. Set it up to manage your prints efficiently.
For detailed specifications of the Anycubic Kobra 2 Plus, including bed size, print height, and more, refer to the table below:
| Attribute | Value |
|---|---|
| Printer model name | Anycubic Kobra 2 |
| Bed type | Square |
| Bed size | 220 x 220 mm |
| Max print height | 250 mm |
| Heated bed | Yes |
| Max extruder temp | 260°C |
| Max bed temp | 110°C |
| Filament width | 1.75 mm |
| Auto Bed Leveling | Yes |
| Direct drive | Yes |
IMG Source: shopifycdn.net
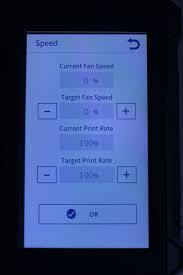
Let’s address the feedback regarding the Anycubic Kobra 2 Plus display panel. Here are some insights based on user experiences and discussions:
Probe Mode Issue:
SD Slot on Screen:
IMG Source: china-gadgets.de
Elevate your printing experience with the Anycubic Kobra 2 Plus Display Panel today.