Enhancing 3D Printing with Anycubic Kobra 2 Max Stepper Motors
Are you looking to upgrade the performance of your Anycubic Kobra 2 Max 3D printer? Dive into the world of stepper motors, particularly focusing on the Y-axis stepper motor replacement. Stepper motors are the unsung heroes behind 3D printing precision, and understanding how to replace them can be crucial for maintaining your printer’s accuracy.
In this guide, we’ll walk you through the step-by-step process of replacing the Y-axis stepper motor in your Anycubic Kobra 2 Max, ensuring smooth and reliable printing results.
Replacing Y-Axis Stepper Motor in Anycubic Kobra 2 Max 3D Printer
Let’s talk about the stepper motors in the Anycubic Kobra 2 Max 3D printer. Stepper motors play a crucial role in the movement and precision of 3D printers. Specifically, I’ll focus on the Y-axis stepper motor for the Anycubic Kobra 2 Max. Here’s a step-by-step guide on how to replace it:
Release Y-Axis Belt and Unscrew Motor Pulley:
First, disconnect your printer’s power.
Turn the Y-axis tensioner counterclockwise to loosen and remove the belt from the motor pulley.
Next, unscrew the pulley and remove it. If your printer has a combined pulley and motor design, you can skip this step.
Note that the Kobra Max model has long shafts on both sides of its Y-motor, so you’ll need to loosen the belts and pulleys on both ends.
Remove the Old Y-Axis Stepper Motor:
To remove the Y-axis motor, loosen both the belts and pulleys as well as the motor bracket.
The motor bracket secures the motor and ensures stable printing.
Use a tool to unscrew the screws connecting the motor to the bracket, and unplug the motor cable.
This will allow you to successfully remove the Y-axis motor.
Install the New Y-Motor:
Install the new motor onto the bracket and secure the pulley onto the motor shaft.
For models other than Kobra Neo and Kobra Go (which have a combined motor), pay attention to aligning a flat surface of the motor shaft with a screw on the pulley before tightening them.
Finally, plug in the motor cable and tighten the Y-axis belt.
Test Your Y-Motor:
Perform a simple test to verify if the replacement was done correctly.
Control the heated bed through the printer display and make it move back and forth.
Observe if the motion position is accurate and whether it runs smoothly on the rail.
For more detailed information, you can refer to the official guide provided by Anycubic.
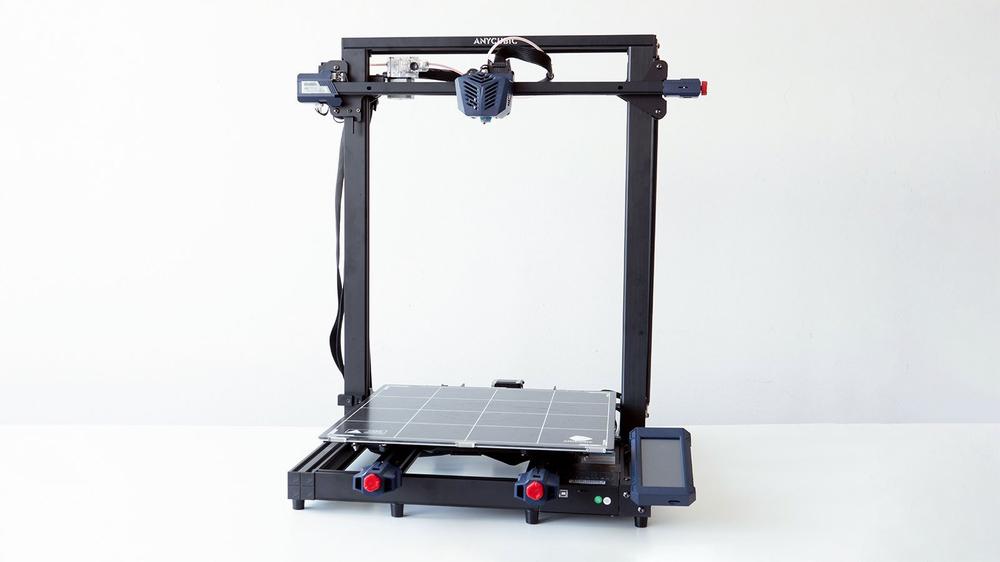
Anycubic Kobra 2 Max: Stepper Motors and Key Specifications
The Anycubic Kobra 2 Max is the flagship printer in the Kobra 2 series, offering impressive features for 3D printing enthusiasts. Let’s delve into the details of its stepper motors and other key specifications:
IMG Source: all3dp.com
Anycubic Kobra 2 Max Features
The Anycubic Kobra 2 Max offers several benefits for 3D printing enthusiasts. Let’s delve into its advantages:
Massive Build Size: The Kobra 2 Max boasts an impressive build volume of 420 x 420 x 500 mm (approximately 16.5 x 16.5 x 19.7 inches). This generous space allows you to create large-scale prints, making it ideal for crafting cosplay props like helmets and shields.
Speed: While Anycubic claims a blazing speed of 500 mm/s, the reality is slightly different. The Kobra 2 Max can achieve a brisk printing speed of 150 to 230 mm/s, which is still remarkable considering its substantial build size. The direct drive extruder and dual-motor, dual-Z-axis motion structure contribute to efficient material conveyance and faster printing.
Auto Bed Leveling: The printer features automatic bed leveling, simplifying the setup process and ensuring better first layers. No more manual adjustments—just let the sensors handle it.
Flexible Build Surface: The Kobra 2 Max comes with a textured PEI steel flex plate for the build platform. This surface enhances bed adhesion and accommodates various materials. Plus, it’s more forgiving than rigid surfaces, allowing for easier print removal.
Connectivity Options: You can connect the printer via USB or Wi-Fi using the Anycubic slicer and mobile app.
Vibration Compensation: Equipped with a high-speed cooling fan (running at 7,000 rpm/min), the Kobra 2 Max minimizes layer lines and ensures efficient cooling during printing. However, be prepared for some noise due to the fan.
Keep in mind that despite its benefits, the Kobra 2 Max has its quirks, including a proprietary nozzle, a massive footprint, and noticeable Z seams at high speeds. Nevertheless, it remains a solid choice for those seeking a large-format 3D printer with decent performance.
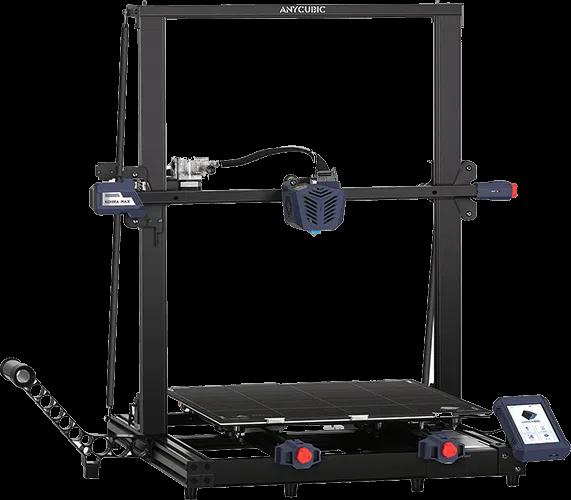
Specifications:
Extruder Type: Direct Drive
Nozzle Diameter: 0.4 mm (Proprietary High Flow)
Filament Compatibility: PLA, PETG, ABS, TPU (up to 260°C)
Bed Leveling: Automatic + Z height
Filament Runout Sensor: Yes
Machine Footprint: 735 x 640 x 740 mm (28.9 x 25.1 x 29.1 inches)
IMG Source: 3dgearzone.com
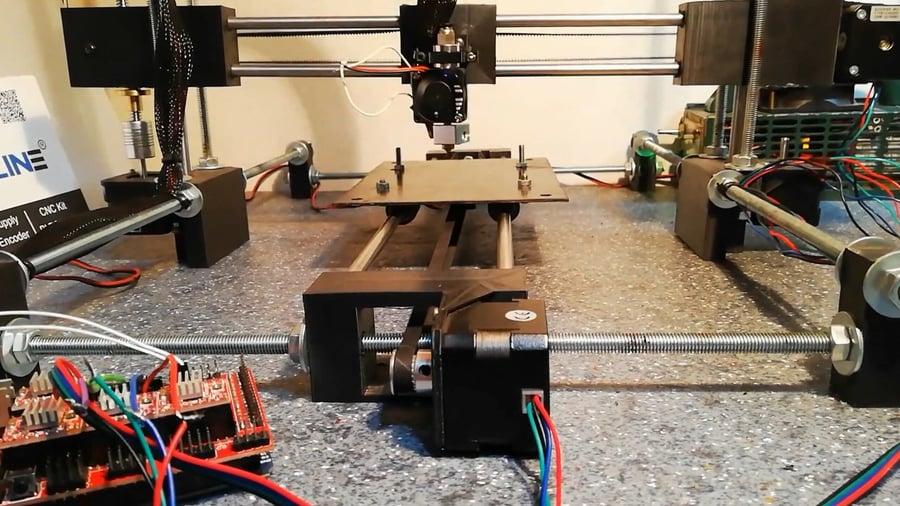
Installing and Calibrating Stepper Motors in a 3D Printer
Installing and calibrating stepper motors in a 3D printer is essential for achieving accurate and reliable prints. Let’s break it down into steps:
Install Stepper Motors:
Ensure your 3D printer is powered off.
Identify the stepper motor locations (usually X, Y, Z, and extruder).
Connect the motor cables to the corresponding motor drivers on your control board (e.g., RAMPS, SKR, or other boards).
Secure the motors to their designated mounts on the printer frame.
Calibrate Stepper Motors:
X, Y, and Z Axes Calibration:
Attach a ruler or tape measure to the axis you want to calibrate (X, Y, or Z).
Using the printer’s menu or G-code commands, move the axis a specific distance (e.g., 100 mm).
Measure the actual distance traveled by the axis.
Calculate the difference between the desired distance and the actual distance.
Adjust the steps per millimeter (steps/mm) value in your firmware settings based on the calculated difference.
Repeat the process until the axis moves the correct distance.
Extruder Calibration:
Heat the hotend to the printing temperature.
Mark a point on the filament (e.g., 120 mm from the extruder).
Extrude a specific amount of filament (e.g., 100 mm) using G-code commands.
Measure the actual extruded length.
Calculate the difference between the desired and actual lengths.
Adjust the extruder steps/mm value in your firmware.
Repeat the process until the extruder accurately extrudes the desired length.
Check Calibration:
Print a calibration cube or other test models.
Measure the dimensions of the printed object (e.g., X, Y, Z dimensions).
Adjust the steps/mm values as needed to achieve accurate dimensions.
Additional Tips:
Use a digital caliper for precise measurements.
Keep track of your original steps/mm values before making adjustments.
Regularly check and recalibrate if necessary, especially after any hardware changes or firmware updates.
For more detailed instructions, you can also refer to helpful resources like YouTube tutorials, articles on stepper motor configuration, and guides specific to your 3D printer model
IMG Source: all3dp.com
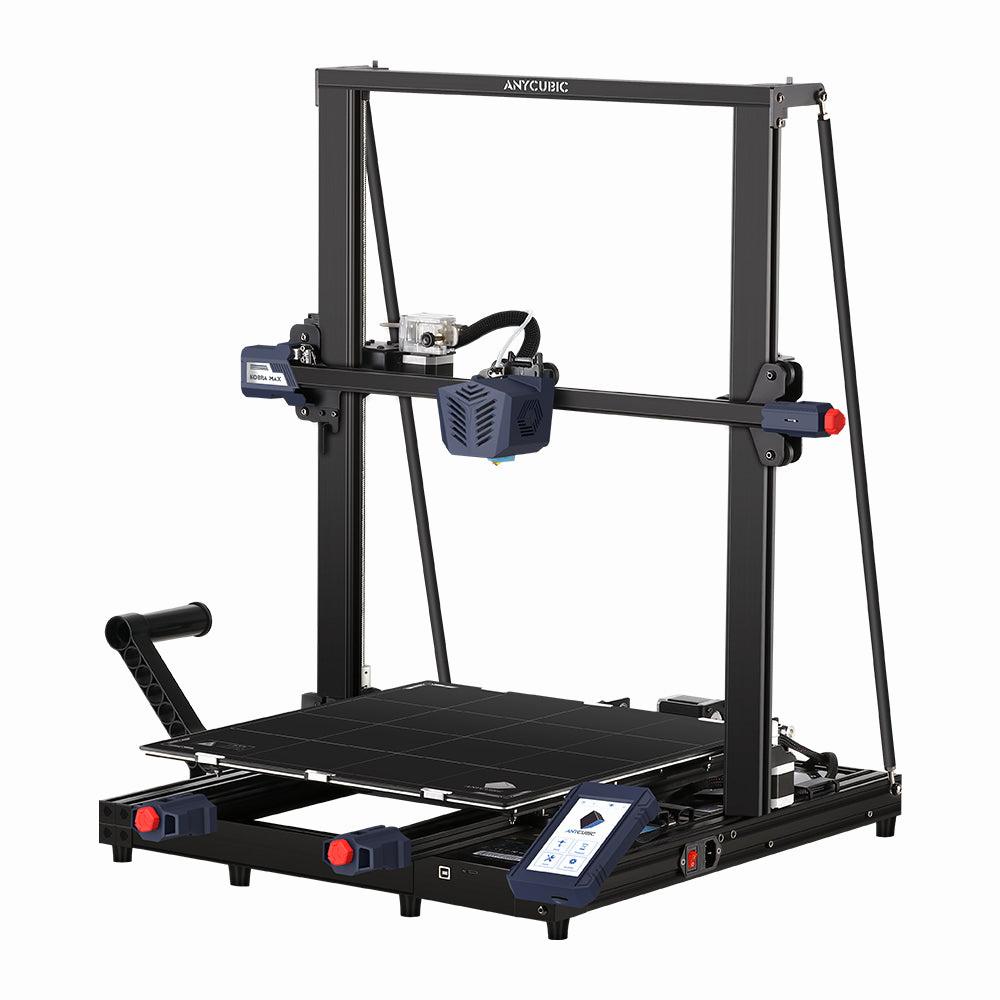
Comparison of Anycubic Kobra 2 Series Printers
Let’s delve into the comparison between the Anycubic Kobra 2 Max and its competitors. The Kobra 2 Max is part of the Anycubic Kobra 2 Series, which includes other models like the Kobra 2 Neo, Kobra 2 Pro, and Kobra 2 Plus. These printers are known for their fast and accurate printing capabilities.
Here’s a breakdown:
Anycubic Kobra 2 Max:
Largest Size: The Kobra 2 Max boasts a massive build volume of 420x420x500 mm.
Customized Klipper Firmware: It uses a customized version of Klipper firmware that supports features like input shaping and pressure advance.
Temperature Range: The Kobra 2 Max can reach a maximum temperature of 230°C due to its PTFE-lined hotend (with the possibility of going up to 260°C if properly ventilated) .
Flagship Large-Format Printer: As the flagship printer in the series, it empowers users to create larger and more intricate objects within a single print job while enhancing the overall 3D printing experience through smart features .
Anycubic Kobra 2 Neo:
Entry-Level Choice: The Kobra 2 Neo is the most cost-effective entry-level fast 3D printer in the series.
Automatic Leveling: It supports automatic bed leveling.
Affordability: A great choice for those starting out with 3D printing.
Anycubic Kobra 2 Pro:
Speed Demon: The Kobra 2 Pro stands out as the fastest 3D printer in the Kobra 2 series.
Impressive Print Speed: With a standard print speed of 300 mm/s and a maximum print speed of 500 mm/s, it completes the 3D Benchy model in just 14 minutes and 56 seconds, reducing printing time by 86% compared to conventional FDM printers .
High Acceleration: The Kobra 2 Pro boasts an impressive acceleration of 20,000 mm/s², allowing it to handle complex paths and fine details with ease.
Anycubic Kobra 2 Plus:
Balanced Choice: The Kobra 2 Plus is an all-rounded fast 3D printer.
Smart Features: It includes features like Anycubic APP support, double Z-axis, built-in storage, LeviQ 2.0 automatic leveling, smart Z-offset, vibration compensation, and flow control.
IMG Source: anycubicnordic.com
In conclusion, the stepper motors in the Anycubic Kobra 2 Max play a vital role in ensuring the printer’s performance and reliability. By following the detailed steps provided in this guide for replacing the Y-axis stepper motor, you can enhance the functionality of your 3D printer. The Anycubic Kobra 2 Max offers impressive features and benefits for 3D printing enthusiasts, making it a solid choice for those seeking a large-format printer with efficient performance.
Whether you’re a beginner or a seasoned enthusiast, mastering the calibration and installation of stepper motors is essential for achieving accurate and high-quality prints. Keep exploring the world of 3D printing with your Anycubic Kobra 2 Max stepper motors, and unlock endless possibilities for your creative projects.