Welcome to this comprehensive guide on maintaining and optimizing the Anycubic Kobra 2 Max 3D printer, focusing on the crucial components of the hot end, nozzle, and thermistor. In this article, we will delve into the intricacies of ensuring peak performance of your printer’s hot end and nozzle, with particular emphasis on the Anycubic Kobra 2 Max Nozzle Thermistor. Let’s explore essential tips and steps to keep your 3D printer running smoothly and efficiently.
Hot End and Nozzle Maintenance
The Anycubic Kobra 2 Max is an upgraded large-format 3D printer with impressive specifications. Let’s delve into the details related to the hot end and nozzle:
Hot End Maintenance:
The hot end of an FDM 3D printer plays a crucial role in heating and extruding filaments during the printing process. Regular maintenance ensures consistent performance.
To maintain the hot end of the Anycubic Kobra 2 Max, consider the following steps:
Regular Cleaning: Remove accumulated filament, dust, and other residues.
Calibrate Temperature: Ensure a suitable printing temperature for optimal results.
Check Components: Inspect for loose parts, screws, and any signs of wear or damage.
When replacing the hot end, follow these steps:
Safety First: Remove filament, turn off the printer, and unplug it.
Remove Housing Screws: Use an M2.0 hex key to remove the four screws of the housing.
Disconnect Wiring: Unplug the wiring connected to the print head.
Detach Teflon Tube: Press the quick connector and pull off the Teflon tube.
Replace the Print Head: Connect the new print head and reattach the Teflon tube.
Secure Screws: Install and secure the four screws of the print head.
Final Check: Ensure all connections are normal after replacement.
Nozzle Temperature Accuracy:
Some Kobra Max 3D printers may have incorrect nozzle temperature settings, leading to issues like stringing or filament boiling.
Verify the accuracy of your nozzle temperature using a thermocouple probe or thermometer.
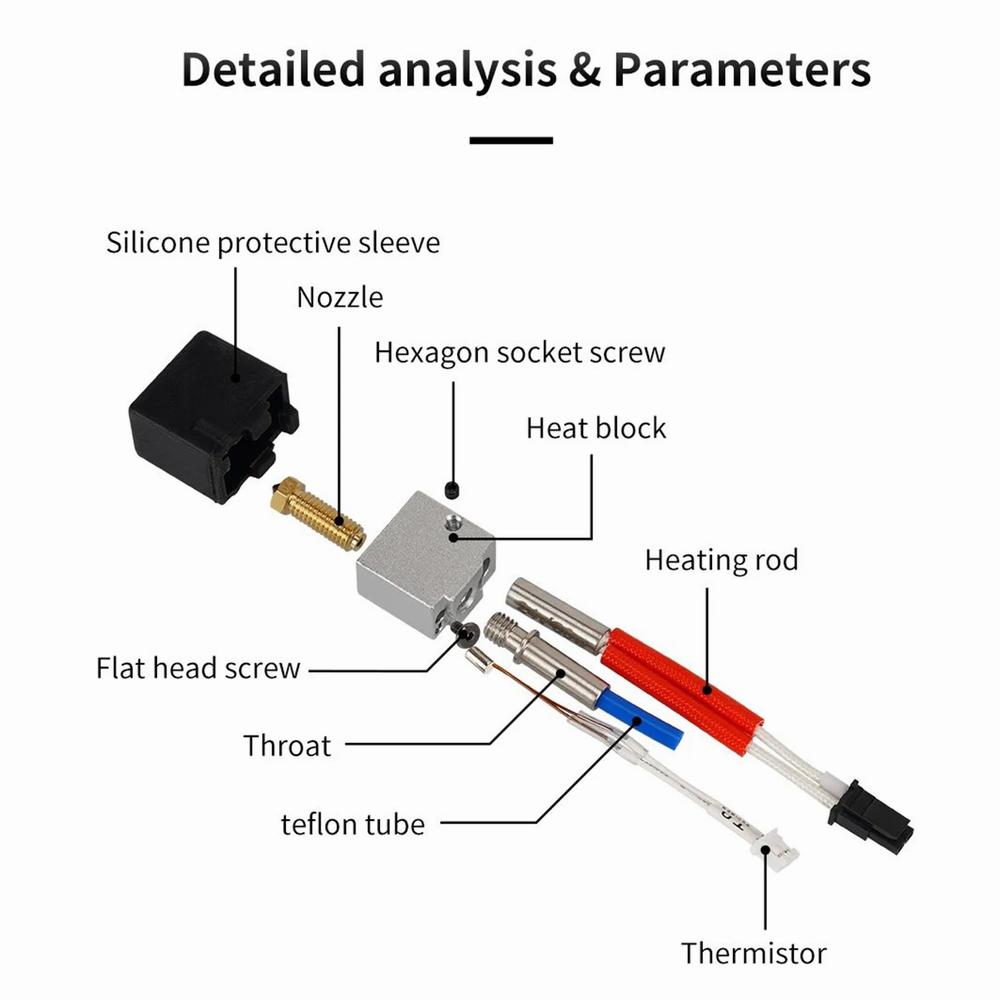
Anycubic Kobra 2 Max Nozzle and Thermistor Features
Let’s explore the features of the Anycubic Kobra 2 Max 3D printer’s nozzle and thermistor:
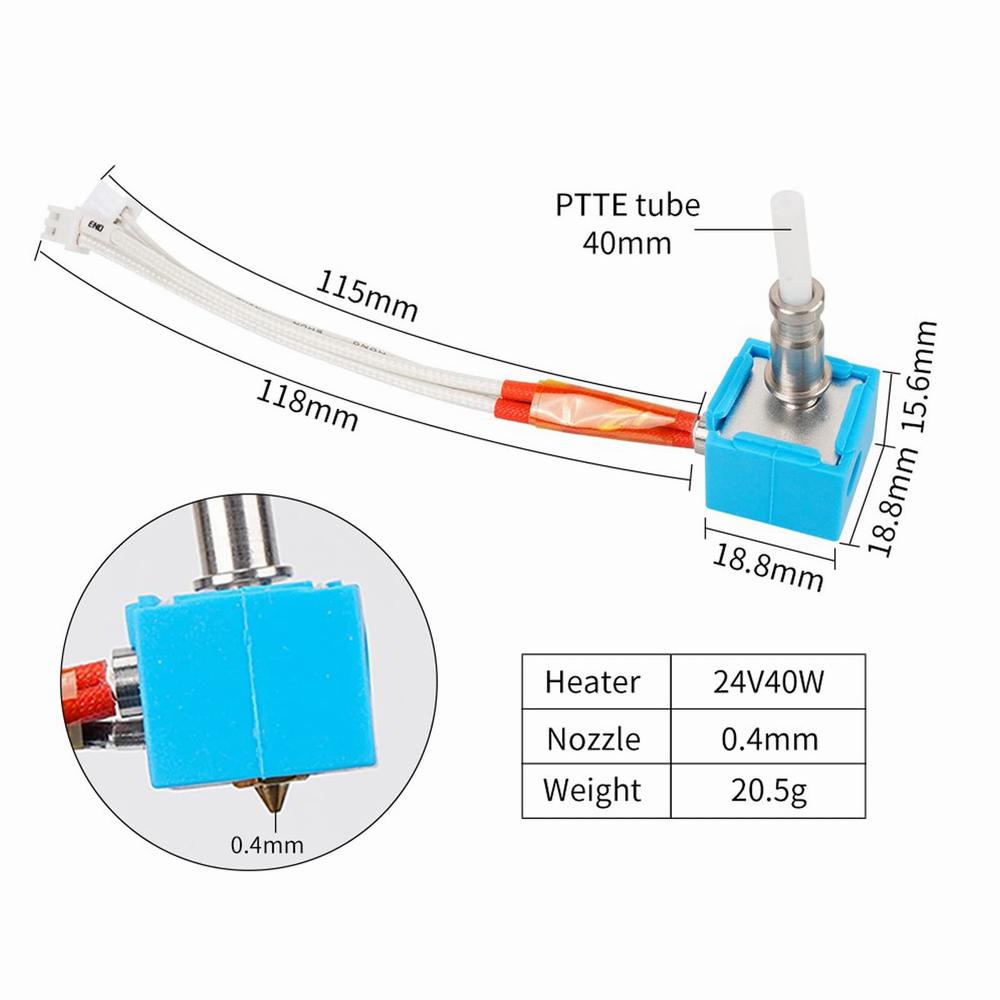
Nozzle:
The Anycubic Kobra 2 Max features a custom brass nozzle that is specifically designed for this printer.
Unlike regular volcano nozzles, the Kobra 2 Max nozzle has a unique flair at the end.
If you need to replace the nozzle, make sure to use the compatible Anycubic nozzle designed for this printer.
Thermistor:
The thermistor is responsible for temperature sensing and control.
While specific details about the thermistor are not explicitly mentioned in the available information, it’s an essential component for maintaining accurate and consistent printing temperatures.
Anycubic ensures that the Kobra 2 Max’s thermistor is optimized for reliable 3D printing performance.
Remember that the Anycubic Kobra 2 Max is the flagship printer in the Kobra 2 Series, offering a massive build volume and smart control features to enhance your 3D printing experience. If you’re unboxing and setting up your Kobra 2 Max, follow the step-by-step guide provided by Anycubic to get started
IMG Source: alicdn.com
Upgrade Benefits of Anycubic Kobra 2 Max
The Anycubic Kobra 2 Max offers several advantages over its predecessor, the Kobra Max. Let’s delve into the benefits of upgrading to this new model:
Faster Printing Speed: The Kobra 2 Max boasts a significantly faster printing speed compared to the Kobra Max. With a standard printing speed of 300mm/s, you can complete your prints more efficiently.
Larger Printing Volume: The Kobra 2 Max provides an impressive printing volume of 81 liters, making it ideal for larger-scale projects. Its build size is 500x420x420mm (HWD), allowing you to create substantial 3D prints.
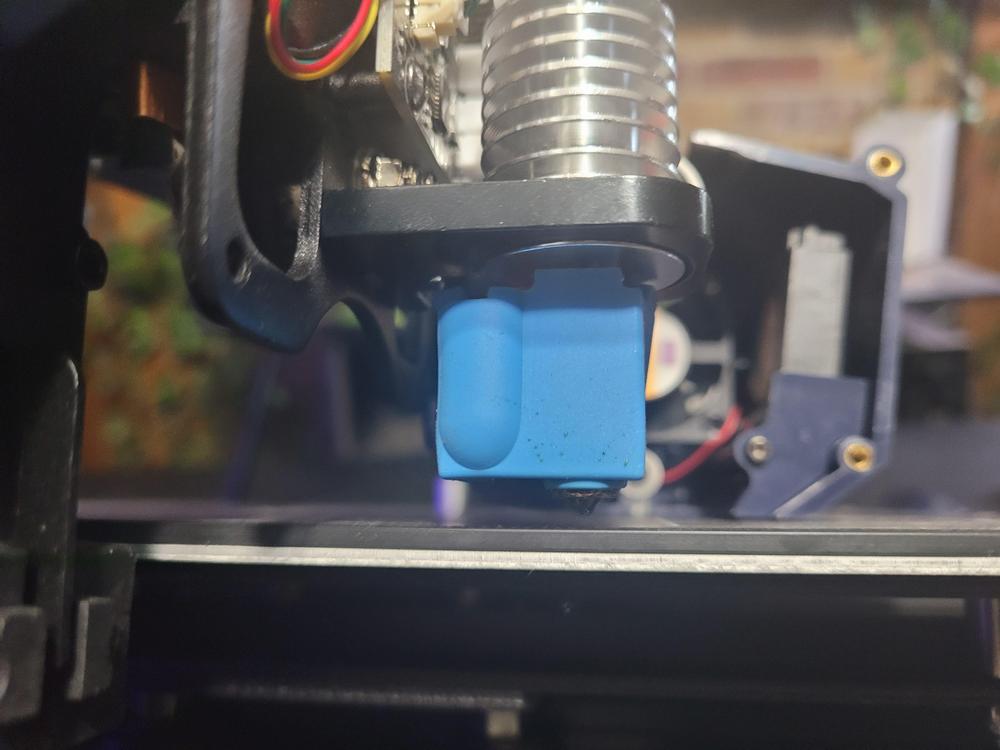
All Metal Hotend: One of the standout features is the all-metal hotend. Unlike the proprietary PTFE-lined hotend in the Kobra Max, the Kobra 2 Max’s all-metal design offers better heat transfer, improved reliability, and compatibility with a wider range of nozzle options. You can even upgrade to a CHT or CHT clone nozzle for enhanced performance.
IMG Source: redd.it
Installing a Thermistor on Your 3D Printer: A Step-by-Step Guide
Installing a thermistor on your 3D printer is essential for accurate temperature control. Let’s walk through the process step by step:
Understand the Thermistor:
A thermistor is an electrical device whose resistance varies with temperature. In 3D printers, it plays a crucial role in monitoring and regulating temperatures.
There are two common types of thermistors:
Negative Temperature Coefficient (NTC) Thermistors: Their resistance decreases as the temperature rises.
Positive Temperature Coefficient (PTC) Thermistors: Their resistance increases with higher temperatures.
Locate the Thermistor Positions:
Thermistors are typically found in two areas of your 3D printer:
Hot End: This is where the filament melts and extrudes.
Print Bed: The surface where your prints adhere during printing.
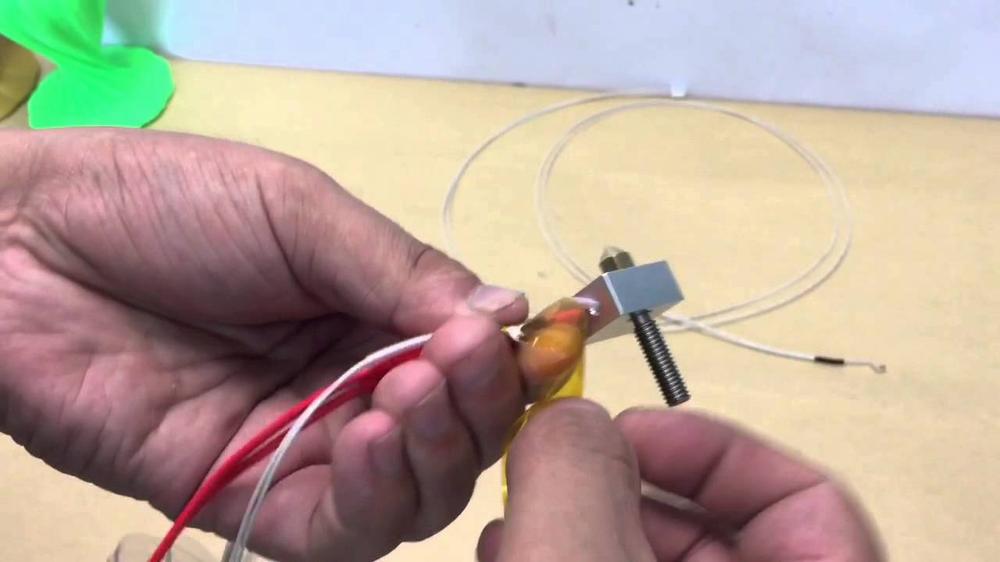
Replacing the Thermistor:
Hot End:
First, identify the old thermistor wire connected to the printer’s micro-controller system.
Carefully remove the old thermistor wire using tweezers or a similar tool.
Place the new thermistor in the same position and secure it.
Cover the wires with Kapton tape to prevent tangling.
Print Bed:
Follow a similar process for the print bed thermistor.
Replace the old thermistor with the new one.
Secure it in place and ensure proper wiring.
Calibration and Testing:
After installation, calibrate the thermistor:
Use a multimeter to check the resistance of the temperature sensor.
Adjust the printer’s firmware settings to match the new thermistor’s characteristics.
Ensure the temperature readings are accurate.
Test the printer by heating the hot end and print bed to verify proper functioning.
Common Issues with Thermistors:
Thermal Runaway: If the thermistor fails, it can lead to uncontrolled temperature increases, risking damage to the printer.
Higher Than Usual Print Temperatures: Inaccurate readings may cause print quality issues.
Recommended Thermistors:
Consider these options for replacements:
HICTOP 100K ohm NTC 3950 Thermistors
Creality 3D Printer NTC Thermistor Temp Sensor.
IMG Source: ytimg.com
Troubleshooting Nozzle Thermistor Issues on Anycubic Kobra 2 Max
If you’re experiencing issues with the nozzle thermistor on your Anycubic Kobra 2 Max, here are some troubleshooting steps you can follow:
Turn Off the Printer: Ensure that the printer is disconnected from the power source and turned off. Safety first!
Position Calibration: Perform position calibration by following these steps:
Verify Nozzle Temperature: Check the nozzle temperature and adjust it to the optimum temperature for the printing material you’re using.
Check for Clogs: Nozzles can get clogged due to debris or filament buildup. Use tools to carefully remove any blockages. Remember to handle the hot components with caution.
If you need more detailed instructions or encounter specific issues, consider referring to the official Anycubic documentation for your printer model
IMG Source: media-amazon.com
In conclusion, ensuring the proper maintenance and calibration of the hot end, nozzle, and thermistor on your Anycubic Kobra 2 Max is vital for achieving high-quality 3D prints consistently. By following the detailed maintenance steps outlined in this guide, you can optimize your printer’s performance and address any potential issues effectively. Remember, a well-maintained nozzle thermistor is key to accurate temperature control and preventing print quality issues.
Stay informed, stay proactive, and enjoy a seamless 3D printing experience with your Anycubic Kobra 2 Max!