Ultimate Guide to Anycubic Kobra 2 Max Electronics Board
Welcome to a comprehensive guide on enhancing your Anycubic Kobra 2 Max 3D printer with an upgraded electronics board. Dive into the intricacies of the Anycubic Kobra 2 Max Electronics Board as we explore the possibilities of maximizing your printer’s performance and functionality. From motherboard upgrades to printhead enhancements, this article delves deep into the realm of electronics customization for your 3D printing needs.
Upgrading the Anycubic Kobra 2 Max 3D Printer
The Anycubic Kobra 2 Max is a 3D printer known for its large print size and high-speed capabilities. If you’re considering upgrading its electronics board, here are some insights:
Motherboard Upgrade:
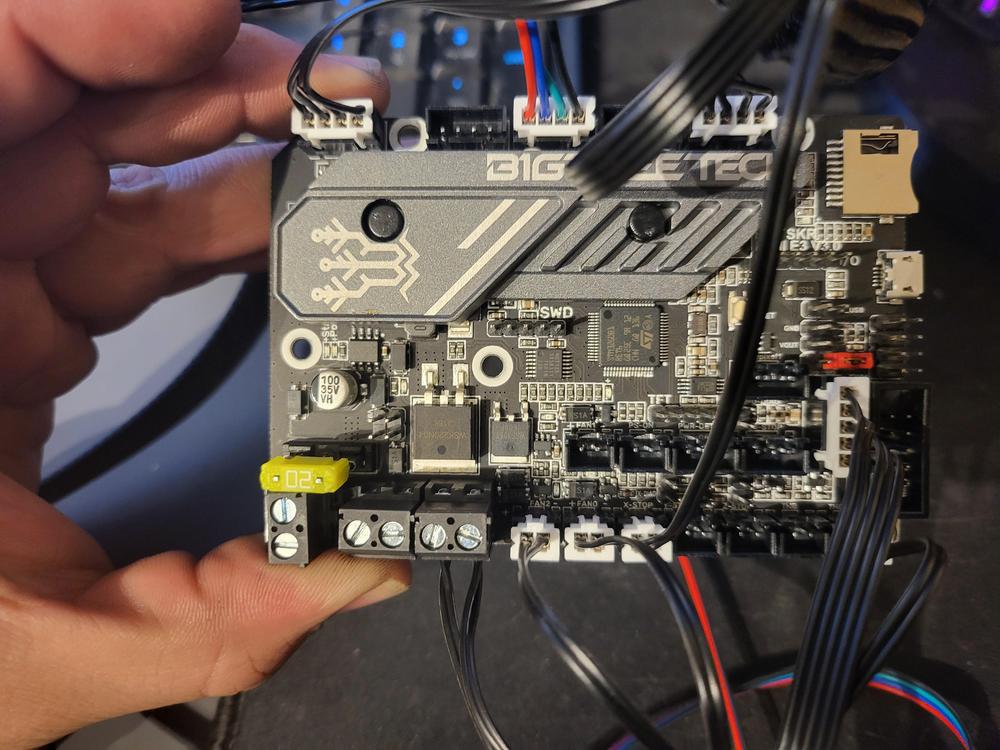
The BIGTREETECH SKR-mini-E3-V3.0 is a popular choice for upgrading the Kobra Max. It offers two ports for Z-axis motors and includes a BLTouch port, which can replace the stock ABL module.
To install the SKR-mini-E3-V3.0:
Connect X, Y, and two Z motors using 4-pin JST connectors.
Wire hotend heating (2 wires) and temperature sensor (2 wires) directly to the BTT.
Bed heating (2 wires) and bed temperature sensor (2 wires) should also be straightforward.
The Kobra Max has three fans, which align with the BTT’s support for three fans.
Limit switches may be plug-and-play, but verify compatibility.
If using BLTouch, wire it directly to the BTT and replace the stock ABL module.
Display control can be handled via OctoPi.
For the printhead, consider a lightweight X gantry plate to mount components like the E3D Revo Six, Orbiter V2, BLTouch, and fans.
Printhead and Gantry Plate:
Since the stock ABL is not needed, you can mount the BLTouch. Consider a specialized X gantry plate for this purpose.
Design and print brackets for non-critical parts like cooling and LED.
For the main mounting plate, explore options like aluminum or steel. You could even improve upon the stock one.
Decide whether using 4 wheels (e.g., WhamBam MUTANT) is better than 3 wheels for stability.
Software:
Update the firmware on the BTT using the compiled firmware from the BIGTREETECH GitHub repository.
Exploring Anycubic Kobra 2 Max Electronics Board Components
The Anycubic Kobra 2 Max is a substantial 3D printer with impressive print quality and functionality. Let’s delve into the components of its electronics board:
Mainboard (Trigorilla Pro A V1.0.4): This central component controls the printer’s overall operation. It manages motor movements, temperature regulation, and communication with other parts of the printer.
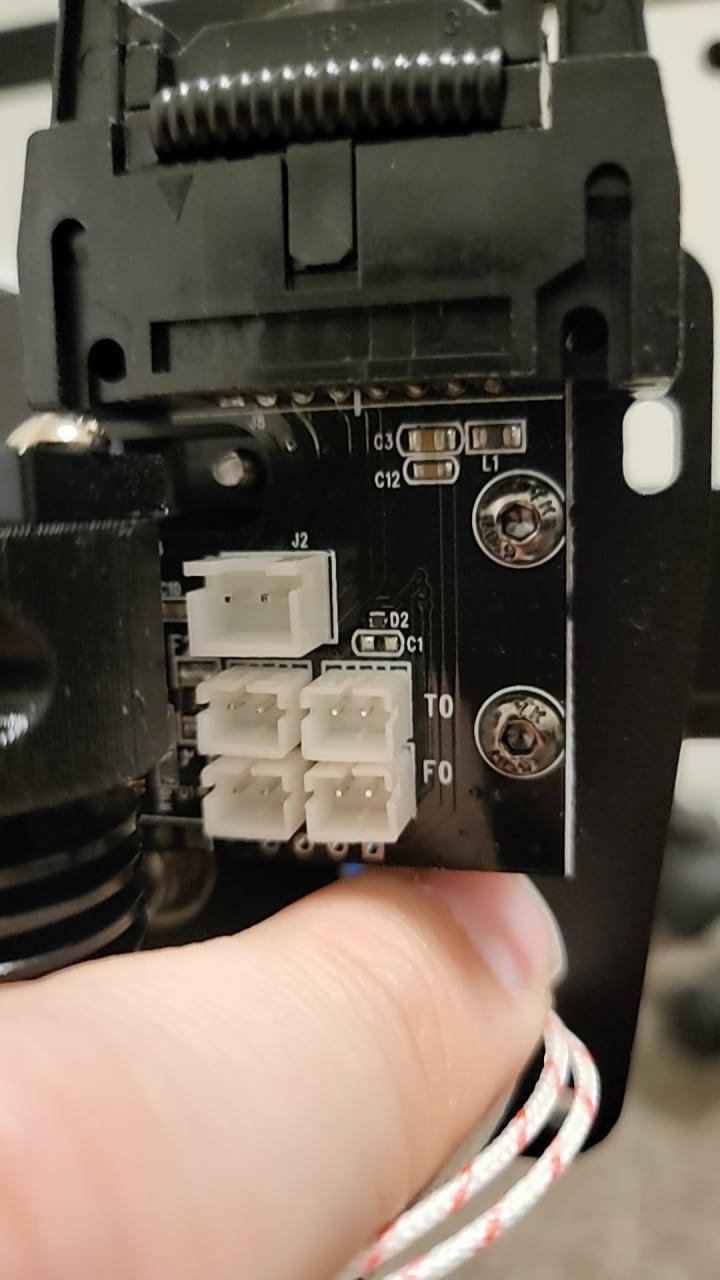
Extruder Board (NF007 Extruder V0.0.6): The extruder board handles the filament feeding mechanism. It ensures precise filament control during printing, allowing for accurate layer deposition.
Interface (4.3 LCD Touchscreen): The touchscreen interface provides a user-friendly way to interact with the printer. You can navigate menus, adjust settings, and monitor print progress directly from this display.
While the Kobra 2 Max performs admirably, some users have expressed interest in open-source firmware like Klipper for greater customization and root access to the main board. Anycubic has yet to release camera monitoring firmware, but the community anticipates future updates. Additionally, some users have explored alternative motherboards like the BIGTREETECH SKR-mini-E3-V3.0 for further enhancements.
Remember, the Kobra 2 Max’s robust performance and massive build volume make it a reliable choice, even as enthusiasts seek more flexibility in firmware and hardware modifications.
IMG Source: redd.it
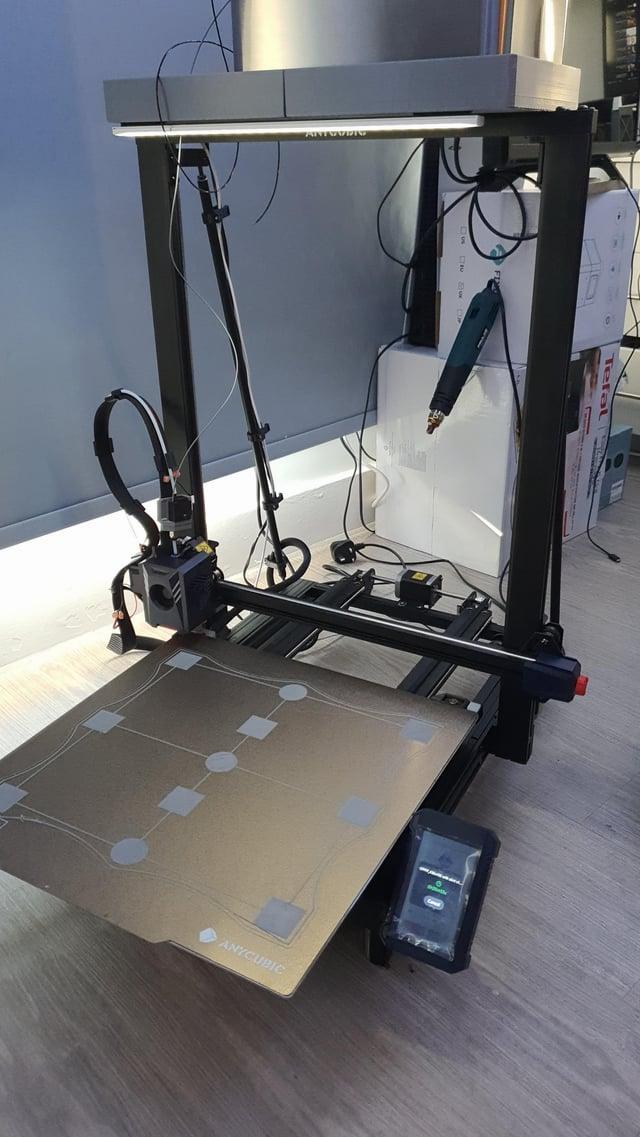
Anycubic Kobra 2 Max Assembly Guide
Let’s walk through the installation process for the Anycubic Kobra 2 Max electronics board. Assembling this large machine might seem daunting, but with a step-by-step guide, it becomes manageable. Here are the instructions:
Unboxing and Setup:
Begin by unboxing your Anycubic Kobra 2 Max. Make sure you have all the components, including the electronics board.
Follow the video guide provided by Anycubic to go through all the details of unboxing and setting up your printer.
Pay attention to cable connections, ensuring they are secure and correctly plugged in.
X-Axis Bracket and Coupler:
Cut off the zip tie on the X-axis bracket.
Turn the coupler to raise the X-axis (back side).
This step ensures proper alignment and stability for the X-axis movement.
Frame Installation:
Install the frame, focusing on the front side.
Ensure that the Z aluminum beam is accurately mounted onto the groove of the base aluminum beam.
Proper alignment is crucial for the printer’s structural integrity.
Firmware Upgrade (Optional):
If needed, consider upgrading the firmware for improved performance and features.
Refer to the Anycubic Kobra 2 Max user manual or online resources for specific firmware upgrade instructions.
For more details, you can also explore the Anycubic Kobra 2 Max user guide and community discussions on platforms like Reddit.
IMG Source: redd.it
Troubleshooting Common Issues with Anycubic Kobra 2 Max 3D Printer’s Electronics Board
Troubleshooting issues with the electronics board in your Anycubic Kobra 2 Max 3D printer is essential for maintaining optimal performance. Let’s delve into common problems and their solutions:
Motor Shaking or Abnormal Sound:
If the motor vibrates or produces unusual sounds during printing, check the following:
Belt Tension: Ensure that the belts (X/Y/Z) are appropriately tensioned.
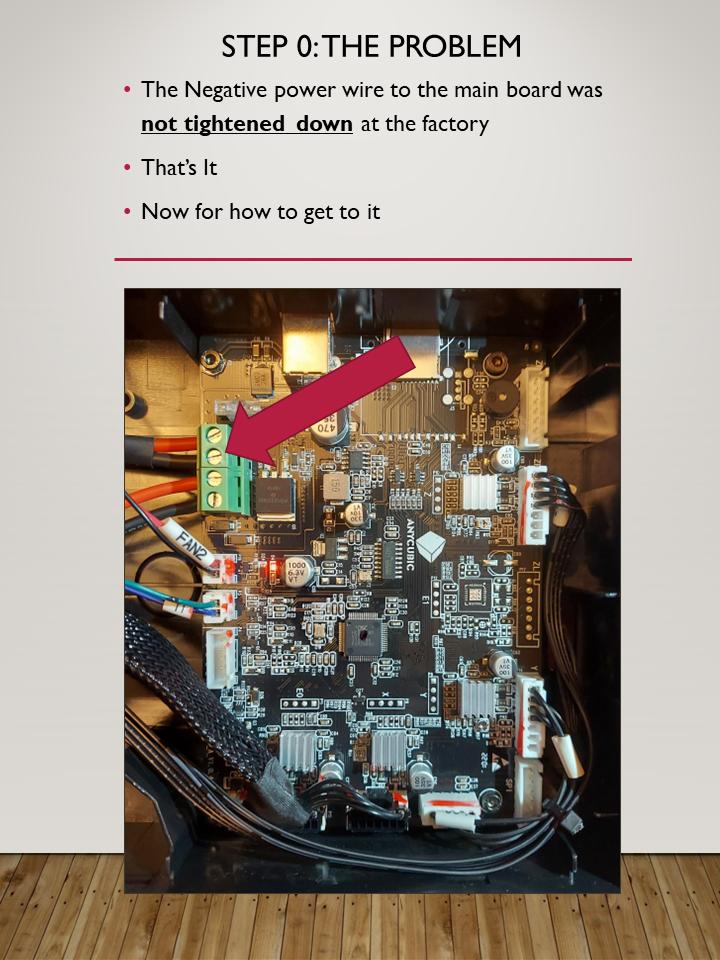
Motor Cable Connections: Verify that all motor cables are securely connected and aligned.
Driving Current: Adjust the driving current if necessary.
Motor Health: If the motor is faulty or damaged, consider contacting Anycubic’s customer service for support.
Abnormal Print Head Movement:
Loose or blocked rails, worn bearings, or damaged stepper motors can cause this issue.
Solutions:
Clean Guide Rails: Remove debris and obstacles from the guide rails.
Replace Worn Bearings: If bearings are worn, consider replacing them.
Proper temperature control is crucial for successful FDM printing.
Common issues:
T0 Sensor Abnormalities:
Check hot end wiring connections.
Ensure the sensor is clean and free of debris.
Replace a faulty temperature sensor if needed.
Filament Leaking:
Tighten the hot end assembly.
Replace worn nozzles promptly.
Set the correct printing temperature for the filament material.
Remember that addressing these issues will not only enhance your proficiency in using the printer but also improve print quality. If you encounter leveling problems, consider referring to Anycubic’s official after-sales engineer or their detailed leveling guide
IMG Source: redd.it
Anycubic Kobra 2 Max: Flagship FDM 3D Printing Experience
The Anycubic Kobra 2 Max is an impressive large-format 3D printer that offers a flagship experience for FDM printing. Let’s delve into its features and explore any potential performance optimizations:
Build Volume: The Kobra 2 Max boasts a substantial build volume of approximately 16.5 x 16.5 x 19.7 inches (420 x 420 x 500 mm), allowing you to create sizable prints with ease.
Speed and Setup Optimization:
Fast Printing: With a maximum print speed of 250 mm/s, the Kobra 2 Max is designed for efficiency.
Easy Setup: The modular assembly and upgraded user interface streamline the setup process, enabling users to start 3D printing within 10 minutes.
Sensitive Filament Detector: It can be overly responsive.
Space Requirement: Ensure you have a large, stable table space.
Assembly and Learning Curve:
While the Kobra 2 Max reduces the DIY factor compared to the Anycubic Kobra Go, it still requires some assembly.
The integrated body structure simplifies setup, but assistance during installation is advisable.
Once the print head assembly is complete, attaching smaller components like the LCD screen and filament holder is straightforward.
IMG Source: redd.it
In conclusion, the Anycubic Kobra 2 Max Electronics Board serves as the backbone of your 3D printing endeavors, offering a gateway to improved precision and efficiency. Whether you’re troubleshooting issues or seeking to optimize performance, a thorough understanding of your printer’s electronics is key to achieving stellar results. With the right upgrades and maintenance, your Anycubic Kobra 2 Max can reach new heights of printing excellence, making your creative projects a seamless reality.