Are you looking to enhance the performance of your Raise3D Pro 2 3D printer by replacing the endstops? Ensuring smooth operation and precise printing, the process of replacing endstops is vital for maintaining your printer’s functionality. Let’s delve into the detailed steps involved in ‘Raise3D Pro 2 Endstops Replacement’ to help you navigate this essential procedure with ease.
Replacing Endstops on Raise3D Pro2 3D Printer
Replacing the endstops on your Raise3D Pro2 3D printer involves a few steps. Let’s walk through the process:
Lower the Build Plate:
Turn on your 3D printer and navigate to the “Utilities” tab.
Use the onboard touchscreen to lower the Z-axis platform. Aim for a clearance of 5-12 mm.
This step ensures you have enough space to work comfortably.
Unload Filaments:
In the “Utilities” tab, verify that the temperature is set for your chosen material (e.g., 215°C for Raise3D PLA).
Adjust the temperature if needed.
Click the “Unload” button to begin the filament unloading process.
Once the temperature is reached, press “Unload” to withdraw the filament.
Cooldown Process:
Open the “Home” tab on the screen.
Set the nozzle temperature to 0°C and confirm.
Repeat this process for both nozzles.
Allow the components to cool down completely before proceeding.
Removing the Hotend:
Use a 2.5mm hex wrench to remove the two screws securing the cooling fan.
Loosen the 4 set screws inside the heating block to release the hotend from the wiring.
Finally, loosen the fixing screw to fully remove the hotend from the 3D printer.
Inspect Replacement HotEnd:
Ensure the new hotend is properly adjusted.
The bottom of the heat sink should lie flush with the bottom of the larger cylinder.
If the heat sink is improperly positioned, refer to the “How to Change a Nozzle” document for additional instructions.
Wiring Process:
Insert the heater rod (Red Wire) into the bottom hole of the heater block.
Push it through until it comes out the other end and secure it with the two set screws.
Insert the silver thermocouple into the upper hole on the heater block and secure it in place.
Installing the Hotend:
Reassemble the components in reverse order.
Make sure all connections are secure.
Power on the printer and test the new hotend.
Remember to follow safety precautions and consult the official documentation for any specific details related to your Raise3D Pro2 printer. If you have any further questions, feel free to reach out!
Troubleshooting Tips for Raise3D Pro2 Printer
When dealing with a Raise3D Pro2 printer, identifying malfunctioning endstops is crucial for smooth operation. Here are some steps and considerations to help you troubleshoot:
Inspect and Clean Endstops:
Power off the printer.
Uninstall the thumb screw from the side of the extruder you want to clean.
Insert the nozzle cleaning rod (found in the accessory box) into the feeding entrance to detect any blockage.
Mark the depth on the nozzle cleaning rod and take it out from the extruder.
Check Filament Profiles and Settings:
Ensure you are using a proper filament profile. Incorrect settings can lead to issues.
Place the spool closer to the extruder to prevent filament tension problems.
Retraction Settings and Cold-Side Clogs:
You mentioned cold-side clogs. These can occur due to retraction settings.
Retraction may compress the filament, causing distortion in its diameter.
Consider adjusting retraction distance and speed.
Disabling retraction might help, but be cautious of oozing.
Filament Details:
Provide more details about your filament:
Which side (left or right extruder) has the clicking issue?
What brand and color of filament are you currently using?
Calibrate Nozzle Offset:
Check the X and Y offsets for your extruders.
Adjust them based on your recorded values and what is shown on the screen.
Serial Port Log:
Insert a USB drive into your printer’s touchscreen.
Select the gear wheel icon, then go to “Machine” > “More settings.”
Tap on “Serial port log” and export the log to the inserted USB drive.
IMG Source: all3dp.com
Key Considerations for Replacement Endstops
When selecting replacement endstops for your Raise3D Pro 2 printer, there are several important factors to take into account. Let’s explore these considerations:
Compatibility: Ensure that the replacement endstops are compatible with your Raise3D Pro 2 printer model. Check the specifications and documentation to verify that they match the existing components.
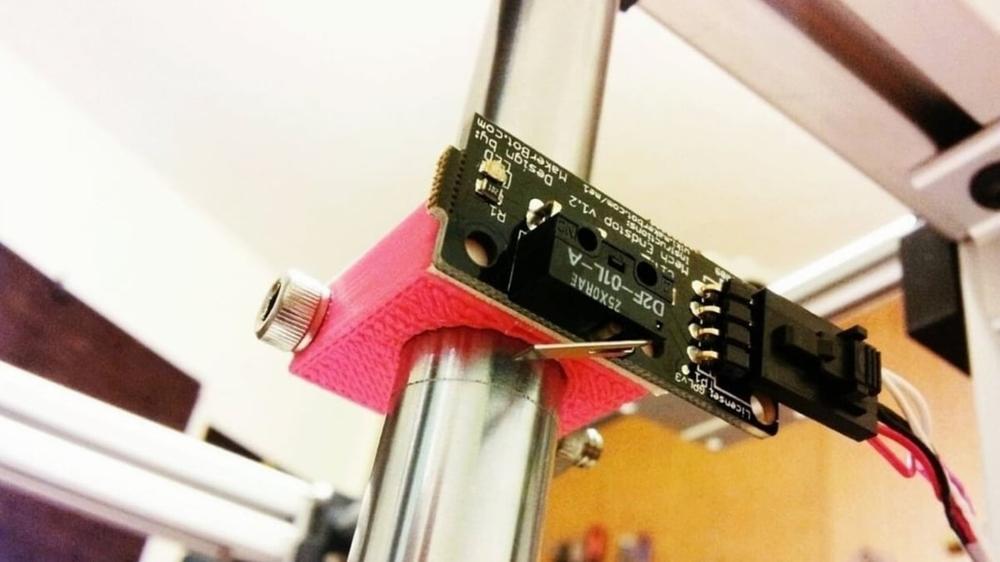
Type of Endstop:
Mechanical Endstops: These use a physical switch to detect the end position. They are reliable and straightforward.
Optical Endstops: These use light sensors to detect the position. They are more precise but may require careful calibration.
Inductive Endstops: These detect metal objects without physical contact. They are commonly used for auto bed leveling.
Wiring and Connectors:
Ensure that the replacement endstops have the same wiring and connectors as the original ones. This will simplify installation and prevent compatibility issues.
Double-check the pinout and connector type (e.g., 2-pin, 3-pin, etc.).
Voltage and Current Rating:
Verify that the replacement endstops can handle the voltage and current used in your printer.
Examine the specifications to ensure they match the original endstops.
Mounting Style:
Consider the mounting style of the endstops. Are they compatible with the existing mounting points on your printer?
Some endstops are designed for specific printer models, so choose accordingly.
Precision and Accuracy:
If you’re using endstops for auto bed leveling, consider their precision and accuracy. Optical or inductive endstops are often preferred for this purpose.
Durability and Longevity:
Look for endstops made from durable materials that can withstand continuous use.
Check if they have a long lifespan and can handle the wear and tear of 3D printing.
Availability and Support:
Ensure that replacement endstops are readily available from reliable sources.
Check if the manufacturer provides good customer support or documentation.
Remember to consult the official Raise3D documentation or reach out to their support team for specific guidance on choosing replacement endstops for your Pro 2 printer.
IMG Source: raise3d.com
Replacing Endstops on Raise3D Pro2 3D Printer
Replacing endstops on the Raise3D Pro2 3D printer can be done methodically to ensure safety and accuracy. Here are the step-by-step instructions:
Lower the Build Plate:
Turn on your 3D printer.
Access the “Utilities” tab.
Use the onboard touchscreen to lower the Z-axis platform. Aim for a clearance of 5-12 mm.
Unload Filaments:
In the “Utilities” tab, verify that the temperature is set for your selected material (e.g., 215°C for Raise3D PLA).
Adjust the temperature if needed.
Press the “Unload” button to withdraw the filament.
Cooldown Process:
Open the “Home” tab on the screen.
Set the nozzle temperature to 0°C and press OK.
Repeat this process for both nozzles.
Allow components to cool down completely.
Removing the Hotend:
Using a 2.5mm hex wrench, remove the two screws securing the cooling fan.
Loosen the 4 set screws inside the heating block to release the hotend from the wiring.
Loosen the fixing screw to detach the hotend from the 3D printer.
Remove the heater rod and thermocouple wires from the heater block.
Inspect Replacement HotEnd:
Verify that the new hotend is properly adjusted.
The bottom of the heat sink should lie flush with the bottom of the larger cylinder.
Wiring Process:
Insert the heater rod (Red Wire) into the bottom hole of the heater block until it comes out the other end.
Secure it in place with the two set screws.
Insert the silver thermocouple into the upper hole on the heater block and secure it.
Installing the Hotend:
Reattach the hotend to the 3D printer machine.
Follow these steps carefully to ensure a successful replacement.
Remember to handle the components with care and follow safety precautions throughout the process. If you have any questions, feel free to reach out to the Raise3D support team.
IMG Source: ytimg.com
Troubleshooting Solutions for Raise3D Pro 2 Endstop and Extrusion Issues
Troubleshooting issues with your Raise3D Pro 2 can be frustrating, but let’s dive into some potential solutions for your endstop and extrusion problems.
Front Fan Speed:
Ensure that the front fan of the print head is spinning at full speed when the printer is turned on. If it’s not, this could cause jamming issues as the hot end won’t be properly cooled. Make sure the lid is removed when printing with PLA to allow proper airflow.
Filament Jamming:
If you’re experiencing clicking sounds from the drive motor and nothing comes out during printing, it might be due to filament jamming.
Check the nozzle: Make sure there are no blockages. You mentioned that the entire head has been disassembled and cleaned, so this should have been addressed.
Fan Issues: The front fan issue might have contributed to the jamming. Tap it gently to get it spinning.
Slicer Settings: While you don’t usually play around with settings, consider checking your slicer settings. Ensure they are appropriate for the material you’re using.
PLA Loading/Unloading: When loading or unloading PLA, observe the clicking sound. If it persists, investigate further.
Fan Control:
The front fan typically runs all the time. However, if you want to customize its behavior, you can explore G-code commands.
To stop the front fan when the hot end temperature drops below a certain threshold (e.g., 50°C), you can use a custom G-code script.
Consult the Raise3D support site or community forums for specific G-code instructions.
IMG Source: prusa3d.com
In conclusion, the ‘Raise3D Pro 2 Endstops Replacement’ process is a critical aspect of maintaining and optimizing your 3D printer’s functionality. By following the outlined steps meticulously, you can ensure a seamless transition to new endstops and enjoy continued top-notch performance from your Raise3D Pro 2. Remember to adhere to safety precautions, consult official documentation, and reach out to the Raise3D support team if needed.
Keep your 3D printing projects running smoothly with proper endstop maintenance and replacement.