Have you ever wondered how long it takes to 3D print an object? The duration of 3D printing can vary significantly based on several factors such as object size, printing technology, materials used, layer height, and printer quality. Let’s delve deeper into this fascinating world of additive manufacturing and explore the intricacies of print times.
3D printing durations can vary significantly based on several factors. Let’s break it down:
Object Size and Complexity:
Printing Technology:
Materials Used:
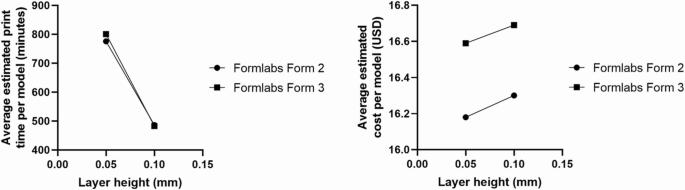
Layer Height and Resolution:
Printer Quality and Hardware:
Specific Examples:
Remember that these estimates are approximate, and actual printing times can vary based on specific settings and conditions. Your 3D printer software will provide an accurate time estimate for each print.
The duration of 3D printing can be influenced by several factors. Let’s explore them:
Design Complexity: The intricacy of the design significantly impacts printing time. More complex designs take longer to print compared to simpler ones.
Object Size: Larger objects naturally require more time to print than smaller ones. The volume of material needed directly affects the printing duration.
Printer Technology: Different 3D printing technologies have varying speeds. For instance:
Layer Height and Thickness: The thickness of each layer and the height of each layer contribute to the overall printing time. Smaller layer heights improve print quality but extend the duration.
Material Used: Different materials have varying melting points and cooling times. Some materials may require higher extrusion temperatures, affecting the overall printing time.
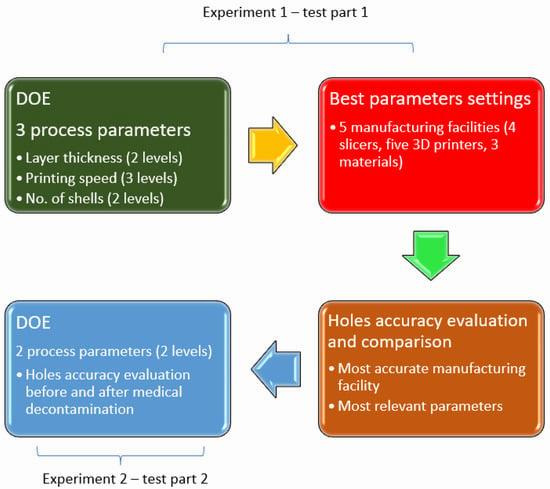
IMG Source: mdpi.com
Why Speed Matters:
The speed of 3D printers has significantly improved over time, allowing for faster completion of intricate models. What used to take hours can now be accomplished in mere minutes. Even budget-friendly printers have benefited from advancements like speedy firmware and high-flow filament.
Let’s explore how various 3D printers stack up in terms of both quickness and output quality.
Below, I’ve compiled a summary of our findings based on timed print tests using standard settings, maximum acceleration, and unrestricted flow. We tested several models from leading manufacturers, including Creality, Bambu Lab, and Prusa. Here’s what we discovered:
| Printer | Time to Print (minutes) | Cooling | Ringing Layers | Default Print Speed | Max Speed | Max Acceleration |
|---|---|---|---|---|---|---|
| Creality K1 Max | 13:50 | Fair | No rough near overhangs | 300 mm/s | 600 mm/s | 20,000 mm/s² |
| Creality K1 | 13:54 | Fair | No rough near overhangs | 300 mm/s | 600 mm/s | 20,000 mm/s² |
| Bambu Lab X1-Carbon | 15:29 | Good | Slight rough | 250 mm/s | 500 mm/s | 20,000 mm/s² |
| Elegoo Neptune 4 Plus | 16:25 | Fair | Slight rough | 250 mm/s | 500 mm/s | 12,000 mm/s² |
| Bambu Lab P1P | 17:44 | Fair | Good | 270 mm/s | 500 mm/s | 20,000 mm/s² |
| Bambu Lab P1S | 18:00 | Fair | Little rough | 270 mm/s | 500 mm/s | 20,000 mm/s² |
| Bambu Lab A1 Mini | 19:17 | Good | Excellent | 270 mm/s | 500 mm/s | 10,000 mm/s² |
| Sovol SV07 | 19:24 | Good | Fair | 250 mm/s | 500 mm/s | 8,000 mm/s² |
| Elegoo Neptune 4 | 20:00 | Good | Acceptable | 250 mm/s | 500 mm/s | 5,000 mm/s² |
| AnkerMake M5c | 20:04 | Good | Good | 270 mm/s | 500 mm/s | 5,000 mm/s² |
| Elegoo Neptune 4 Pro | 20:06 | Good | Acceptable | 250 mm/s | 500 mm/s | 5,000 mm/s² |
| AnkerMake M5 | 23:00 | Fair | Ok | 250 mm/s | 500 mm/s | 5,000 mm/s² |
| BIQU Hurakan | 24:31 | Good | Slight rough | 60 mm/s | 150 mm/s | 3,000 mm/s² |
| Prusa MK4 | 27:06 | Good | Good | 170 mm/s | 300 mm/s | 4,000 mm/s² |
| Prusa Mini+ | 28:47 | Rough | Decent | 140 mm/s | 200 mm/s | 4,000 mm/s² |
| Anycubic Kobra 2 | 32:00 | Excellent | Good | 150 mm/s | 300 mm/s | 3,000 mm/s² |
| Creality Ender 3 V3 SE | 41:00 | Good | Good | 180 mm/s | 250 mm/s | 2,500 mm/s² |
| Sovol SV06 | 59:00 | Excellent | Perfect | 60 mm/s | 200 mm/s | 1,000 mm/s² |
The fastest printer in our lineup is the Creality K1 Max, completing a Speed Benchy in just 13 minutes and 50 seconds. With a top speed of 600 mm/s and a max acceleration of 20,000 mm/s², it outpaces other brands by nearly 5 minutes. Keep in mind that quality output also varies significantly among these models.
Remember, speed isn’t everything—finding the right balance between speed and quality is essential for successful 3D printing. Lower speeds can
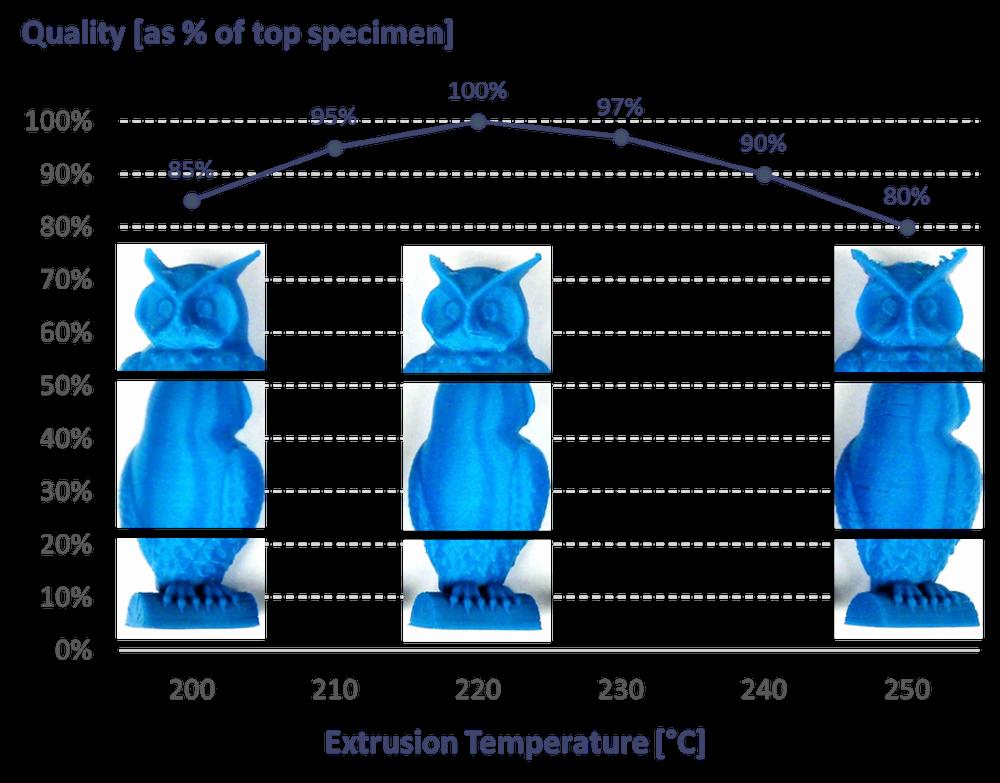
IMG Source: 3dprintingindustry.com
Optimizing 3D printing time is essential for efficiency and productivity. Here are some practical tips to speed up your 3D printer without compromising print quality:
Increase Print Speed in Slicer Settings:
Acceleration & Jerk Settings:
Infill Pattern:
Infill Density:
Wall Thickness/Shells:
Dynamic Layer Height/Adaptive Layers Settings:
Print Multiple Objects in One Print:
Removing or Reducing Supports:
Pro Tip: If you’re looking for a high-speed 3D printer, consider the Creality Ender 3 V2 with a maximum printing speed of 200mm/s. It’s a popular choice among users.
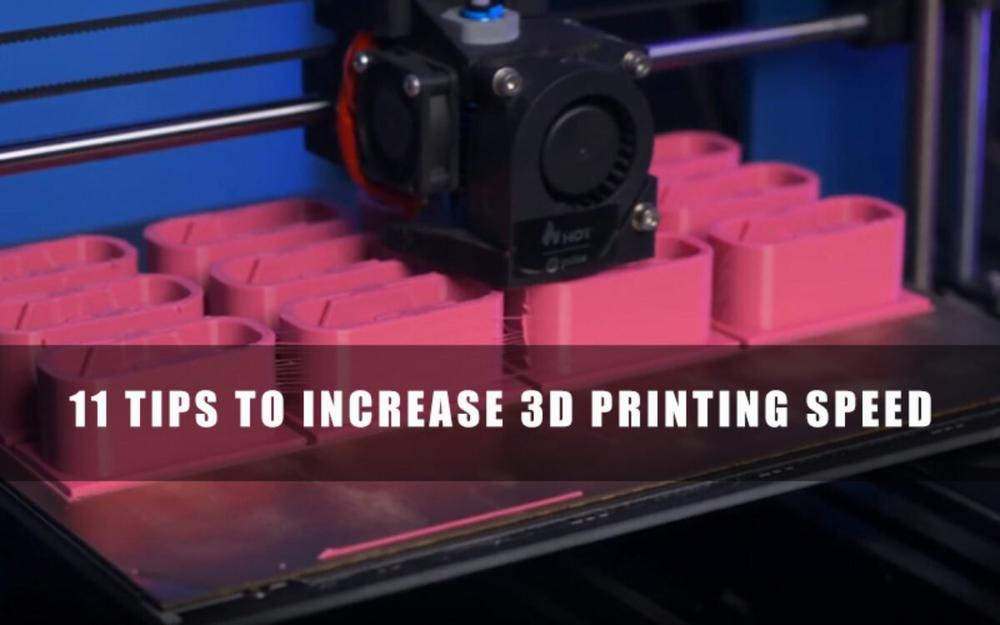
IMG Source: twotrees3d.com
The duration of 3D printing can vary significantly based on several factors, including the type of printer, the complexity of the model, and the chosen materials. Let’s delve into the details:
Type of 3D Printer:
Type of Materials:
Average Print Times for Popular Projects (based on a layer height of 100 microns and a print speed of 50-60 mm/s):
IMG Source: springernature.com
Implementing practical tips like adjusting print speed, infill pattern, and wall thickness can help speed up your prints without sacrificing quality. Whether you’re a seasoned maker or a beginner in the world of 3D printing, understanding the variables that influence print times will empower you to make informed decisions and achieve impressive results in your creations.