Embark on a journey to unravel the intricacies of the Creality K1 Max pulleys, a vital component of this cutting-edge 3D printer. Discover how these pulleys play a pivotal role in enhancing performance and print quality, and uncover insightful tips on optimizing their functionality. Let’s delve into the world of Creality K1 Max and its pulleys to unlock the potential of your 3D printing experience.
Creality K1 Max Pulleys: Details and Replacements
Let’s delve into the world of Creality K1 Max and its pulleys.
The Creality K1 Max 3D printer utilizes NEMA17 stepper motors with attached pulleys. Here are some details about these components:
Stepper Motor with Pulley:
Model: Creality 42-40 NEMA17
Dimensions: 42 mm x 42 mm x 48 mm (L x W x H)
Phase Number: 2 Phases
Step Angle: 1.8°
Steps/Revolution: 200
Shaft Size: 5mm OD x 21mm Length
Current: 1.0 A
Pulley Type: 2GT, 20-tooth
Compatibility: Fits the Creality K1 Max
Pulley Replacement to Reduce VFA (Vibration Frequency Artifacts):
Some users have reported that replacing the stock pulleys with smaller, higher-quality ones can decrease VFA on the K1 Max.
Specifically, using Mellow 20T pulleys has been suggested.
Benefits of pulley replacement:
Reduced VFA (visible in print quality)
Higher accelerations due to reduced motor load
No speed limitations (printer can reach up to 800mm/s during travel moves)
Steps for pulley replacement:
Loosen the belts as much as possible.
Remove side panels and the door.
Remove the top metal frame (but not the gantry).
Remove the motors.
Change the pulleys.
Assemble everything back.
Firmware adjustments (see below).
Firmware settings (for both X and Y axes):
rotation_distance: 40 (instead of 72)
driver_SGTHRS: 110 (instead of 65)
interpolate: False (instead of True)
microsteps: 128 (instead of 32)
run_current: 1.2 (unless you want 30k+ accelerations)
Important Note:
If you wish to use the stock gantry, a 28T pulley is recommended as the smallest size to change to. Going smaller may result in belt skip due to inadequate tooth engagement.
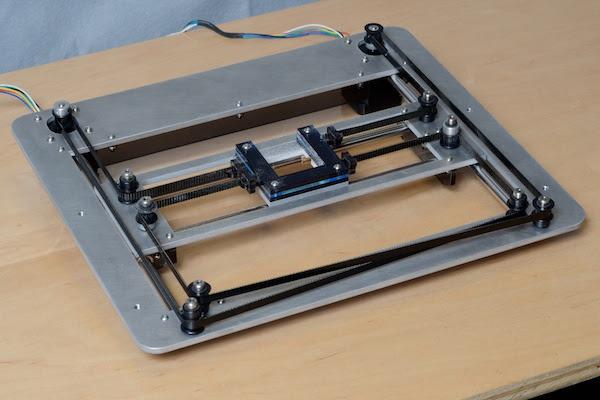
Understanding 3D Printer Pulley Mechanisms
A 3D printer pulley mechanism is a fascinating component that plays a crucial role in various applications. Let’s delve into the details:
Pulley Basics:
A pulley is a simple machine consisting of a wheel with a groove or channel around its circumference.
It is often used to transmit force or motion by connecting it to a belt, rope, or chain.
When force is applied to one end (usually by pulling the rope or belt), the pulley rotates, allowing movement or lifting of loads.
Types of 3D Printer Pulley Mechanisms:
Timing Belt Pulleys: These are commonly used in 3D printers for precise movement along the X, Y, and Z axes. They work in conjunction with timing belts.
Idler Pulleys: These guide the timing belts and ensure proper tension. They are often found near the stepper motors.
Tensioner Pulleys: Used to adjust the tension of the belts, ensuring smooth movement and accurate prints.
Filament Pulleys: These guide the filament from the spool to the extruder, maintaining consistent feeding during printing.
3D Printing Your Own Pulleys:
If you’re interested in creating custom pulleys for your 3D printer, you can design and print them using software like Fusion 360 or Tinkercad.
Here are the steps to make a simple 3D printed pulley:
Create a Sketch: Open Fusion 360, create a sketch, and select the “Top” view.
Design the Pulley Profile: Draw the pulley’s profile (usually circular) using arcs and lines.
Extrude the Profile: Extrude the sketch to create a 3D shape.
Add a Central Hole: Design a hole in the center for the shaft.
Export the STL File: Export the model as an STL file.
Print the Pulley: Load the STL into your 3D printer software and print it using the material of your choice.
Resources for 3D Printed Pulleys:
You can find existing 3D printable pulley designs on platforms like Thingiverse:
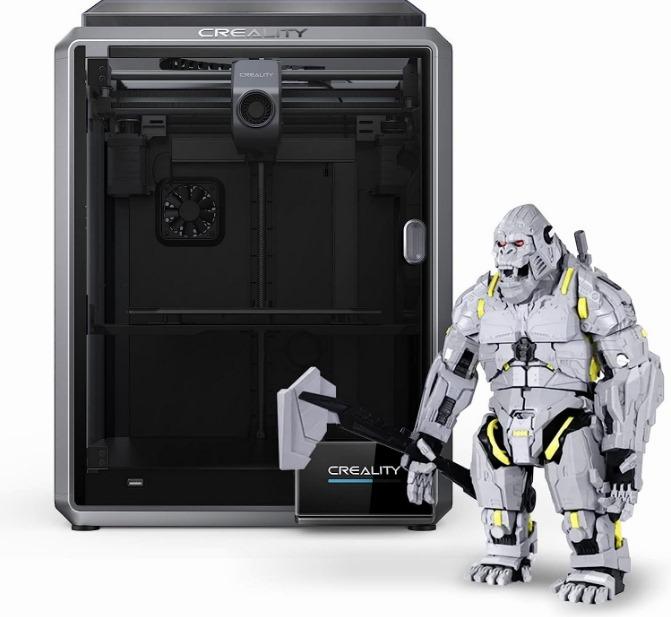
Comparison of Creality K1 and Creality K1 Max 3D Printers
Let’s delve into a comparison between the Creality K1 and the Creality K1 Max 3D printers. These flagship models offer distinct features, and understanding their differences can help you decide which one suits your needs best.
Touchscreen Interface:
Creality K1: The K1 boasts an intuitive touchscreen interface that simplifies navigation and parameter adjustments. It ensures ease of use for both beginners and experienced users.
Creality K1 Max: Taking it a step further, the K1 Max features a larger, more user-friendly touchscreen, offering an even more seamless interaction.
Filament Diameter and Build Plate:
Both the K1 and K1 Max use a filament diameter of 1.75mm.
They come equipped with a flexible build plate for convenience.
Performance:
With print speeds of up to 600mm/s and an acceleration of 20,000mm/s², both models deliver exceptional performance.
Build Volume:
Creality K1: Offers a build volume of 300 x 300 x 300 mm.
Creality K1 Max: Provides a larger build area with the same dimensions of 300 x 300 x 300 mm.
IMG Source: fantaskycdn.com
Benefiting from Pulley Upgrades on the Creality K1 Max
The Creality K1 Max is a fascinating 3D printer with several notable features. Let’s delve into the benefits of its pulleys:
Reduced VFA (Vibration-Induced Artifacts):
Some users have reported that replacing the stock pulleys with smaller, higher-quality ones can significantly decrease VFA on the K1 Max.
The visible VFA is minimal at speeds other than 80-120mm/s and 180-200mm/s.
Interestingly, the K1 Max’s model fan, while not perfectly balanced, can add micro-VFA at speeds above 30%.
Smaller pulleys don’t limit speed; the printer can easily reach 800mm/s during travel moves.
Additionally, pulley replacement allows for higher accelerations due to reduced motor load. With the same torque, you can theoretically achieve 36,000mm/s² with 20T pulleys (compared to 20,000mm/s² with the stock 36T pulleys).
Adjusting the current can help manage motor noise and heat.
Gantry Considerations:
When replacing pulleys, keep in mind that using the stock gantry with 20T pulleys may lead to skipping.
A 28T pulley is the recommended smallest size if you choose to stick with the stock gantry.
IMG Source: redd.it
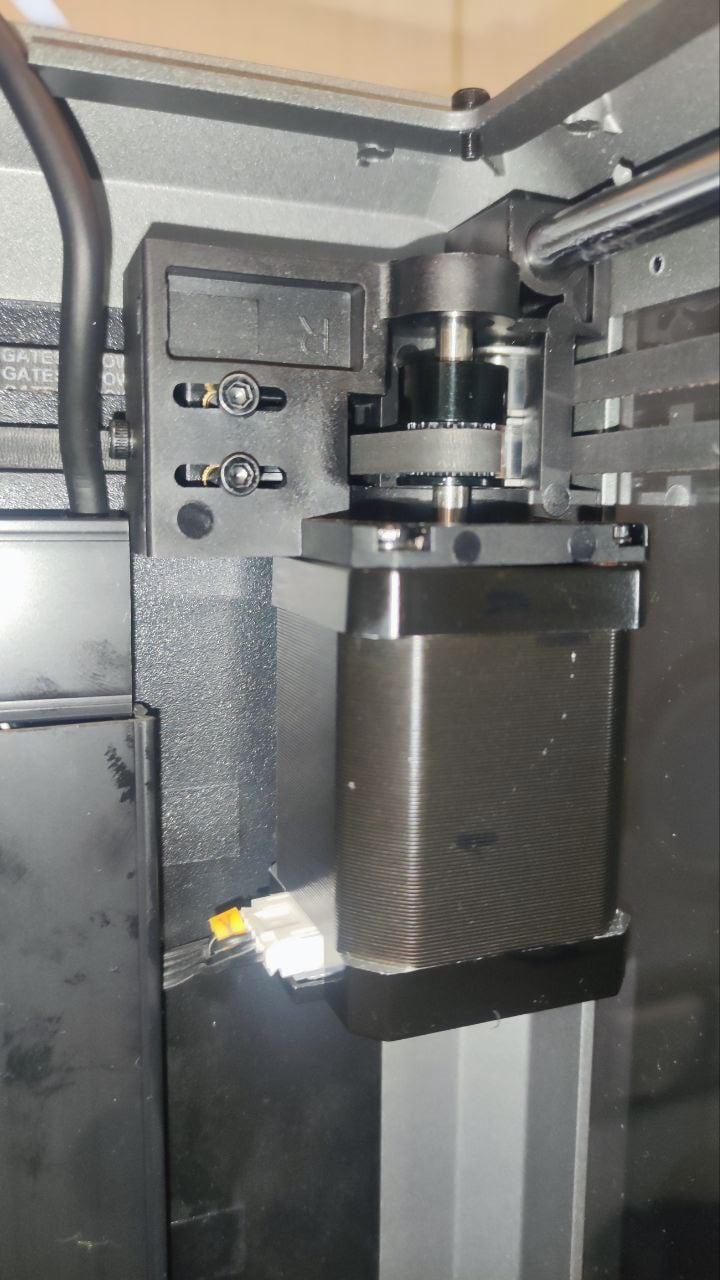
Locate the Pulleys
Let’s walk through the installation process for the pulleys on your Creality K1 Max 3D printer. Here are the steps:
Unboxing and Setup:
Begin by unboxing your Creality K1 Max and ensuring you have all the necessary components.
Follow the unboxing steps provided in the user manual.
Install the printer according to the instructions, including connecting power and any other required cables.
Locate the Pulleys:
The pulleys are essential components that guide the movement of the printer’s belts.
Identify the pulleys on your printer. They are typically located near the extruder assembly and along the printer’s frame.
Check Pulley Tightness:
Before installation, ensure that the pulleys are securely attached to their respective shafts.
If any pulleys are loose, tighten them using an appropriate tool (such as an Allen wrench).
Align the Belts:
The pulleys work in conjunction with the belts to move the print head.
Make sure the belts are properly aligned with the pulleys. Adjust their tension if needed.
Install the Pulleys:
If you need to replace or install new pulleys, follow these steps:
Remove any covers or panels that obstruct access to the pulleys.
Loosen the set screws on the pulley using an Allen wrench.
Slide the pulley onto the shaft, aligning it with the belt path.
Tighten the set screws to secure the pulley in place.
Repeat this process for all relevant pulleys.
Calibration and Testing:
After installing the pulleys, perform a calibration process to ensure proper alignment and tension.
Test the printer’s movement by manually moving the print head along the X, Y, and Z axes.
Observe the pulleys during movement to verify smooth operation.
Refer to the User Manual:
For detailed diagrams and specific instructions related to your Creality K1 Max, consult the official user manual.
The manual provides step-by-step guidance for various aspects of printer setup and maintenance.
For more advanced modifications or customization, you can explore community resources like the Creality K1 Max GitHub repository, which provides additional insights and tools.
IMG Source: ytimg.com
In conclusion, the Creality K1 Max pulleys stand as indispensable cogs in the smooth functioning of this advanced 3D printer. From reducing VFA to enabling higher accelerations, the impact of these pulleys is profound. By understanding the nuances of pulley replacement and installation, users can elevate their printing capabilities and achieve unmatched precision.
Embrace the power of the Creality K1 Max pulleys to harness the full potential of your 3D printing endeavors.