Are you looking to enhance the performance of your Creality K1 3D printer? Understanding the intricacies of the Creality K1 belts is crucial for optimal functioning. Dive into the world of 2GT belts used in the XY axis of the Creality K1 printer and discover the key specifications that can make a difference in your printing experience.
Let’s explore the length, width, and pitch of these belts to equip you with the knowledge needed to maintain and upgrade your 3D printer efficiently.
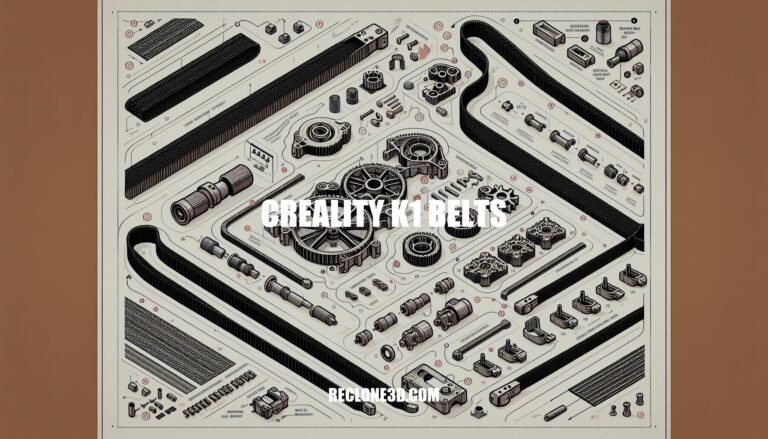
Details of 2GT Belts for Creality K1 Printer
The Creality K1 printer utilizes 2GT belts for its XY axis. Here are some details about these belts:
Belt Length: The 2GT belt used in the Creality K1 has a length of 1800mm .
Width: The belt is 6mm wide .
Pitch: It follows a 2mm (2GT) pitch .
If you need to replace the belts or adjust their tension, you can refer to the following resources:
YouTube Video: There’s a helpful video on belt tension for the Creality K1 by Voron Design. Although it’s not clear if Creality3D has other recommendations, this video provides guidance on achieving the right tension for the Gates Belts .
Spool3D Canada: You can purchase a Creality XY Axis 2GT Belt Kit for your 3D printer. This kit includes the belts needed for the K1, K1 Max, and CR5 models .
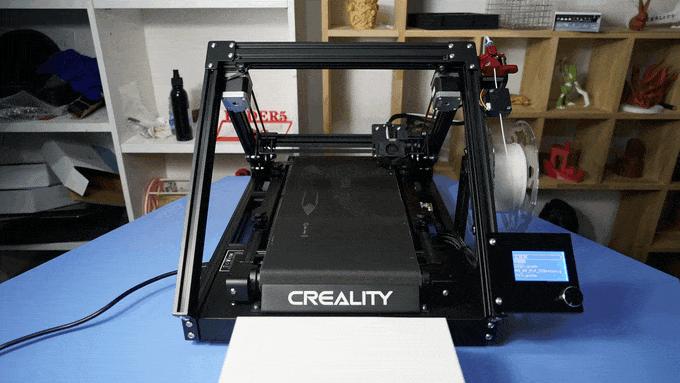
The Creality K1 3D printer offers several benefits, making it an interesting choice for enthusiasts and professionals. Let’s explore some of its advantages:
The Creality K1 is designed for speed. It can print up to 12 times faster than traditional 3D printers, making it one of the fastest models available.
If you need rapid prototyping or quick production, the K1’s speed can be a significant advantage.
Improved Stability and Smooth Printing:
The K1 provides enhanced stability during printing, resulting in smoother and more reliable output.
Its robust construction ensures minimal vibrations, reducing the chances of layer misalignment or print defects.
Efficient Heat and Cooling System:
The K1 features fast heat-up and cooling times. This efficiency allows you to start printing sooner and reduces waiting time between prints.
Effective temperature management contributes to better print quality and consistency.
Innovative Bed Leveling System:
The K1 incorporates an automatic bed leveling system. This feature saves time and effort by ensuring that the print bed is perfectly leveled before each print.
Accurate bed leveling leads to better adhesion and prevents warping.
CoreXY Implementation:
While the K1 excels in speed, it falls short in terms of its CoreXY implementation. CoreXY is a motion system that provides precise and efficient movement.
Users should be aware that the K1’s CoreXY design may have limitations compared to other CoreXY printers.
Constrained Filament Path:
The filament path in the K1 is somewhat constrained, which can affect filament flexibility and ease of use.
Users should consider this limitation when selecting filament types and spool sizes.
User Interface (UI):
The K1’s user interface could be improved. Some users find it less intuitive or lacking certain features.
However, this aspect doesn’t significantly impact the printer’s core functionality.
In summary, the Creality K1 is an excellent choice if you prioritize speed and need a reliable 3D printer for rapid prototyping or small-scale production. Its innovative features, such as automatic bed leveling, contribute to a positive printing experience.
IMG Source: 3dnatives.com
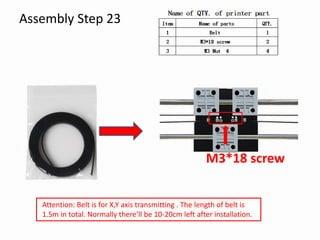
Installing 3D Printer Belts: Step by Step Guide
Replacing or installing belts on a 3D printer is essential for maintaining accurate movement and print quality. Let’s walk through the steps to install 3D printer belts step by step:
Gather Necessary Tools and Equipment:
You’ll need an Allen key to loosen bolts on the X and Y axis belt tensioners.
Make sure you have a replacement belt ready.
Unplug Your 3D Printer:
Safety first! Unplug your 3D printer to prevent any potential injuries while working around the extruder, wires, and print bed.
Loosen Bolts at the X Axis Carriage:
Start with the X axis belt since it’s simpler.
Loosen the two screws at the end of the X axis gantry or carriage to decrease the belt tension.
On most 3D printers (like the Ender 3), there will be three screws at the end of the X axis gantry. Loosen the two smaller screws. You don’t need to remove the bolts; just loosen them (usually 1 turn each is enough).
Remove the Belt from the Metal Bracket:
Once the tension is reduced, remove the belt from the metal bracket.
Feed the New Belt:
Insert the new belt into the same path as the old one.
Insert Belt Ends into the Bracket:
Attach the belt ends to the metal bracket.
Make sure the belt is properly aligned and not twisted.
Tighten the Bolts for Proper Belt Tension:
Gradually tighten the screws at the end of the X axis gantry to achieve the right tension.
The belt should be snug but not overly tight.
Remember, these steps can vary slightly depending on your specific 3D printer model. Always refer to your printer’s manual or manufacturer’s guidelines for precise instructions.
For the Y-axis belt replacement, the process is similar:
Unscrew the nut on the Y-axis tensioner counterclockwise.
Unscrew the fixing screws that hold the Y-axis tensioner on the Y-axis carriage.
Use auxiliary tools to remove the copper buckles at both ends of the belt from the bottom of the printing platform.
IMG Source: slidesharecdn.com
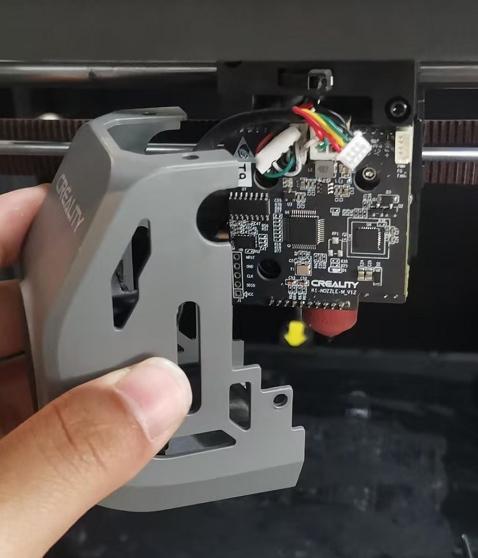
Common Troubleshooting Steps for Creality K1 3D Printer Belt Issues
If you’re experiencing belt-related issues with your Creality K1 3D printer, here are some troubleshooting steps to consider:
Belt Tension:
Inconsistent belt tension can lead to printing problems. Ensure that the belts are properly tensioned.
Parallel Alignment: Check if the belts are parallel to the Y-axis rails. If not, adjust them to ensure consistent tension.
Belt Tension Meter: You can print a belt tension meter to measure the tension. Aim for around 110 Hz on the X-axis and adjust the Y-axis accordingly.
Crooked Belts:
In some cases, belts may become crooked, affecting dimensional accuracy. Inspect the belts for any irregularities or misalignment.
Crooked belts can cause changes in tension, resulting in inconsistencies in print dimensions.
Z-Axis Belt Slippage:
If you’re facing issues with the Z-axis belt slipping, consider checking its tension and alignment.
Verify that the belt is securely attached to the pulleys and motor.
Regular Maintenance:
Regularly inspect and clean the belts to remove any debris or dust.
Lubricate the belts if necessary, but avoid over-lubrication.
Remember that troubleshooting can be iterative, so don’t hesitate to revisit these steps if needed. If you encounter specific problems, refer to the comprehensive troubleshooting guide provided by Creality for detailed solutions
IMG Source: shoplazza.com
Maintaining Belts on Creality K1 3D Printer
Maintaining the belts on your Creality K1 3D printer is essential for optimal performance. Here are some steps you can follow for belt adjustment and manual belt leveling:
Belt Tensioning:
Proper belt tension ensures smooth movement and accurate prints.
Use the Panzertomate-way to adjust belt tension.
Check the GitHub repository for detailed instructions and scripts related to Root on Klipper: GitHub Repository.
Portable Cable Organizer / Winder: Printables Link
Christmas Tree: Printables Link
Dragon Pencil Cup: Printables Link
IMG Source: ytimg.com
In conclusion, mastering the maintenance and troubleshooting of the Creality K1 belts is essential for ensuring top-notch printing results. By following step-by-step guides for belt installation, adjusting tension, and troubleshooting common belt-related issues, you can elevate the performance of your 3D printer. Whether you’re tackling belt tension inconsistencies, crooked belts, or Z-axis belt slippage, taking proactive measures will boost your Creality K1’s reliability and print quality.
Stay informed, stay proactive, and unleash the full potential of your Creality K1 printer by harnessing the power of its belts.