Welcome to a comprehensive overview of the Creality Ender 7 build plate, a vital component of this cutting-edge 3D printer. Delve into the innovative features and functionalities that make the Ender 7 stand out in the realm of additive manufacturing. Discover how the build plate enhances print quality, adhesion, and overall user experience.
Let’s explore the intricate details of the Creality Ender 7 build plate and unleash the potential it holds for your 3D printing endeavors.
Enhanced Build Plate Features of Creality Ender-7 3D Printer
The Creality Ender-7 3D printer boasts impressive features, including a new breakthrough in speed—with a normal printing speed of up to 250 mm/s while maintaining precise molding quality. However, let’s focus on the build plate aspect.
The Ender-7 comes with a PEI coated flexible magnetic build plate, which is a fantastic upgrade for ensuring reliable first-layer adhesion. Here are the details:
PEI Coating: The build plate consists of two parts:
A powder-coated PEI plate: This surface provides excellent adhesion for your prints.
A magnetic base plate: The magnetic feature allows for easy removal and flexibility.
Heat Resistance: The powder-coated PEI plate can withstand temperatures of up to 200°C.
In summary, the Creality Ender-7’s build plate combines robustness, magnetism, and heat resistance to enhance your 3D printing experience. Whether you’re a beginner or an experienced maker, this printer offers high-speed printing without compromising quality
Build Plate Features of Creality Ender 7 3D Printer
Let’s explore the build plate features of the Creality Ender 7 3D printer:
Build Surface: The Ender 7 features a carborundum glass plate with excellent adhesion. This coating ensures good print adhesion during printing, and the finished objects can be removed easily and cleanly. The adhesion gradually decreases as the heated bed temperature drops.
Print Bed Size: The build area of the Ender 7 measures 250 mm x 250 mm x 300 mm. This generous print volume allows you to create larger and more intricate 3D models.
Printing Speed: The Ender 7 supports a high-speed printing capability, with a maximum recommended printing speed of 250 mm/s. This feature enables faster production of your 3D prints.
Layer Height: You can achieve layer heights ranging from 0.1 mm to 0.4 mm. This flexibility allows you to balance print quality and speed according to your project requirements.
Heated Bed Convenience: The build surface is designed for easy removal of printed models. It eliminates the need for glue or additional tools, and you can even print directly on the cold bed.
Core-XY Structure: The Ender 7 utilizes a Core-XY motion system, which enhances precision and stability during printing.
Minimalist Aesthetic Design: The printer boasts a sleek and minimalist aesthetic, making it a visually appealing addition to your workspace.
IMG Source: media-amazon.com
Essential Build Plate Maintenance Tips
Proper build plate maintenance is essential for successful 3D printing. Let’s dive into some useful tips to keep your build plate in top shape:
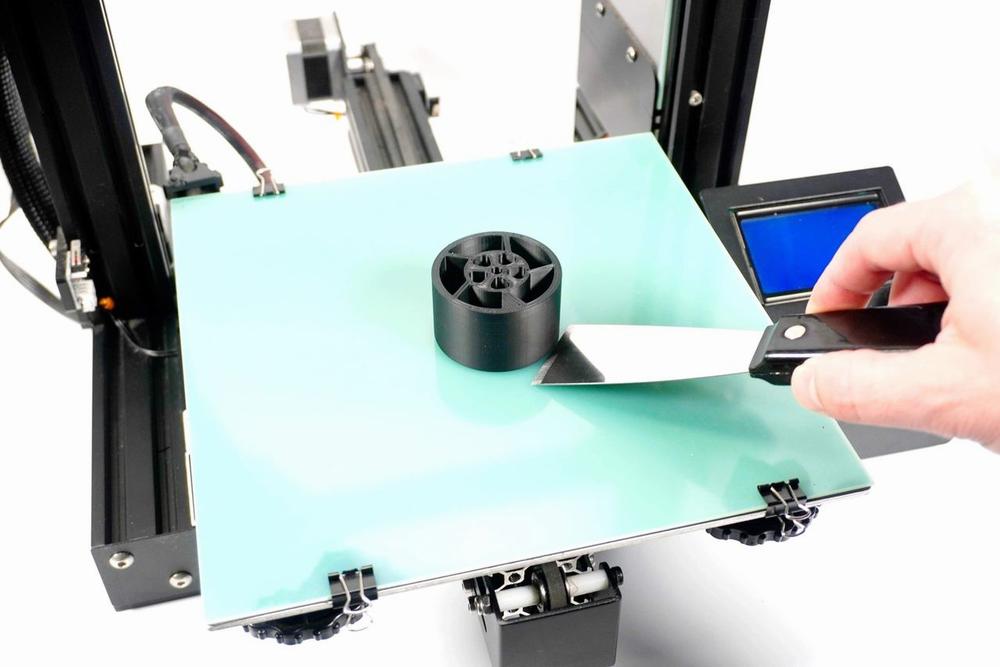
Clean the Build Plate After Each Print:
Remove any plastic residue left on the build area using a flat blade or scraper.
Sweep away debris using a brush, paying attention to the Y-axis tracks.
Clean the build plate surface with isopropyl alcohol (IPA) or warm soapy water to remove adhesive residues.
Choose the Right Adhesion Settings:
Skirt: Extrudes an outline around your model to prime the nozzle and check bed leveling.
Brim: Adds a single layer around the base to prevent warping and improve adhesion.
Raft: Creates a thick grid between the build plate and the model for stability.
Optimize Build Plate Temperature:
Ensure the build plate temperature is set correctly for the material you’re using.
Use a heated bed set to 65°C or higher for better adhesion.
Level Your Build Plate:
Proper bed leveling ensures consistent first-layer adhesion.
Adjust the leveling screws or knobs to achieve a flat surface.
Use Trusted Adhesives:
Some users find that a thin layer of glue stick or hairspray helps improve adhesion.
Experiment with different adhesives to find what works best for your printer and material.
Adjust Slicer Settings:
Increase the Initial Layer Flow Rate to enhance adhesion.
Fine-tune other settings like brim width, line count, and distance for optimal results.
For more details, you can refer to this article on perfect build plate adhesion settings.
IMG Source: wsimg.com
Optimizing Build Plate Adhesion
Build plate adhesion is crucial for successful 3D printing. Let’s explore some strategies to optimize it:
Choose the Right Build Plate Adhesion Type:
Skirt: Extrudes an outline around your model to ensure the nozzle is ready to extrude cleanly. It’s useful for leveling prints before the actual process begins.
Brim: Adds a single layer of flat area around the base of the model to prevent warping. It provides extra surface area for better adhesion.
Raft: Creates a thick grid with a “raft” between the build plate and the model, enhancing adhesion.
Temperature and Material Considerations:
Ensure your build plate temperature is set correctly for the material you’re using.
PLA: Typically prints well at around 60°C to 70°C.
ABS: Requires a higher build plate temperature (around 90°C to 110°C).
PETG: Similar to PLA, but slightly higher (around 70°C to 80°C).
Clean and Prepare the Build Surface:
Make sure your print surface is smooth, clean, and ready.
Remove any greasy liquids, oils, or fingerprints from the build surface.
If you use tape or any other adhesion sheet, replace it regularly.
Adjust Initial Layer Flow Rate:
Increasing the Initial Layer Flow Rate can help improve adhesion.
Fine-tune this setting to find the right balance.
IMG Source: redd.it
Troubleshooting Build Plate Issues for Creality Ender 7
Troubleshooting build plate issues on your Creality Ender 7 can significantly improve your 3D printing experience. Let’s address some common problems related to the build plate and how to fix them:
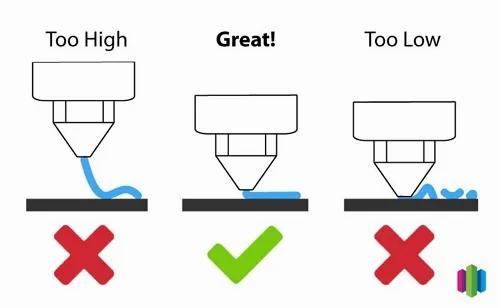
Rough First Layer:
Cause: A rough first layer occurs when the nozzle is too close to the bed, resulting in uneven peaks and ripples.
Solution:
Adjust the Z-offset (the distance between the nozzle and the bed) to ensure proper spacing.
Run a calibration test to fine-tune the nozzle height.
Reference:
Gaps Between Lines:
Cause: If there are gaps between printed lines, the nozzle might be too far from the bed.
Solution:
Level the bed properly to ensure consistent nozzle-to-bed distance.
Increase the first layer height and width settings.
Reference:
Poor Adhesion:
Cause: Poor adhesion can result from low bed temperature, a dirty bed surface, or incorrect adhesive.
Solutions:
Clean the bed thoroughly to remove any residue.
Raise the bed temperature to improve adhesion.
Use suitable bed adhesion methods (such as glue stick, hairspray, or painter’s tape).
Reference:
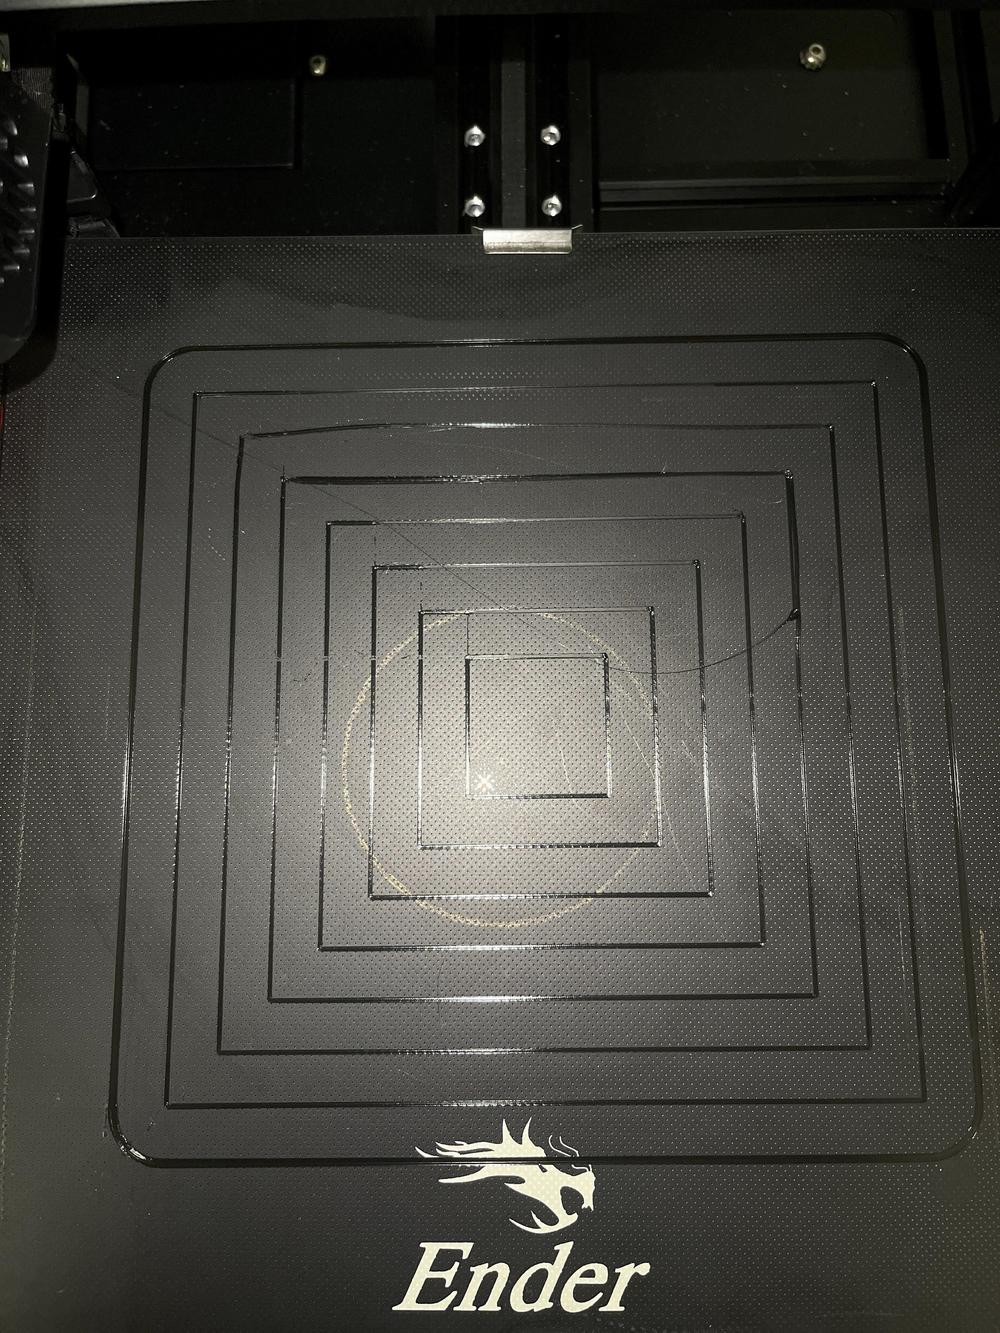
PEI Magnetic Flex Build Plate Systems:
These systems work well but have drawbacks. They are often fastened using clamps or clips, which can exert force on the glass edges and cause the build plate to appear bent or bowed.
Reference:
IMG Source: creality.com
In conclusion, the Creality Ender 7 build plate offers a blend of precision, durability, and convenience for 3D printing enthusiasts. By incorporating advanced materials and intuitive design elements, the build plate ensures optimal adhesion, smooth print removal, and efficient printing processes. Proper maintenance and adherence to best practices can further elevate your printing experience with the Ender 7.
Embrace the capabilities of the Creality Ender 7 build plate to unleash your creativity and bring your designs to life with unmatched accuracy and reliability.