Are you struggling with maintaining your Creality Ender 7 Bowden Tube for optimal 3D printing performance? Understanding the ins and outs of caring for your Bowden tube is crucial for achieving high-quality prints consistently. Let’s explore some key insights on how to effectively maintain and upgrade your Bowden tube to enhance your printing experience.
Maintaining the Bowden Tube
The Creality Ender 7 is a popular 3D printer, and understanding how to maintain its Bowden tube is essential for smooth printing. Here are some key points related to the Bowden tube:
Clearing Clogs:
If your printer experiences clogs, it’s crucial to address them promptly.
Check both the Bowden tube and the nozzle. If either is clogged, it can affect print quality.
You can find helpful tutorials on platforms like YouTube that demonstrate how to clear clogs in the Bowden tube and nozzle.
Upgrading the Bowden Tube:
Consider upgrading your Bowden tube for better performance.
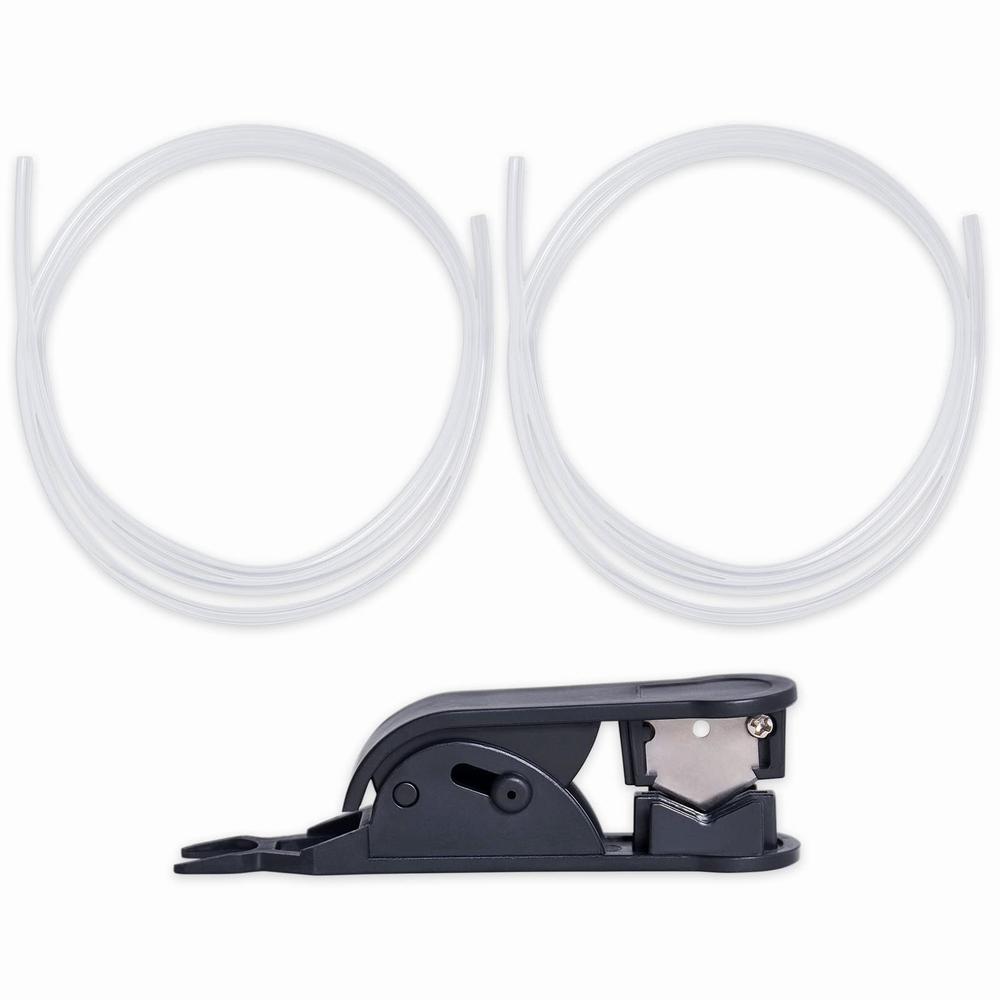
The Capricorn premium xs Bowden tubing is specifically designed for 1.75mm filament and can enhance your printing experience.
When replacing the Bowden tube, unclamp it by pushing in on the compression fitting and gently pulling it out.
Cold End Coupler Stuck on Bowden Tube:
Sometimes, the cold end coupler can get stuck on the Bowden tube.
Depress the retaining ring and try pushing the Bowden tube further into the coupler. This should disengage the internal sprung clip and allow removal of the Bowden tube.
PTFE Bowden Tubes Impact on 3D Printing Quality
Let’s delve into the impact of PTFE Bowden Tubes on 3D printing quality.
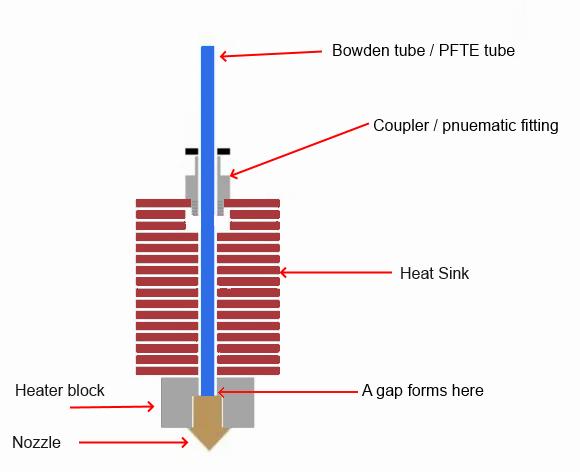
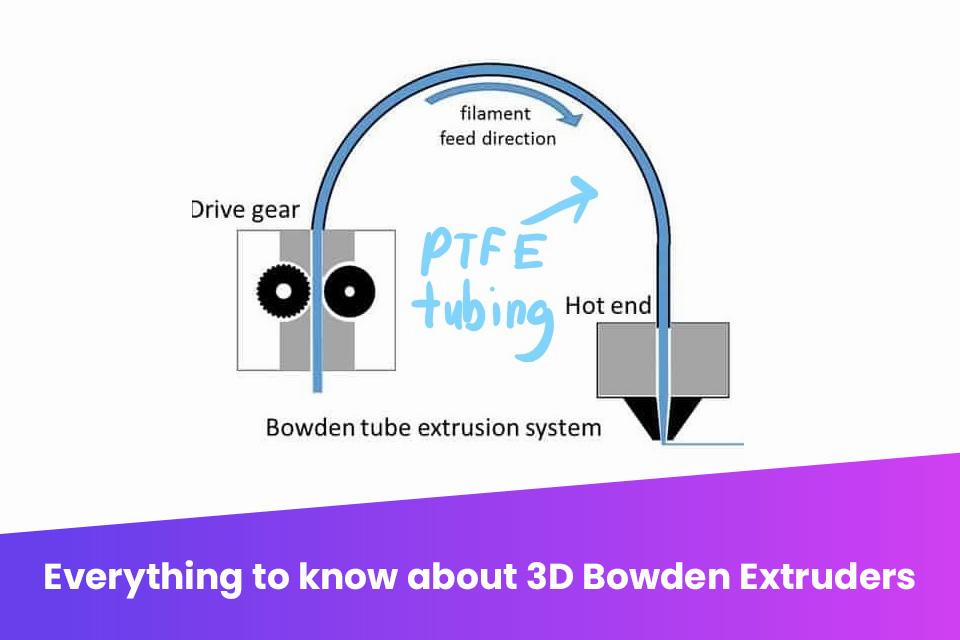
Bowden Tube Basics:
A Bowden tube is a component in some 3D printers that guides filament from the extruder motor to the hotend.
It can be found in printers with a Bowden extrusion system, where the extruder motor is separate from the hotend.
The tube acts as a conduit, allowing filament to travel a longer distance before reaching the nozzle.
Pros and Cons of Bowden Tubes:
Advantages:
Reduced Moving Mass: Since the extruder motor is away from the hotend, the moving mass is lighter, which can lead to faster printing speeds.
Less Vibrations: The motor’s vibrations don’t directly affect the hotend, potentially resulting in smoother prints.
Less Wear on X-Axis: The extruder motor doesn’t move along the X-axis, reducing wear on the X-axis components.
Challenges:
Increased Friction: Filament travels through the Bowden tube, and any friction can impact extrusion quality.
Retraction Challenges: Retraction settings need careful tuning to prevent oozing and stringing.
Limited for Flexible Filaments: Bowden systems struggle with flexible filaments due to the longer path and increased friction.
Filament Diameter and Tube Compatibility:
Ensure that the Bowden tube matches your filament diameter. Using the wrong size can introduce additional friction.
For example, if you attempt to feed a 3.00mm filament into a Bowden tube designed for 2.85mm filaments, you’ll introduce extra friction, potentially leading to poor extrusion.
Choosing the Right Bowden Tube:
Look for high-quality tubes with the following features:
Smooth Inner Bore: Reduced friction allows filament to move effortlessly.
Durable PTFE Material: Ensures longevity and minimal wear even after extended use.
To optimize printing quality with a Bowden system:
Adjust retraction settings.
Test different filament types and brands.
Monitor print quality and make incremental changes.
IMG Source: media-amazon.com
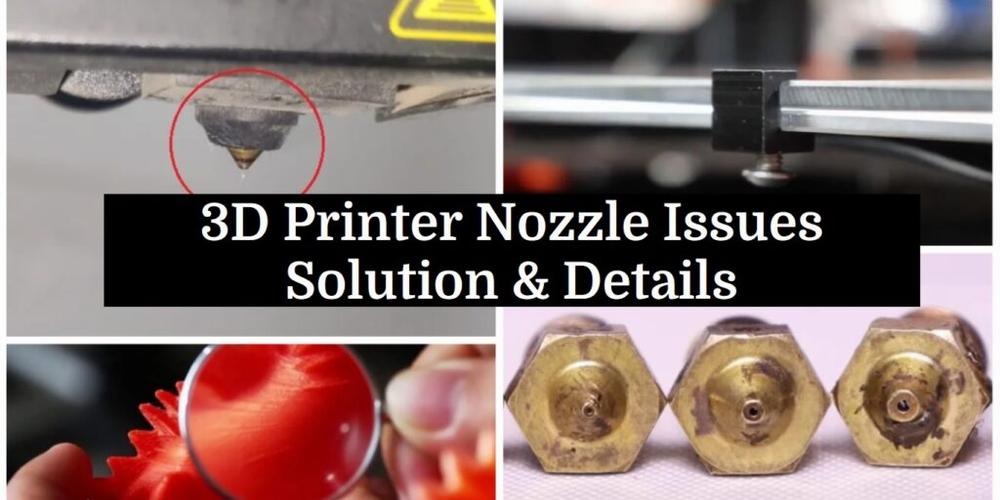
3D Printer Nozzle Maintenance
Proper maintenance of your 3D printer nozzle is essential for achieving accurate and reliable prints. Let’s delve into some common problems related to clogged or dirty nozzles and explore methods to maintain optimal performance:
Regular Cleaning:
Frequency: Like other components, the nozzle accumulates dirt over time. Regular cleaning is crucial.
Visual Inspection: Examine the nozzle visually for any dirt on the outside. Look out for burnt plastic stuck to the side of the nozzle or the hot end.
Unusual Sounds: Listen for scraping or clicking sounds during printing. These may indicate that the filament struggles to pass through the nozzle, signaling the need for cleaning.
Cleaning Technique: When cleaning, use a brass wire brush or a light abrasive pad. Put the printer in pre-heat mode and gently scrub the outside of the nozzle. Avoid aggressive rubbing and be cautious around heater or sensor wires in the hot end.
Benefits: Routine cleaning reduces material buildup and minimizes the risk of clogs.
Clogged Nozzle Issues:
Cosmetic Blemishes: A dirty nozzle can lead to burnt, dark spots in finished prints and misaligned layers.
Print Failures: If the nozzle clogs mid-print, it can cause failed prints.
Strain on Components: A clogged nozzle puts additional strain on other mechanical parts, necessitating more maintenance in the long run.
Additional Tips for Nozzle Maintenance:
Avoid Abrasive Filaments: Unless you have a hardened steel nozzle, steer clear of abrasive filaments like metal-filled or glow-in-the-dark ones.
Proper Filament Storage: Store filaments in a dry and cool place to prevent moisture absorption and extrusion issues.
Replace Worn-Out Nozzles: When your nozzle wears out or gets damaged, replace it promptly.
IMG Source: themechninja.com
Step-by-Step Guide to Replace Bowden Tube on a 3D Printer
Here’s a step-by-step guide on how to replace the Bowden tube on your 3D printer:
Turn off and unplug the printer: Safety first! Make sure your printer is powered down and disconnected from the electrical outlet.
Disconnect the Bowden tube from the 3D printer: Locate the end of the Bowden tube where it connects to the hot end (usually near the nozzle). Gently release any clips or couplers holding it in place and remove the tube.
Clean the Bowden tube: Use isopropyl alcohol to clean the inside of the Bowden tube. This ensures that no residue or debris interferes with the filament flow.
Prepare the new Bowden tube: Cut the new tube to the same length as the old one. Make sure the cut is clean and square.
Insert the new tube into the hot end: Firmly push the new Bowden tube into the hot end assembly. Ensure it goes all the way in and seats properly.
Reclamp the tube into place: If your printer uses clips or couplers, secure the Bowden tube back in its original position. Make sure it’s snug and won’t come loose during printing.
Test the connection: Power up the printer and perform a test print to verify that the Bowden tube is properly installed and filament flows smoothly.
For visual reference, you can also check out this video tutorial on replacing the Bowden tube on an Ender 3 Pro 3D printer.
IMG Source: cookiecad.com
Tips for Bowden Tube Care
Caring for your Bowden tube in a 3D printer is essential to maintain smooth filament flow and prevent clogs. Here are some tips and steps to ensure your Bowden tube stays in good condition:
Regular Cleaning:
Remove the Bowden Tube: Press down on the tube coupling collet while pulling the Bowden tube upward, out of the print head and feeder.
Clean the Tube: Use a bit of filament to push a small piece of sponge or paper through the Bowden tube to remove any particles. Be careful not to let the particles fall into the printer.
Repeat: Continue pushing the sponge or paper through the tube until it’s clean.
Avoid Kinks and Bends:
Choose the Right Tube: Use a tube with sufficient stiffness and flexibility for your printer setup.
Secure the Tube: Use cable ties or clips to prevent excessive movement during printing and avoid unnecessary bending.
Reattaching the Bowden Tube:
Switch Off and Unplug the Printer: Safety first!
Disconnect the Bowden Tube: Remove it from the 3D printer.
Clean with Isopropyl Alcohol: Ensure it’s free from any residue.
Insert the Tube into the Connector: Securely attach it.
Tighten the Connector: Make sure it’s snug.
Plug the Printer Back In: Power it up.
Test the Connection: Confirm that the Bowden tube is properly reattached.
IMG Source: makenica.com
Ensuring the proper care and maintenance of your Creality Ender 7 Bowden Tube is essential for smooth and reliable 3D printing. By implementing regular cleaning routines, upgrading to premium Bowden tubing, and following best practices for nozzle maintenance, you can prevent clogs and ensure consistent print quality. Remember, a well-maintained Bowden tube contributes significantly to the overall performance of your 3D printer.
Stay proactive in keeping your Bowden tube in top condition to enjoy successful printing outcomes with your Creality Ender 7.