When it comes to maximizing the performance of your Creality CR-10 3D printer, one crucial component that often deserves attention is the power supply. Ensuring a reliable and efficient power source is essential for achieving consistent print quality and avoiding potential issues. Let’s explore some key considerations and recommendations to optimize your CR-10’s power supply for an enhanced 3D printing experience.
Power Supply Options for Creality CR-10 3D Printer
Let’s talk about the power supply for the Creality CR-10 3D printer.
Mean Well Power Supply (12V):
The Mean Well Power Supply is a high-quality replacement for your Creality CR-10, CR-10S, CR-10-S4, CR-10-S5, and CR-10-MINI printers. It operates at 12V and is designed to provide reliable power for your 3D printing needs.
If your current power supply fails or if you simply want an upgrade, this Mean Well unit is an excellent choice. It may also fit other 3D printers, so be sure to double-check compatibility before ordering.
Price: $39.99
Creality Stock Power Supply (12V):
The original Creality Stock Power Supply is specifically designed for Creality CR-10Mini, CR-10, CR-10S, CR-10-S4, and CR-10-S5 3D printers. However, please note that it will not work with the Ender 3, Ender 3 PRO, Ender 4, CR-10S PRO, CR-20, CR-20 PRO, or CR-X. These machines require 24V components.
If you have one of the compatible Creality printers, this stock power supply is a suitable replacement.
This power supply is guaranteed to work with several Creality printers, including the CR-10 (Standard, Mini, S4, S5), CR-10S (Standard, Mini, S4, S5), Ender 2, and Alfawise U10. It may also fit other models.
Most stock power supplies list 12V 30A, and this MeanWell unit is a reliable replacement for those.
If you’re looking for an upgrade, consider this option.
Comparison of Power Supplies in Creality CR-10 Printers
Let’s compare the power supply specifications and features of the Creality CR-10, CR-10 V2, and CR-10 V3 3D printers:
Creality CR-10:
Power Supply: The CR-10 is equipped with a power supply that requires an input ranging between 110 to 200 Volts, with an output of 12 Volts and a power rating of 270 Watts.
Other Features: The CR-10 offers a large build volume and a printing precision of approximately 0.1 mm. It allows a maximum print speed of 200 millimeters per second.
Creality CR-10 V2:
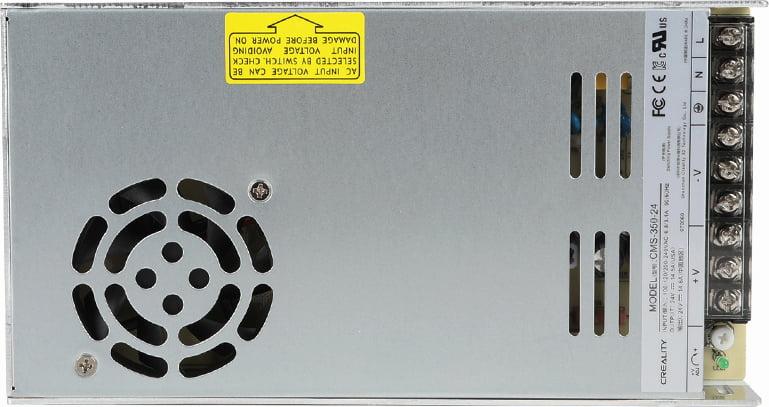
Power Supply: The CR-10 V2 features a 24 V/350 W Mean Well power supply, providing a stronger power source for the printer.
Upgrades: It comes with a TMC-208 ultra-mute drivers on the motherboard and dual-port cooling for improved heat dissipation.
Creality CR-10 V3:
Power Supply: The CR-10 V3 is equipped with a MeanWell power supply.
Additional Features: It boasts a Titan direct drive system for better extrusion and faster printing speeds. The silent motherboard ensures quiet operation even during high-speed printing. The CR-10 V3 offers a large build volume of 300x300x400mm.
IMG Source: creality3dofficial.com
Setting up your Creality CR-10 V3 3D Printer
Setting up your Creality CR-10 V3 3D printer is an exciting step toward bringing your 3D printing dreams to life. Let’s walk through the process step by step:
Unboxing and Initial Inspection:
When unboxing your CR-10 V3, take a moment to appreciate the anticipation and curiosity. Verify that all components are present:
The printer itself
Filament spool
Tools
Various accessories
Inspect the printer’s frame for any shipping-related issues like cracks or dents. Report any findings promptly.
Check the hotend and build platform for cleanliness and damage.
Ensure that wires are connected properly and examine the print bed surface.
Confirm that the instruction manual and software are included.
Preparing Your Workspace:
A clean, organized workspace is essential for efficient printing.
Ventilation is crucial to disperse fumes from printing materials.
Place your CR-10 V3 on a stable, level surface to prevent wobbling during printing.
Power Supply Installation:
Let’s focus on installing the power supply:
Safety First: Ensure the printer is unplugged.
Locate the power supply unit (PSU) and its cables.
Connect the PSU to the printer using the appropriate connectors.
Double-check the connections to avoid loose or disconnected wires.
Plug the PSU into a reliable power source.
Turn on the printer and verify that the power supply is functioning correctly.
Calibrating and Testing:
After power supply installation, proceed with calibration:
Level the print bed to ensure proper adhesion.
Calibrate the Z-axis to set the correct nozzle height.
Load filament and perform a test print to verify everything is working as expected.
Software Setup:
Install the necessary slicing software (such as Cura or PrusaSlicer).
Load your 3D model, slice it, and generate the G-code.
Save the G-code file to an SD card or USB drive.
Insert the storage device into the CR-10 V3 and initiate the print.
Fine-Tuning and Troubleshooting:
As you gain experience, fine-tune settings like layer height, infill, and print speed.
Monitor the print closely during the initial layers to catch any issues early.
Troubleshoot common problems like layer adhesion, stringing, or warping.
For more detailed instructions, you can refer to the comprehensive guide on the Creality Lovers website.
IMG Source: simplyprint.io
CR-10 Power Supply Maintenance
The Creality CR-10 is a popular 3D printer known for its large build volume and impressive print quality. However, like any complex machine, it can encounter issues over time. Let’s delve into some troubleshooting tips and discuss maintenance for the CR-10, particularly focusing on the power supply:
Power Supply Upgrade:
Out of the box, the CR-10’s power supply may benefit from an upgrade. Consider using a big and robust power supply, especially for longer printing projects. A beefier power supply ensures stable performance and reliable printing.
If you find that your current power supply isn’t up to the task, consider replacing it with a higher-capacity one. This can prevent issues related to insufficient power delivery during demanding prints.
Maintenance and Troubleshooting:
Regular maintenance helps keep your CR-10 in top shape. Here are some steps to follow:
Inspect Wiring: Check all power supply cables and connections. Ensure they are secure and free from damage. Loose or frayed wires can cause power interruptions.
Clean Dust and Debris: Dust and debris can accumulate inside the power supply unit. Periodically clean it using compressed air or a soft brush.
Cooling Fan: The power supply has a cooling fan to dissipate heat. Make sure the fan is functioning properly. If it’s noisy or not spinning, consider replacing it.
Voltage Stability: Monitor the voltage output from the power supply. Use a multimeter to measure the voltage at the output terminals. It should match the rated voltage (usually 12V or 24V).
Fuse Check: Some power supplies have fuses. Verify that they are intact. Replace any blown fuses promptly.
Overheating: If the power supply gets excessively hot, ensure proper ventilation. Overheating can lead to component failure.
Power Interruptions: If your printer suddenly shuts down during a print, investigate power interruptions. Check the power cord, outlet, and power switch.
Power Surge Protection: Consider using a surge protector or uninterruptible power supply (UPS) to safeguard against voltage spikes.
Conclusion:
The CR-10 is a workhorse, but it’s not immune to issues. Regular maintenance and troubleshooting can help you address problems promptly and keep your 3D printing experience smooth.
For more detailed troubleshooting, you can refer to the Creality 3D Printer Troubleshooting Guide provided by the community partner Luke Hatfield . Additionally, there are helpful videos on printer maintenance available on platforms like YouTube .
IMG Source: ytimg.com
Enhancing Power Supply Performance
When it comes to enhancing the power supply performance of your Creality CR-10 3D printer, there are a few important considerations. Let’s dive into some recommendations:
Safety First:
Before we discuss upgrades, let’s emphasize safety. The power supply in 3D printers can be lethal if mishandled.
When working with the control box or changing the power supply, treat it like a cobra. Seriously! Even after unplugging, there can be lethal voltages inside.
Follow these best practices:
Remove the AC mains plug before opening the control box.
Turn on the AC power switch to discharge any remaining power.
Be cautious around the power supply terminals, especially if you’re measuring voltages or adjusting steppers.
Power Supply Upgrade:
The stock power supplies provided by Creality are often cheap and prone to failure.
Consider upgrading to a high-quality power supply for better reliability and safety.
One popular option is the Genuine MeanWell 12V 350W PSU. It’s UL certified and offers more stability than the stock PSU.
Benefits of this upgrade:
Reduces issues related to power ripple and grounding.
Compatible with various Creality printers, including CR-10 (Standard, Mini, S4, S5) and CR-10S (Standard, Mini, S4, S5).
Make sure to check your power switch settings based on your country’s voltage (115V for US/Canada, 230V for most other places).
Other Upgrades:
While upgrading the power supply, consider additional enhancements:
Stepper dampeners for reducing noise and vibrations during printing.
Firmware updates can also improve overall performance. Check Creality’s official resources for guidance.
IMG Source: niceshops.com
In conclusion, the power supply plays a vital role in the overall performance and longevity of your Creality CR-10 3D printer. By prioritizing safety, considering upgrades to high-quality options like the Genuine MeanWell 12V 350W PSU, and exploring additional enhancements such as stepper dampeners and firmware updates, you can elevate your printing capabilities and ensure smoother operation. Regular maintenance, troubleshooting, and staying informed about power supply best practices will help you overcome challenges and enjoy seamless 3D printing with your Creality CR-10.
Remember, a well-maintained and upgraded power supply is the cornerstone of a successful 3D printing journey.