Optimizing Creality CR-10 Bearings for 3D Printing Excellence
Are you looking to enhance the performance of your Creality CR-10 3D printer? Upgrading the bearings can be a game-changer when it comes to smooth movement and precise printing. In this article, we will delve into the world of Creality CR-10 bearings and explore the various upgrades and replacement options available to optimize your printing experience.
Upgrades for Creality CR-10 3D Printer
The Creality CR-10 is a popular 3D printer, and there are several upgrades and replacement parts available to enhance its performance. Let’s focus on bearings and other relevant upgrades:
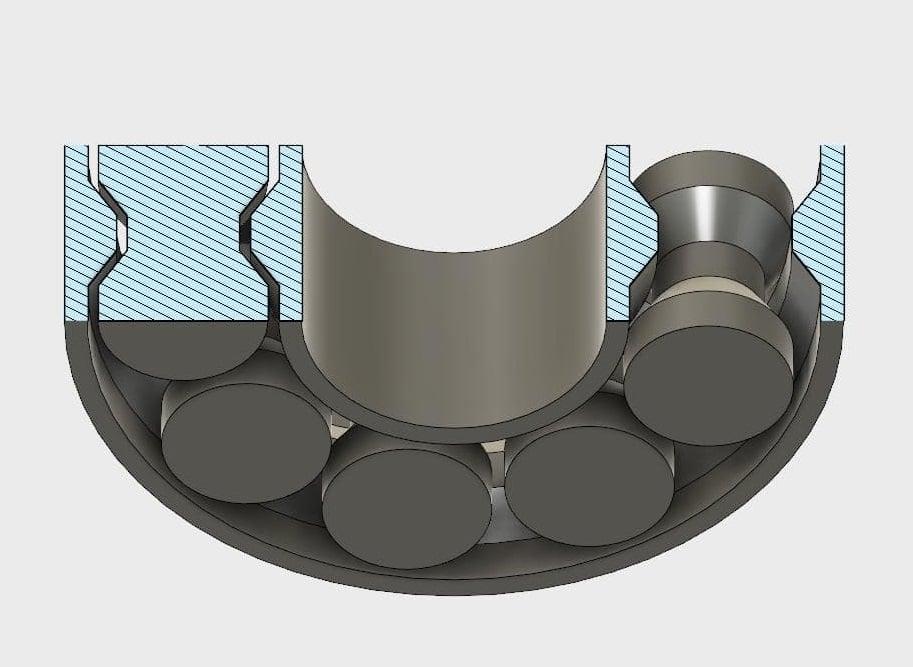
Roller Bearings:
The Creality CR-10 uses roller bearings for smooth movement along its linear rails. These bearings help reduce friction and ensure precise motion during printing.
If you need to replace the roller bearings, you can find original replacement rollers with bearings specifically designed for the Creality CR-10 3D printer. Each item includes one roll and one bearing.
Capricorn Tubing:
Capricorn tubing is a high-quality PTFE tube that improves filament feeding and reduces clogging and jamming.
It also makes the CR-10 compatible with flexible filaments.
Capricorn tubes are made from the best raw materials and have a lubricant coating.
Other Upgrades:
While not directly related to bearings, here are some additional upgrades that can enhance your CR-10 experience:
Enclosure: If you plan to print heat-sensitive materials like ABS and Nylon, consider adding an enclosure. Creality’s official enclosure provides a stable thermal environment and reduces noise.
Automatic Bed Leveling (BL Touch): Upgrading to automatic bed leveling saves time and hassle. AntcLabs’ BL Touch is a reliable and precise choice for the CR-10.
Remember that these upgrades can significantly improve your printing experience and expand the capabilities of your Creality CR-10
Types of Bearings in 3D Printing
Bearings play a crucial role in 3D printers, ensuring smooth movement and reducing friction. Let’s explore the different types of bearings commonly used in 3D printing:
Linear Ball Bearings:
These bearings are often used on smooth shafts to enable linear motion. They consist of rows of ball bearings enclosed within a housing.
Linear ball bearings provide low friction and precise movement, making them ideal for printer axes (such as X, Y, and Z).
They are typically made of materials like bronze or other metals.
Bushings (Sleeve Bearings):
Bushings look like tubes and can be made from bronze or polymers.
They provide a cost-effective solution for linear motion.
While they may not offer the same precision as linear ball bearings, they are suitable for less demanding applications.
Bushings are commonly used in 3D printers for guiding rods and shafts.
3D Printed Bearings:
Yes, you read that right! It’s possible to 3D print bearings.
While not as robust as traditional bearings, 3D printed bearings can be useful for custom applications or rapid prototyping.
Design considerations include tolerances, layer adhesion, and material choice.
Specific Brands and Models:
Some popular bearing options for 3D printers include:
E3D Ball Bearings
BROZZL Linear Bearings
Creality Roller with Bearing
These brands offer reliable bearings designed specifically for 3D printing applications.
IMG Source: all3dp.com
Signs of Worn-out Bearings in a Creality CR-10 Printer
Worn-out bearings in a Creality CR-10 printer can lead to various issues. Here are some signs to watch out for:
Uneven Movement or Clicking Sounds: If you notice uneven movement of the print bed or the hot end carriage, or if you hear clicking sounds during movement, it could indicate worn-out bearings. The bearings may not be allowing smooth motion, affecting print quality.
Layer Misalignment: Worn bearings can cause layer misalignment. If left uncorrected, this can result in problems such as missing layers, insufficiently small layers, large gaps, and sometimes tiny little holes or dots right in between even the top layers.
Resistance or Bumps: To test the bearings, disable the steppers on your printer and manually move the bed and hot end carriage. If you notice any changes in resistance or feel bumps, it’s likely that the bearings are failing.
Under-Extrusion Issues: While not directly related to bearings, under-extrusion (where the printer doesn’t extrude enough filament) can occur due to mechanical issues. If your printer experiences under-extrusion, it’s essential to check the entire motion system, including bearings.
IMG Source: redd.it
Replacing Bearings in Creality CR-10 Printer Maintenance
Replacing bearings in your Creality CR-10 printer is a useful maintenance task to ensure smooth and accurate 3D printing. Here are the steps you can follow:
Identify the Bearings:
The CR-10 printer has several bearings, including linear bearings for the X, Y, and Z axes. Identify which bearings need replacement.
Gather Necessary Tools:
You’ll need a set of Allen wrenches, a small flat-head screwdriver, and replacement bearings.
Make sure you have the correct replacement bearings for your specific CR-10 model.
Power Off and Unplug the Printer:
Safety first! Turn off the printer and unplug it from the power source.
Remove the Print Bed:
If you’re replacing the Y-axis bearings, remove the print bed by unscrewing the leveling knobs and sliding it out.
Access the Bearings:
For X and Y axes:
Remove the gantry cover (if applicable) to access the linear bearings.
Unscrew the bolts securing the linear rail to the frame.
Slide the gantry or print head to one side to expose the bearings.
For Z-axis:
Remove the Z-axis lead screw cover.
Locate the Z-axis bearings on the threaded rod.
Remove Old Bearings:
Use an Allen wrench to remove the bolts securing the bearings.
Gently slide out the old bearings from their housing.
Install New Bearings:
Insert the new bearings into the housing.
Tighten the bolts to secure them in place.
Lubricate the Bearings:
Apply a small amount of lubricant (such as lithium grease) to the bearings.
Move the gantry or print head back and forth to distribute the lubricant.
Reassemble:
Reverse the disassembly steps to put everything back together.
Ensure proper alignment of the gantry and rails.
Calibrate and Test:
Reinstall the print bed (if you removed it).
Power on the printer and perform a test print to check if the new bearings are functioning correctly.
Remember that the CR-10S and CR-10 Mini may have slight variations, so consult the official user manual for specific instructions related to your printer model. Additionally, if you encounter any difficulties during the process, consider seeking guidance from online forums or YouTube tutorials.
IMG Source: niceshops.com
Steps to Maintain 3D Printer Bearings
Maintaining the bearings in your Creality CR-10 printer is essential for smooth operation and print quality. Here are some steps you can follow to keep your printer’s bearings in good condition:
Regular Cleaning:
Dust and debris can accumulate on the bearings over time. Use a soft brush or compressed air to remove any particles from the bearing surfaces.
Pay attention to the linear rails and rods where the bearings slide. Clean them thoroughly to prevent friction.
Lubrication:
Proper lubrication is crucial for smooth movement. Apply a high-quality lubricant specifically designed for 3D printer bearings.
Focus on the linear rods and bearings. Apply a small amount of lubricant and move the print head or bed to distribute it evenly.
Check for Wear and Damage:
Inspect the bearings visually. Look for signs of wear, rust, or damage.
If you notice any issues, consider replacing the affected bearings promptly.
Bearing Replacement:
If a bearing is worn out or damaged, replace it with a new one.
Creality provides replacement parts for their printers. You can find compatible bearings online or through authorized dealers.
Calibration and Alignment:
Properly calibrate your printer to ensure that the bearings are aligned correctly.
Check the printer’s manual or online resources for specific calibration instructions.
Avoid Over-Tightening:
When assembling or disassembling components, be gentle with the screws and bolts that secure the bearings.
Over-tightening can put unnecessary stress on the bearings and affect their performance.
Remember to consult your Creality CR-10
For more detailed instructions, you can also refer to this video tutorial by Santube 3D.
IMG Source: ytimg.com
In conclusion, maintaining and upgrading the bearings in your Creality CR-10 printer is crucial for achieving high-quality 3D prints. By understanding the signs of worn-out bearings, exploring different types of bearings, and following the steps to replace or upgrade them, you can ensure optimal performance and longevity for your printer. Remember, a well-maintained and properly functioning set of bearings is the key to unlocking the full potential of your Creality CR-10 printer.
So, whether you’re troubleshooting issues or looking to take your printing to the next level, investing in quality bearings is a worthwhile endeavor for any 3D printing enthusiast.