Are you a proud owner of the Anycubic Kobra 2 Max 3D printer? If you’re looking to fine-tune your printing precision, the Anycubic Kobra 2 Max hotend upgrade might just be what you need. With its cutting-edge design and compatibility with various Anycubic Kobra models, this hotend replacement promises to elevate your printing experience to new heights.
Let’s delve into the details of this essential component that ensures consistent and reliable extrusion for your 3D printing projects.
Anycubic Kobra 2 Max Hotend Replacement Guide
The Anycubic Kobra 2 Max 3D printer features a precision-designed hotend that ensures consistent and reliable extrusion. If you need to upgrade or replace the hotend on your Anycubic FDM 3D printer, this replacement part is designed to meet your printing needs.
Here are some details about the Anycubic Kobra 2 Max hotend:
Compatibility: The hotend is compatible with the following Anycubic Kobra models:
Anycubic Kobra 2 Max
Anycubic Kobra 2 Pro
Anycubic Kobra 2 Neo
Anycubic Kobra 2 Plus
Maintenance and Replacement:
To replace the hotend, follow these steps:
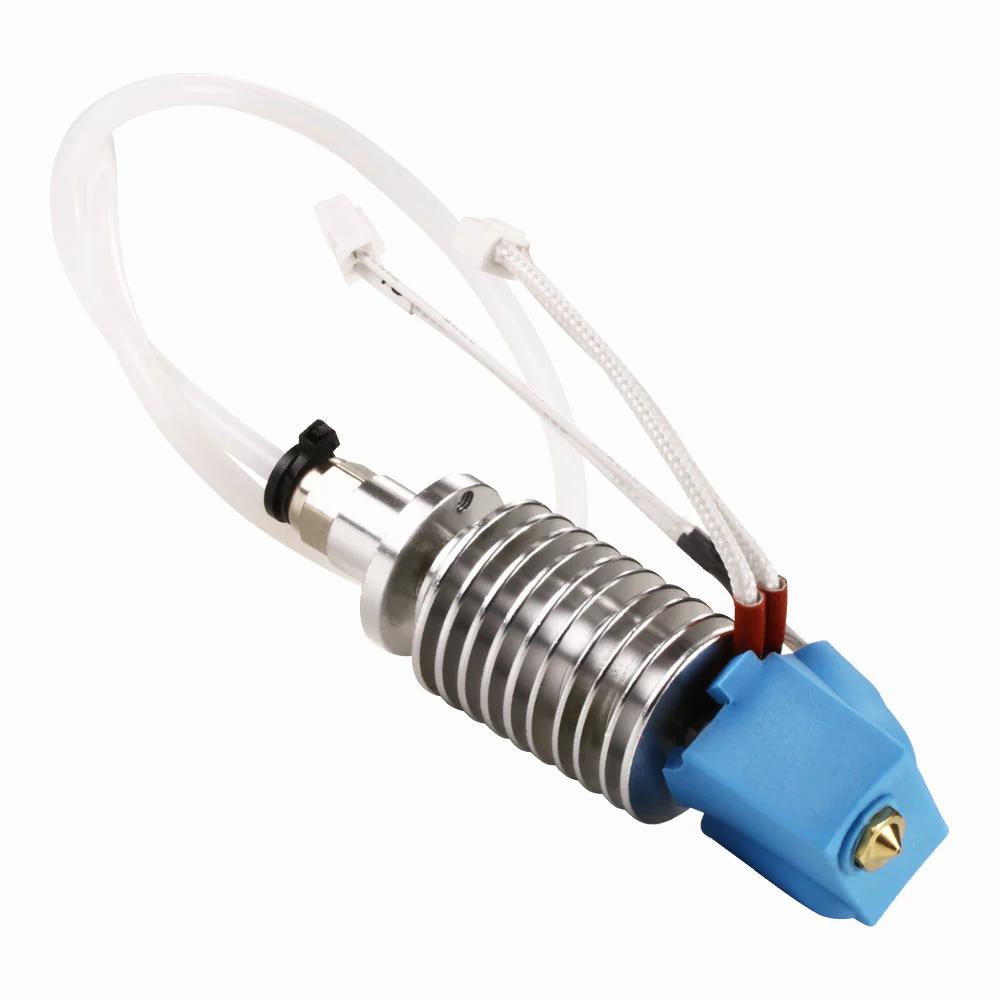
Use an M2.0 hex key to remove the four screws of the housing.
Unplug the wiring plug that connects to the print head.
Press the quick connector and pull off the Teflon tube.
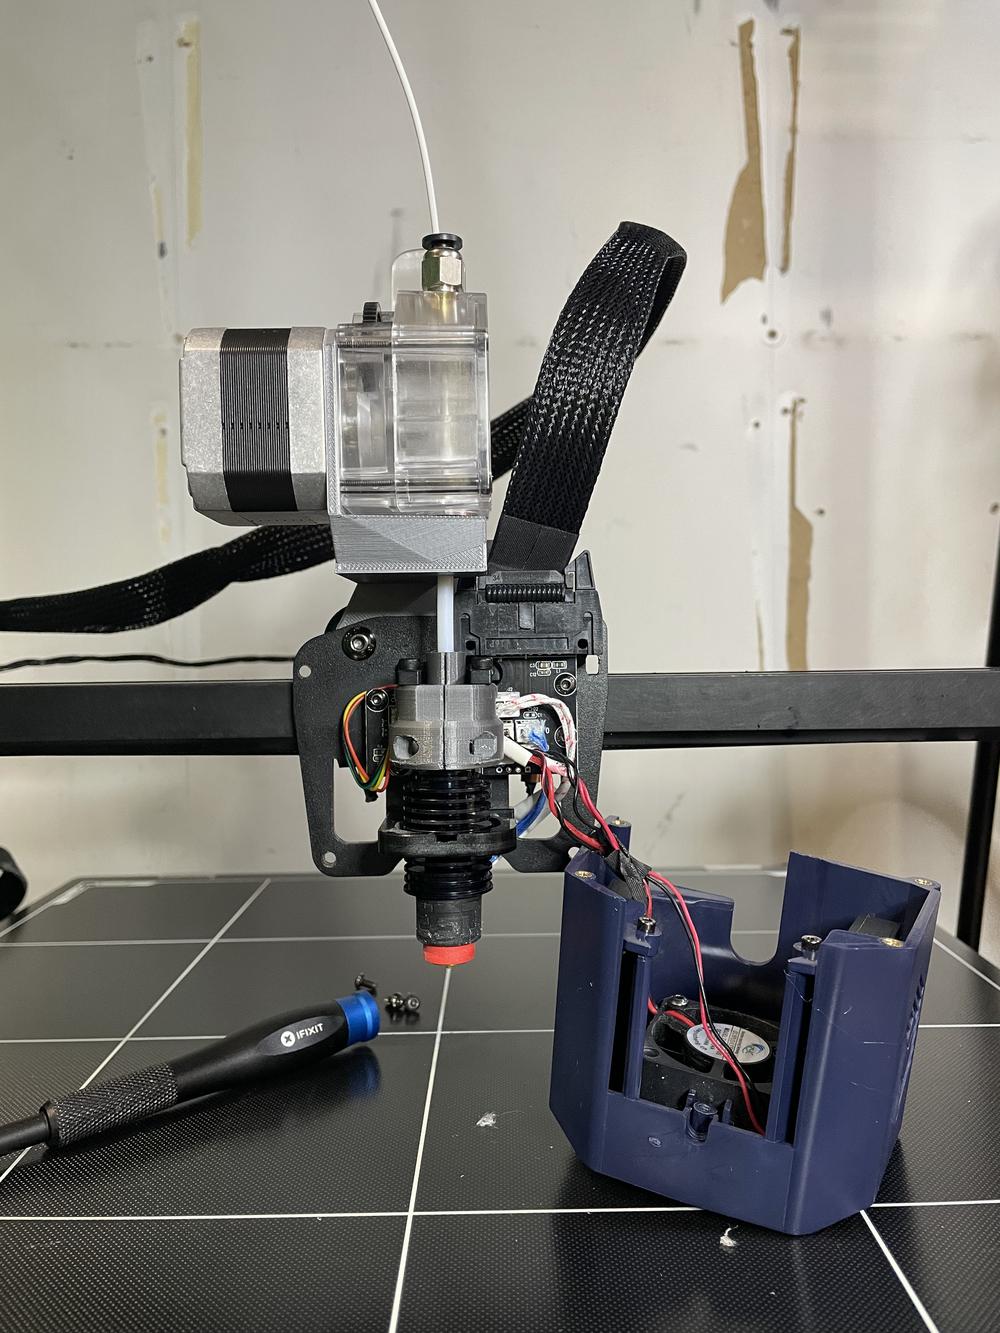
All Metal Hotend Install
The Anycubic Kobra 2 Max 3D printer boasts several noteworthy features, including its hotend. Let’s delve into the specifics:
All Metal Hotend Install
The Kobra 2 Max comes equipped with an all-metal hotend. Here are the key details:
PTFE-Lined Hotend: The stock hotend is PTFE-lined, which means it has a PTFE tube running through it. However, this design can lead to slower heat-up times and is susceptible to clogs.
Flow Rate: The flow rate of the hotend is approximately 20 mm^3/s with a 0.4mm nozzle—similar to the normal volcano flow rate. Unfortunately, due to its proprietary design, it cannot be upgraded with a CHT (Copperhead) or CHT clone nozzle.
For more detailed instructions on upgrading the hotend, you can refer to the official documentation.
In summary, the Anycubic Kobra 2 Max’s hotend ensures consistent and reliable extrusion, featuring a high-quality nozzle to meet your printing needs
IMG Source: redd.it
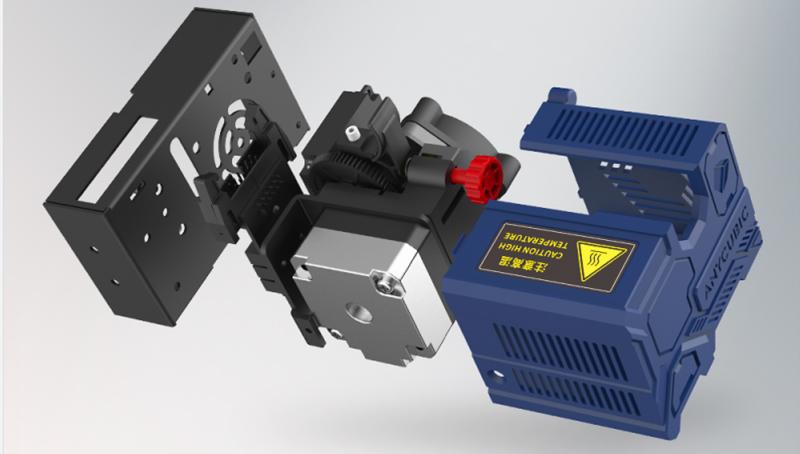
Installing Hotend on Anycubic Kobra 2 Max 3D Printer
Here’s a step-by-step guide for installing the hotend on your Anycubic Kobra 2 Max 3D printer:
Prepare Your Tools:
Before you begin, gather the necessary tools:
M2.0 hex wrench
A new hotend (if you’re replacing the existing one)
Safety First:
Turn off the printer and unplug the power plug to ensure safety.
Remove any filament from the print head.
Remove the Old Hotend:
Use the M2.5 hex key to remove the two screws on the housing.
Unplug the wiring plug of the print head cooling fan and take off the casing.
Unplug the wiring plug that connects to the print head.
Install the New Hotend:
Take out the new hotbed adapter board and screws.
Align the hotbed adapter board with the screw holes on the sheet metal.
Use the S2.5 Allen key to tighten the screws and secure it in place.
Reconnect Wires:
Reconnect any wiring that you unplugged earlier.
Ensure all connections are secure.
Test the Installation:
Turn on the printer and perform a test print to verify that the hotend is functioning correctly.
For more detailed information, you can refer to the official Anycubic Kobra 2 Max maintenance guide here.
IMG Source: shopify.com
Anycubic Kobra 2 Max Review
The Anycubic Kobra 2 Max is a super-sized 3D printer that boasts impressive speed, but there are some caveats to consider. Let’s dive into the details:
Build Size:
The Kobra 2 Max offers a massive build volume of 420 x 420 x 500mm (approximately 16.5 x 16.5 x 19.7 inches). This generous space is great for creating large-scale objects like cosplay props, helmets, and perhaps even shields.
Speed:
Anycubic claims that the Kobra 2 Max can push plastic at an astonishing 500mm/s. However, in reality, it achieves a very brisk speed of 150 to 230mm/s. While this speed is impressive considering the build size, it falls short of the claimed value.
Unfortunately, the printer’s firmware remains inaccessible, and there’s no clarity on how Anycubic unlocked this new speed. It appears similar to Klipper, complete with built-in resonance testing, but no Klipper-like controls are available in the menu or control screen.
Bed Leveling and Issues:
Our test printer had a rough start, arriving with buggy firmware and a slightly uneven bed that dipped in the lower left corner.
Manual leveling isn’t an option; only the sensors are available. To address the bed issue, I resorted to shimming it with Post-It notes.
Connectivity and Footprint:
The Kobra 2 Max offers Wi-Fi connectivity, but only if you use the Anycubic slicer and mobile app.
Prepare for its massive footprint: the printer requires three square feet of operating space. I had to turn it sideways to fit on my IKEA counter, and the spool holder still hung off into space.
Pros and Cons:
Pros:
Massive build size
Auto bed leveling
Flexible built surface
Cons:
Proprietary nozzle
Massive footprint
Ugly Z seams at high speeds
Verdict:
Despite its flaws, the Anycubic Kobra 2 Max performs well on most materials once you navigate the early firmware issues and find your own (slower) speed settings.
However, the bed leveling challenges and lack of fast profiles in the printer’s custom slicer prevent it from making it to the list of the best 3D printers.
Specifications:
Build Volume: 420 x 420 x 500mm (16.5 x 16.5 x 19.7 inches)
Machine Footprint: 735 x 640 x 740mm (28.9 x 25.1 x 29.1 inches) .
IMG Source: 3dprintersonline.com.au
Hot End Maintenance Tips for Anycubic Kobra 2 Max
The Anycubic Kobra 2 Max is a popular large-format FDM printer known for its impressive print size of 400x400x450mm. To keep it running smoothly, proper hot end maintenance is essential. Here are some tips for maintaining the hot end of your Anycubic Kobra 2 Max:
Regular Cleaning:
Remove accumulated filament, dust, and other residues from the hot end. Regular cleaning ensures smooth filament flow and prevents clogs.
Pay attention to the nozzle and surrounding components.
Calibrate Temperature:
Ensure that the printing temperature is set correctly. Proper temperature calibration ensures optimal printing results.
Refer to the printer’s specifications for recommended temperature ranges.
Check Components:
Inspect for loose parts, screws, and any signs of wear.
Verify that all connections are secure.
How to Replace the Hot End of Anycubic Kobra 2 Max:
Safety First:
Remove the filament from the print head.
Turn off the printer and unplug the power plug for safety.
Tools Needed:
Prepare an M2.0 hex wrench and a new hot end.
Step-by-Step Replacement:
Use the M2.0 hex key to remove the four screws securing the housing.
Unplug the wiring connector that connects to the print head.
Press the quick connector and pull off the Teflon tube.
Replace the print head and reconnect the Teflon tube.
Secure the four screws of the print head using the M2.0 hex key.
Reconnect the print head wiring.
Install the print head housing and secure it with the four screws.
Remember to handle components carefully during replacement, paying close attention to wires and connectors. After completing the replacement, check the installation to ensure all connections are normal.
In conclusion, maintaining and replacing your Anycubic Kobra 2 Max hotend is key to ensuring optimal performance and print quality. By following the step-by-step installation guide and staying on top of regular maintenance, you can keep your 3D printer running smoothly. With its all-metal construction and precision-engineered design, the Anycubic Kobra 2 Max hotend stands as a crucial component for achieving reliable extrusion and exceptional printing results.
Stay informed, stay proactive, and keep exploring the possibilities with your Anycubic Kobra 2 Max hotend.